
Vegetables with Turmeric and Coconut Milk Sauce Recipe. Healthy Vegan and Gluten Free curry recipe. Turmeric curry with coconut milk and spices. Recipe with step by step pictures / images and video.
Lot of people have asked me about this vegetables in coconut milk recipe that I shared one too many times in my Insta stories. This is one recipe I make at home often. Lots of vegetables simmered along with Turmeric and spices finished with a good dose of coconut milk. This is a one pot dish and very filling and super healthy. You can have the curry as a soup or serve it with rice. I like to serve this turmeric curry with brown rice. The turmeric plus ginger adds a nice warmth to the curry while the coconut milk makes for a rich creamy sauce. The choice of vegetables you add to the curry is totally up to you. Add whatever you have at home. Also, don’t break a sweat and use canned coconut milk. It tastes perfectly fine in this recipe. This is one perfect recipe for the soup weather we are having in Bangalore this week.
Here is the video of how to make Vegetables with Turmeric and Coconut Milk Sauce
Click the link below to find the recipes on the site that uses the main ingredient as mixed vegetables. Mixed Vegetables Recipes Recipes using coconut milk Here are some of the equipment, utensils and gadgets that will be useful for making this recipe. Click the link to buy them online. Le Creuset Casserole Pan Vegetable Stock Bouillon Cube Canned Coconut Milk Virgin Coconut Oil Turmeric Powder
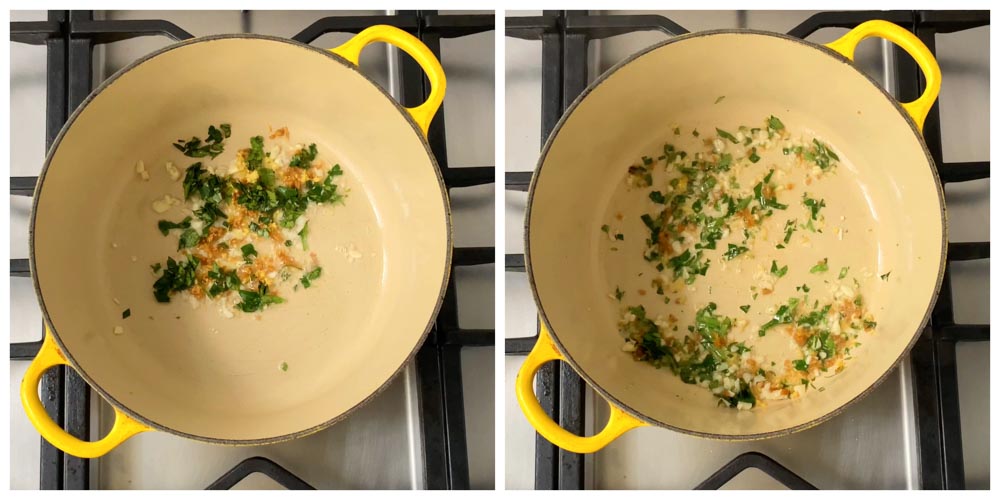
Here is how to make Vegetables with Turmeric and Coconut Milk Sauce Heat coconut oil in a pan and add in the finely chopped garlic and ginger. Add in the finely chopped curry leaves too. Saute for a few seconds. The aroma of ginger and curry leaves when it hits the coconut oil is all kinds of aromatic kitchen therapy.
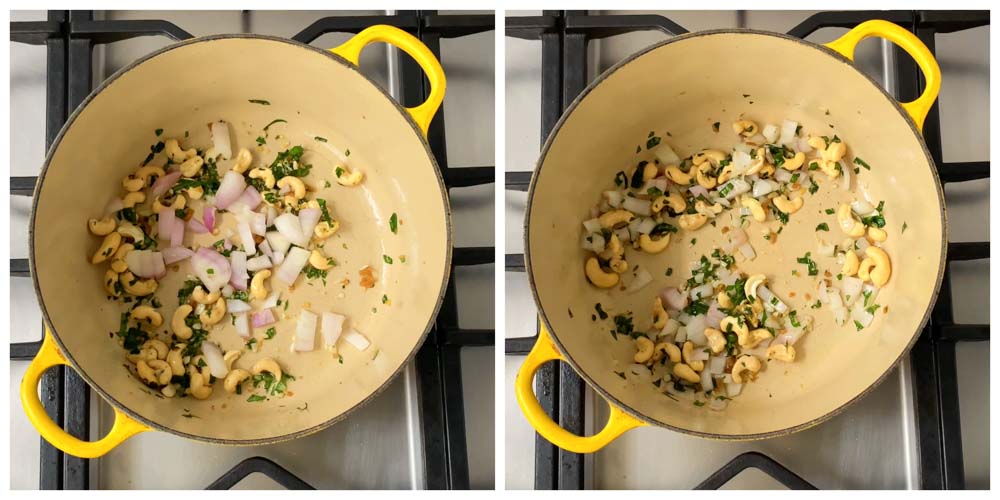
Add in the cashew nuts. Cashew Nuts adds a nice crunch and texture to the turmeric curry. Saute for a minute. Add in the diced onions and saute for a minute.
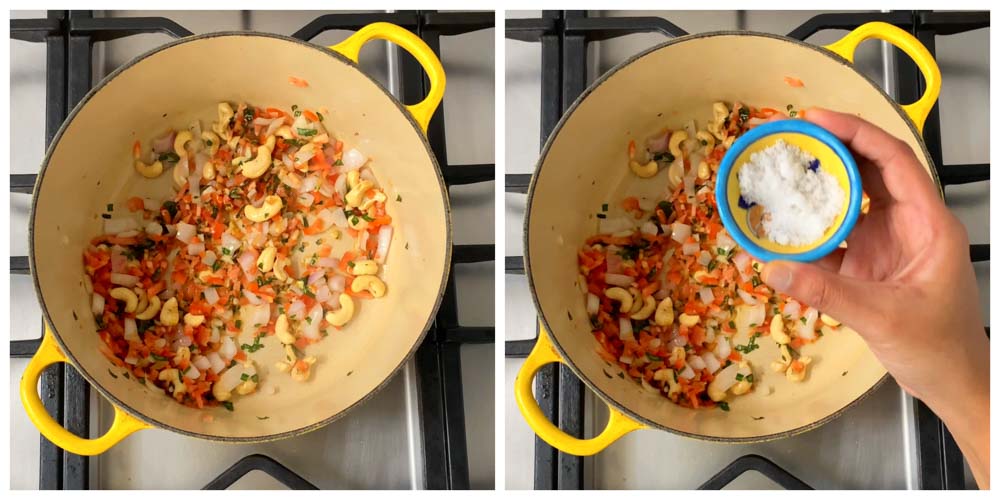
Add in the finely chopped tomatoes and salt. Saute for a few minutes so the tomatoes become soft and juicy.
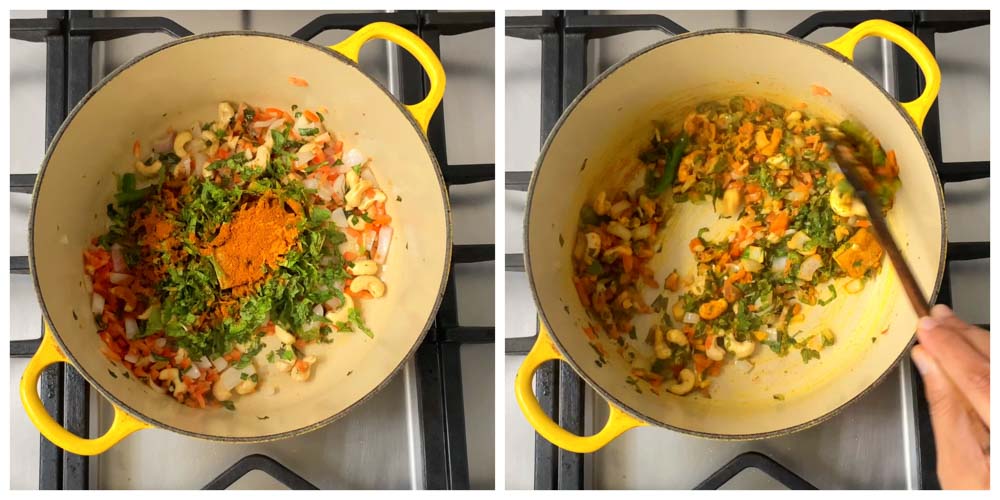
Add in the green chillies, turmeric powder, curry powder and a cube of vegetable stock. The vegetable stock cube adds a lot of flavour to the curry. If you do not want to add the stock cube, you can use homemade vegetable stock. Add in the chopped mint leaves. The mint leaves adds a nice flavour to the turmeric curry.
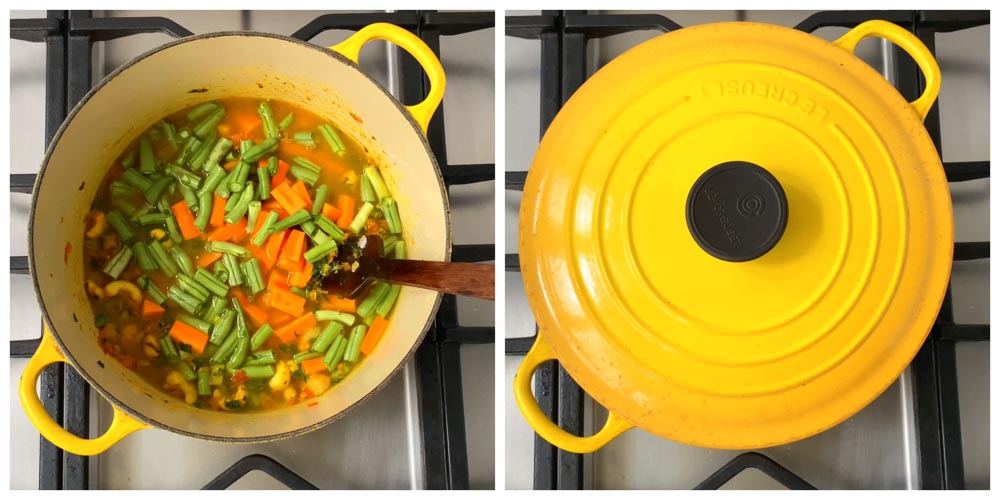
Now we will add in the vegetables. Add in the vegetables that take a long time to cook first. I have added carrots and beans. Add in around 1.5 cups of water, cover with lid and let it simmer for a few minutes.
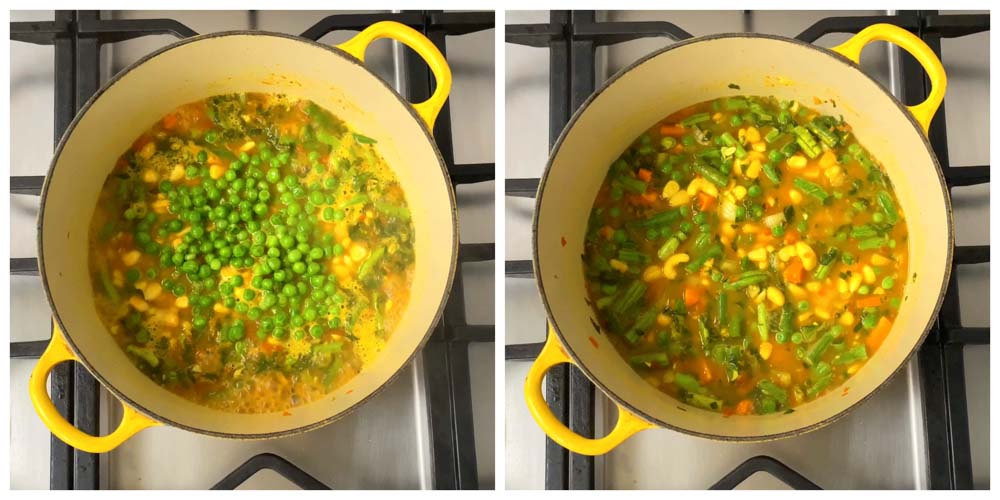
Add in the corn and the fresh green peas. Cover the pan with a lid and simmer for a couple of minutes.
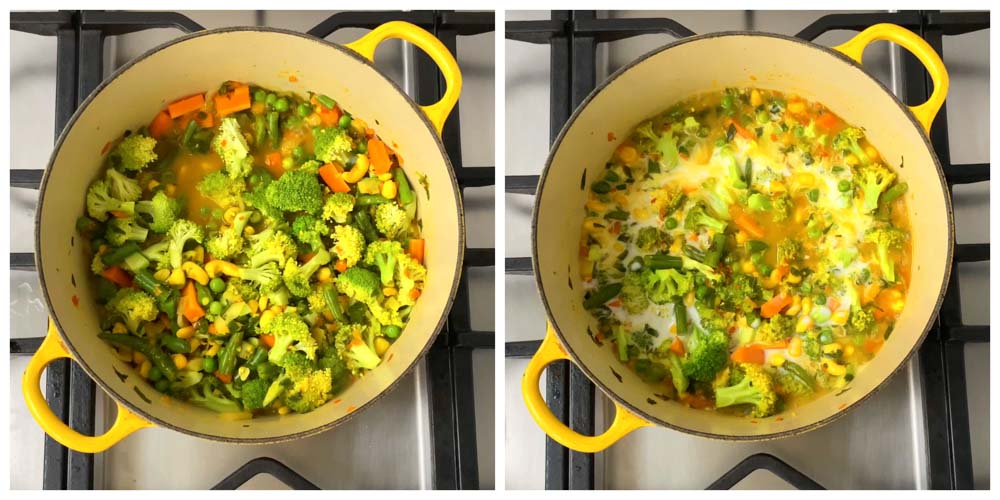
Finally add in the broccoli. Cover the pan with a lid and simmer for just two minutes. We need to retain the crunch of the vegetables. So do not cook for a long time. Add in the coconut milk to the pan. I have used canned coconut milk today and it works just fine. Note: The vegetables you add to the curry is totally up to you. Use whatever veggies you find in your refrigerator. This is a very forgiving recipe.

Add in the bell peppers and the lemon juice.
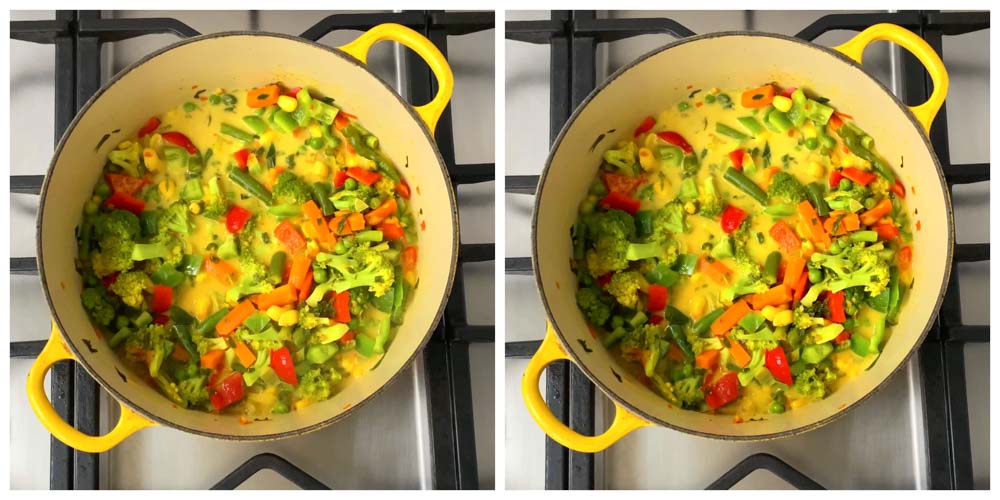
After adding the bell peppers, just simmer for a minute and remove from heat. You do not want to cook for a long time as the bell peppers will become soggy and lose their crunch.

Serve hot with brown rice.
Ingredients for Vegetables with Turmeric and Coconut Milk Sauce
- 1 tablespoon virgin coconut oil
- 5 cloves garlic, finely chopped
- 1 inch piece ginger, finely chopped
- 2 sprig curry leaves, finely chopped
- 1/4 cup cashewnut
- 1/4 cup onions, diced
- 1/2 cup tomatoes, finely chopped
- 1 teaspoon salt
- 3 - 4 green chillies, slit
- 1/4 cup mint leaves, chopped
- 1 vegetable stock cube
- 2 teaspoon turmeric powder
- 1 teaspoon curry powder
- 1/2 cup carrots, diced
- 1/2 cup beans, diced
- 1/2 cup sweet corn
- 1/2 cup green peas
- 2 cups broccoli
- 1 cup coconut milk
- 1/4 cup red bell pepper
- 1/4 cup green bell pepper
- Juice of one lemon
How to make Vegetables with Turmeric and Coconut Milk Sauce
Heat coconut oil in a pan and add in the finely chopped garlic and ginger. Add in the finely chopped curry leaves too. Saute for a few seconds.
Add in the cashew nuts. Cashew Nuts adds a nice crunch and texture to the curry. Saute for a minute. Add in the diced onions and saute for a minute.
Add in the finely chopped tomatoes and salt. Saute for a few minutes so the tomatoes become soft and juicy.
Add in the green chillies, turmeric powder, curry powder and a cube of vegetable stock. The vegetable stock cube adds a lot of flavour to the curry. If you do not want to add the stock cube, you can use homemade vegetable stock. Add in the chopped mint leaves. The mint leaves adds a nice flavour to the turmeric curry.
Now we will add in the vegetables. Add in the vegetables that take a long time to cook first. I have added carrots and beans. Add in around 1.5 cups of water, cover with lid and let it simmer for a few minutes.
Add in the corn and the fresh green peas. Cover the pan with a lid and simmer for a couple of minutes.
Finally add in the broccoli. Cover the pan with a lid and simmer for just two minutes. We need to retain the crunch of the vegetables. So do not cook for a long time.
Add in the coconut milk and lemon juice. Add in the bell peppers. After adding the bell peppers, just simmer for a minute and remove from heat. You do not want to cook for a long time as the bell peppers will become soggy and lose their crunch.
Serve hot with brown rice.
Author: Suguna Vinodh
Prep Time: 15m
Cook Time: 20m
Find it online : https://www.kannammacooks.com/vegetables-with-turmeric-and-coconut-milk-sauce/
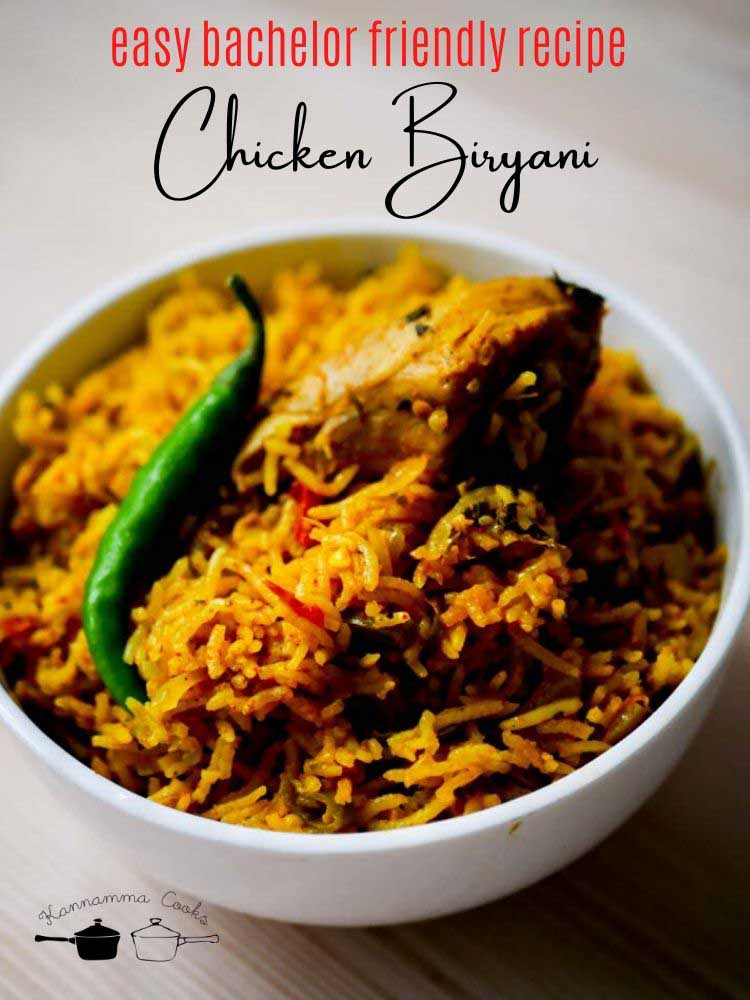
Recipe for Tamil Style easy Chicken biryani that is very easy to do. The biryani is cooked in dum in an oven and it makes it fool proof. This is a no fail fluffy biryani recipe. Recipe for chicken biryani with step by step pictures / images and video.
There are a lot of biryani recipes on the site and I still get a lot of mails / messages everyday asking for a simple bachelor friendly biryani recipe that does not include grinding of pastes, elaborate process etc.. The one thing beginners face is the problem of rice becoming mushy after its cooked. I have made this biryani (the dum part) in the oven and its fail proof. The rice remains fluffy and intact after its baked in the oven. The rice stays as long grains without breaking as its not stirred while cooking. Baking also ensures that there is no scorching at the bottom of the pan which is a big problem for beginners. You cannot go wrong with the recipe and there are not many steps.
Here are the five steps to making an easy chicken biryani at home.
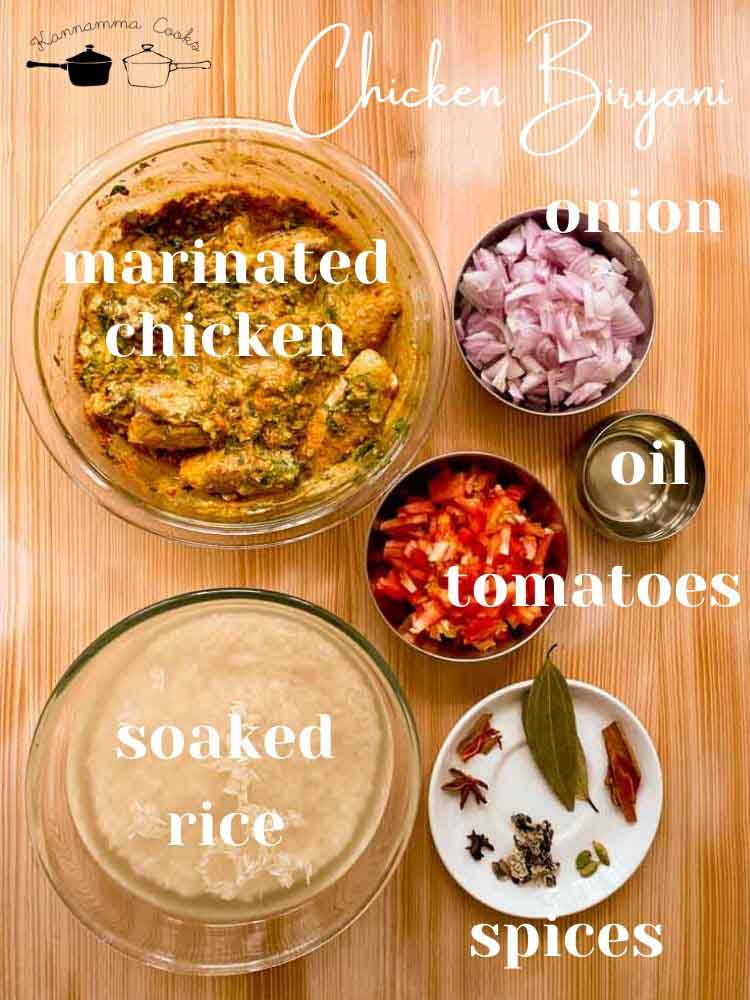
- Step One – Meat Marination
- Step Two – Soaking the rice
- Step Three – Cooking the meat with spices, onions and tomatoes
- Step Four – Adding water and rice
- Step Five – Baking
Click the link below to find the recipes on the site that uses the main ingredient as Chicken. Chicken Recipes Biryani Recipes Here are some of the equipment, utensils and gadgets that will be useful for making this recipe. Click the link below to buy them online. Le Creuset Cast Iron Casserole Good Sturdy Knife Polypropylene Chopping Board Teakwood Chopping Board Measuring Spoons Glass Mixing Bowls (500 ml) Glass Mixing Bowl oven mitten
Here is a step by step video of how to do Easy Chicken Biryani Recipe at home from scratch.

Here is a step by step pictorial with images of how to do Easy Chicken Biryani Recipe at home from scratch. Step One – The first step in making this biryani is to marinate the meat. The chicken needs to be marinated for at-least a couple of hours. You can also marinate over nite in the refrigerator if you have the time. Here is what you will need. I have used store bought biryani masala powder and store bought curry powder for this recipe. Here are the brands I like and recommend. Use whatever brand you generally use at home and its just fine. Biryani Masala Powder Curry Masala Powder Add in all the ingredients listed under chicken marination into a big bowl. Mix well to combine. Let the meat marinate for at least a couple of hours. If you have the time, cover the bowl with a lid and allow it to marinate over nite in the refrigerator. The longer you marinate, the more flavorful the meat will become.
Step Two – Soaking the rice for Easy Chicken Biryani I prefer to use Daawat basmati rice or Lal Qila basmati rice. These two brands work really well and the rice cooks nicely as long grains without becoming mushy.Wash and soak the rice in water before starting to cook for at-least 30 minutes. Soaking the rice helps the rice from becoming mushy when cooked. Gently wash the rice in water and soak it just before starting to cook. It would suffice. Note: As a general rule allow 1/2 cup of rice per person. We have used two cups of rice and it will serve four people with a good appetite.

Step Three – Cooking the meat with spices, onions and tomatoes for the chicken biryani You will need the following spices for making this biryani. If you do not have access to any of the spices listed below, its ok. Continue with the recipe with spices you have on hand.
So, all the prep work is done and we are ready to cook. The meat is marinated, the rice is soaked, spices sorted, veggies cut and ready to go (onions and tomatoes) and oil to cook. If you are feeling fancy, use a combination of ghee and oil for making this biryani. I have used only oil today. Use vegetable oil or coconut oil for making this recipe.

Heat oil in a heavy pan (Heavy bottomed pan is important). Make sure the pan can go in an oven and it does not have any plastic parts on the handle, lid etc.. Add in the spices and saute for a few seconds. Add in the sliced onions and saute for a few minutes till the onions are soft.
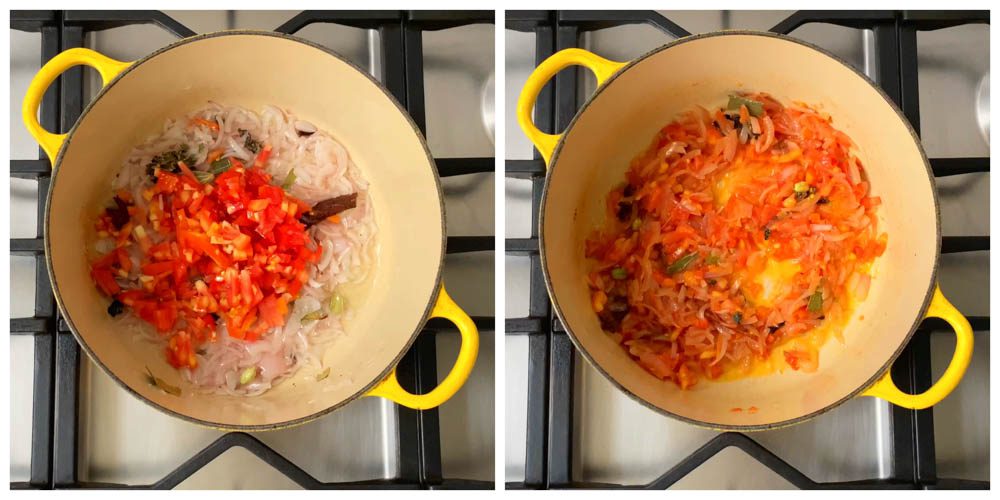
Add in the tomatoes and saute for a few more minutes till the tomatoes are juicy. It will take about 3-4 minutes.

Add in the marinated chicken with all the juices. Mix well to combine. Cover the pan with a lid. Keep the flame on medium and cook for around 12-15 minutes. Saute once in a while so the chicken does not scorch at the bottom. Do NOT add any water to cook the chicken. The moisture from the meat will be enough. The meat should be tender after about 12 minutes and the gravy should be thick.
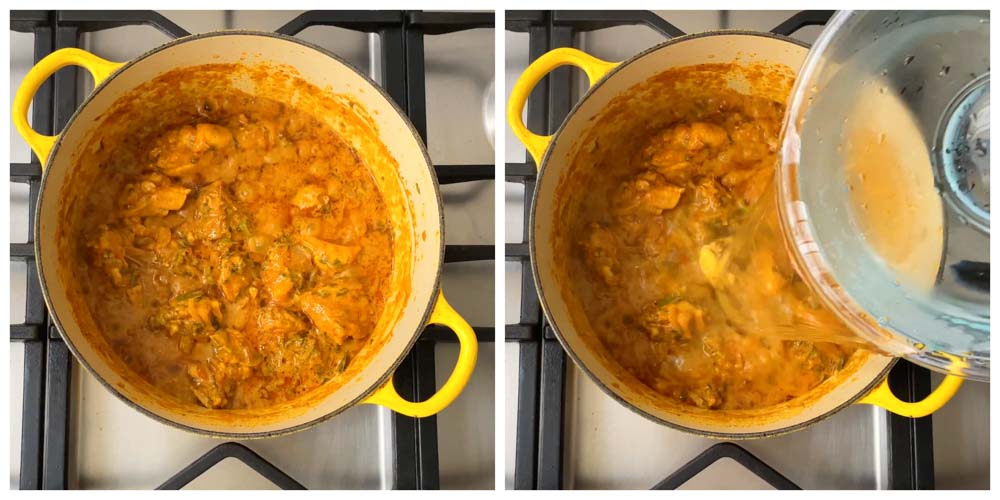
Step Four – Adding water and rice for making the chicken biryani We have used two cups of rice today. We will add 3.5 cups of water. After adding the water, let it come to a full boil. Its important that the water comes to a full boil. Note: This water measurement will work for oven method only.

Drain the rice and add it to the pan. Let it come to a boil again.
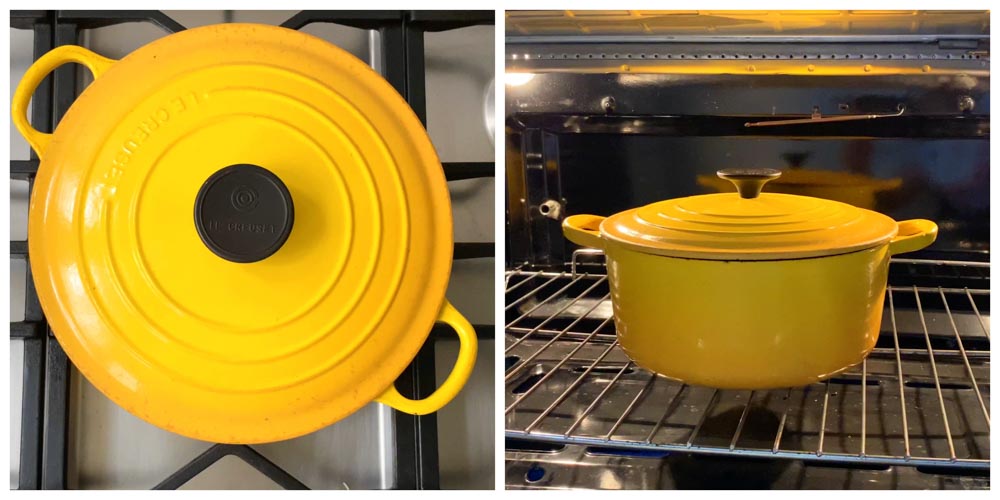
Step Five – Baking / Dum for the chicken biryani Cover the pan with a lid and place it in a preheated oven. Bake the biryani for twenty minutes at 200°C / 400°F. After the said time, remove the pan from the oven and allow it to rest for 10 minutes before opening. IMPORTANT: Place the biryani pan in the oven after the water / liquid in the pan comes to a full boil. Else the biryani wont cook properly. Also, preheat the oven 200°C / 400°F for 15-20 minutes before baking.

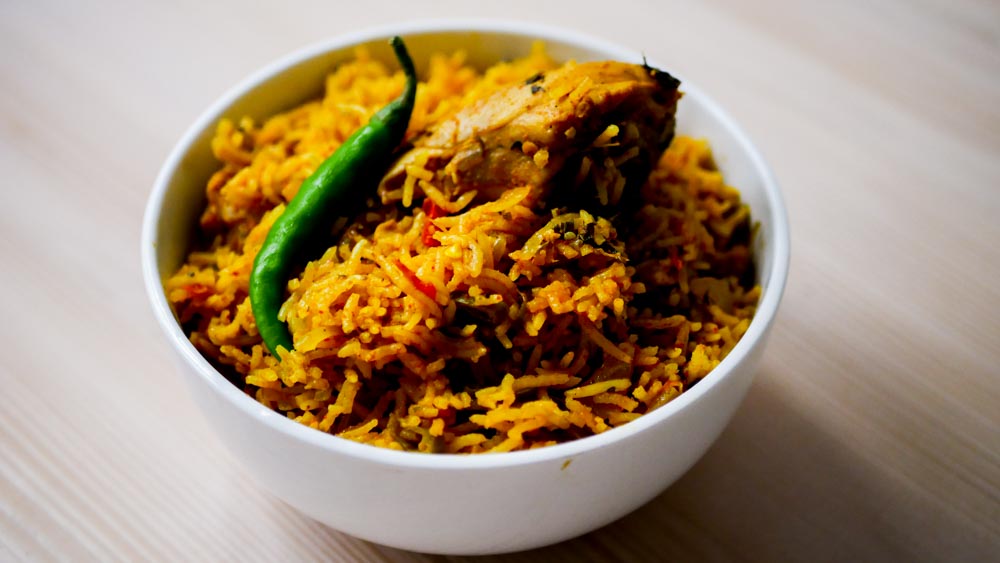
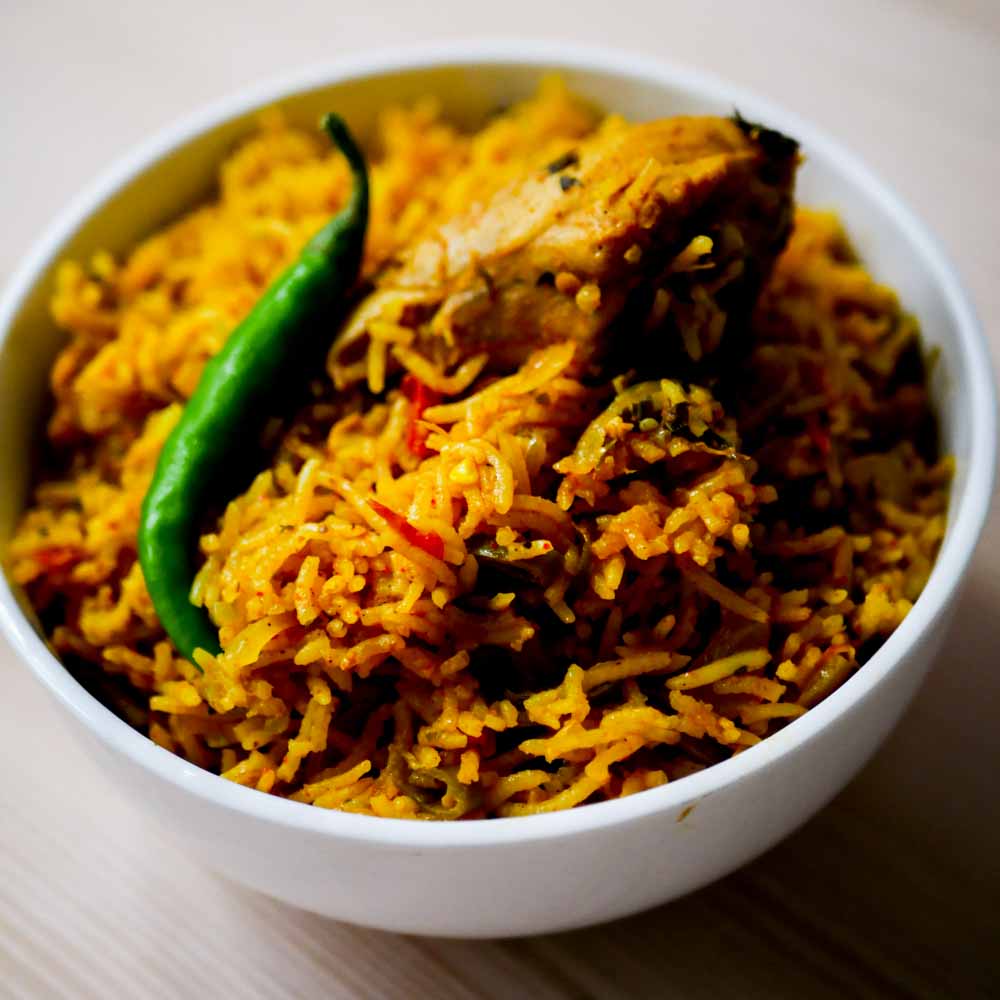
Fantastic one pot easy chicken biryani is ready.
Ingredients for marinating the chicken
- 500 grams chicken (bone-in)
- 1/2 cup ( 120 ml) plain yogurt / curd
- 2 tablespoon ginger garlic paste
- juice of 1 lemon
- 2 teaspoon salt
- 1 teaspoon turmeric powder
- 1 teaspoon curry powder
- 1.5 tablespoon biryani masala powder
- 1/2 teaspoon black pepper powder
- 1 teaspoon red chilli powder
- 2 green chillies, finely chopped
- 1/2 cup coriander leaves, chopped
- 1/2 cup mint leaves, chopped
Rice
- 2 cups basmati rice
- 3.5 cups water (for cooking)
Spices
- 2 bay leaves
- 2 inch piece cinnamon
- 1 star anise
- a small piece mace
- 3 cloves
- 3 cardamom
- a big pinch of kalpasi (lichen)
Other Ingredients
- 1/4 cup vegetable oil
- 1 cup onions, sliced
- 1 cup tomatoes, chopped
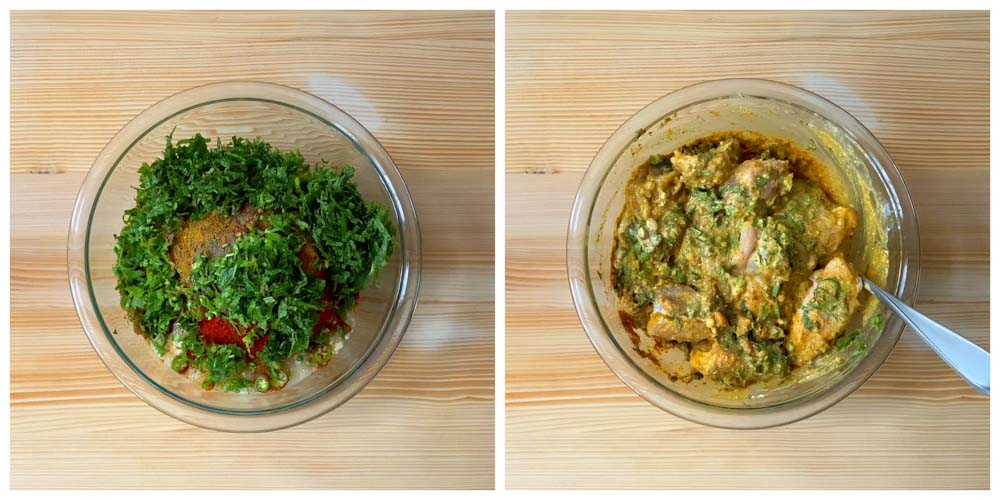
Step One – The first step in making this biryani is to marinate the meat
The chicken needs to be marinated for at-least a couple of hours. You can also marinate over nite in the refrigerator if you have the time. Here is what you will need. I have used store bought biryani masala powder and store bought curry powder for this recipe. Here are the brands I like and recommend. Use whatever brand you generally use at home and its just fine. Biryani Masala Powder Curry Masala Powder
Add in all the ingredients listed under chicken marination into a big bowl. Mix well to combine. Let the meat marinate for at least a couple of hours. If you have the time, cover the bowl with a lid and allow it to marinate over nite in the refrigerator. The longer you marinate, the more flavorful the meat will become.
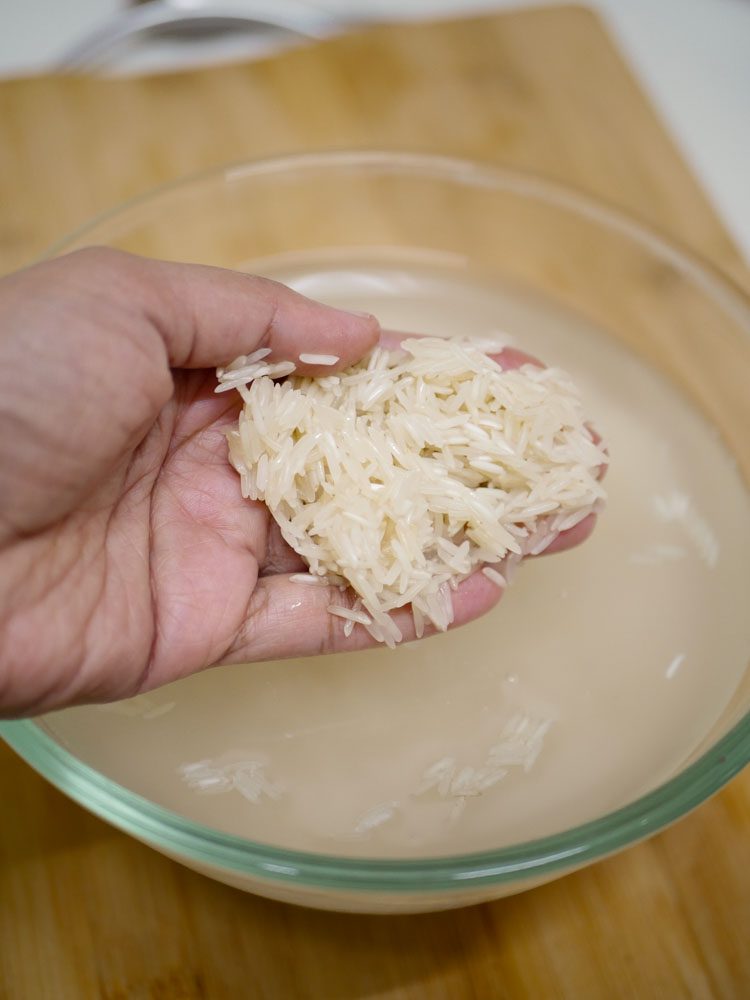
Step Two – Soaking the rice for Easy Chicken Biryani
Wash and soak the rice in water before starting to cook for at-least 30 minutes. Soaking the rice helps the rice from becoming mushy when cooked. Gently wash the rice in water and soak it just before starting to cook. It would suffice.
Step Three – Cooking the meat with spices, onions and tomatoes for the chicken biryani
Heat oil in a heavy pan (Heavy bottomed pan is important). Make sure the pan can go in an oven and it does not have any plastic parts on the handle, lid etc.. Add in the spices and saute for a few seconds. Add in the sliced onions and saute for a few minutes till the onions are soft.
Add in the tomatoes and saute for a few more minutes till the tomatoes are juicy. It will take about 3-4 minutes.
Add in the marinated chicken with all the juices. Mix well to combine. Cover the pan with a lid. Keep the flame on medium and cook for around 12-15 minutes. Saute once in a while so the chicken does not scorch at the bottom. Do NOT add any water to cook the chicken. The moisture from the meat will be enough. The meat should be tender after about 12 minutes and the gravy should be thick.
Step Four – Adding water and rice for making the chicken biryani We have used two cups of rice today. We will add 3.5 cups of water. After adding the water, let it come to a full boil. Its important that the water comes to a full boil. Note: This water measurement will work for oven method only.
Drain the rice and add it to the pan. Let it come to a boil again.
Step Five – Baking / Dum for the chicken biryani Cover the pan with a lid and place it in a preheated oven. Bake the biryani for twenty minutes at 200°C / 400°F. After the said time, remove the pan from the oven and allow it to rest for 10 minutes before opening. IMPORTANT: Place the biryani pan in the oven after the water in the pan comes to a full boil. Else the biryani wont cook properly. Also, preheat the oven 200°C / 400°F for 15-20 minutes before baking.
Fantastic one pot easy chicken biryani is ready.
- Author: Suguna Vinodh
- Prep Time: 2h
- Cook Time: 1h
