
This is my dad’s mom Kittamma Paati’s recipe. My dad always says that Paati and my aunt worked so hard in the agricultural field so that her boys ( 5 of them ) could go to school. After my aunt got married, it was Paati all the way at the house and at the field. This is what my dad used to say when we were young – Paati lived in Periyanaicken Palayam in Coimbatore and her mom’s house was in Vaiyampalayam. Roughly about 10-12 kilometres one way. She used to walk the entire stretch as the bus was at 12 in the noon and the return bus was the next day. She would start at 6 in the morning after milking the cows, getting food ready for the boys and finishing the household chores. She would be back home by 6 in the evening. There were no good roads. 3 hours to go, 3 hours to come back and 5-6 hours at her moms place. She would just do it. She never complained. My dad says she loved buffalo yogurt. She would always end her every meal with curd rice made with buffalo milk after a long days work. She was bed ridden during her final years due to a failed eye surgery and I still remember her sitting at the farm on her bed watching the field. When we would go to meet her, she would hug me tight and kiss me for a good minute all over my face. I was really young at that time. My dad says that she loved Cuticura powder and would ask the shop keeper for “குட்டி தாச்சான் kutty thaachaan” powder. Kutty Thaachan / Kutty Saathaan means little ghost. I still laugh at that joke. Here is a picture of Kittamma Paati taken during my parents wedding.
I have also shared chettinad kuzhi paniyaram made using regular dosa batter. Check the recipe here.

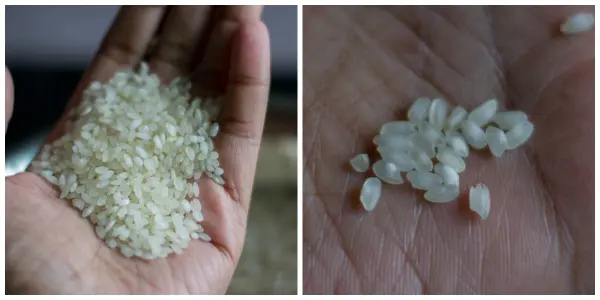
Many people have asked me about idli rice. Here is a little info on the same.
The only rice that will give you desired results while making idli / Dosa is par boiled rice. Raw rice doesnt work. In particular, a par-boiled variety called idly rice is extensively used for making idli in the Tamilnadu region. The technical variety of parboiled rice thats referred to as simply “idly rice” is called as “salem kara” or “salem car”. If you cannot procure idly rice, try getting a good quality par boiled rice. Idly rice is a unique short grained fat rice. Here is a picture of idli rice.
Wash the idly rice, raw rice, fenugreek seeds and whole urad dal in water for couple of times. You can wash them together. After washing, soak the mixture in lots of water. Let it soak for 6-8 hours. Over night soaking is fine too. I usually soak the mixture at night before going to bed and grind it next morning.

Grind the soaked mixture with the water used for soaking to a smooth batter. Use only as much water as required to keep your mixie / blender going. Grind till the mixture reaches dosa batter consistency.


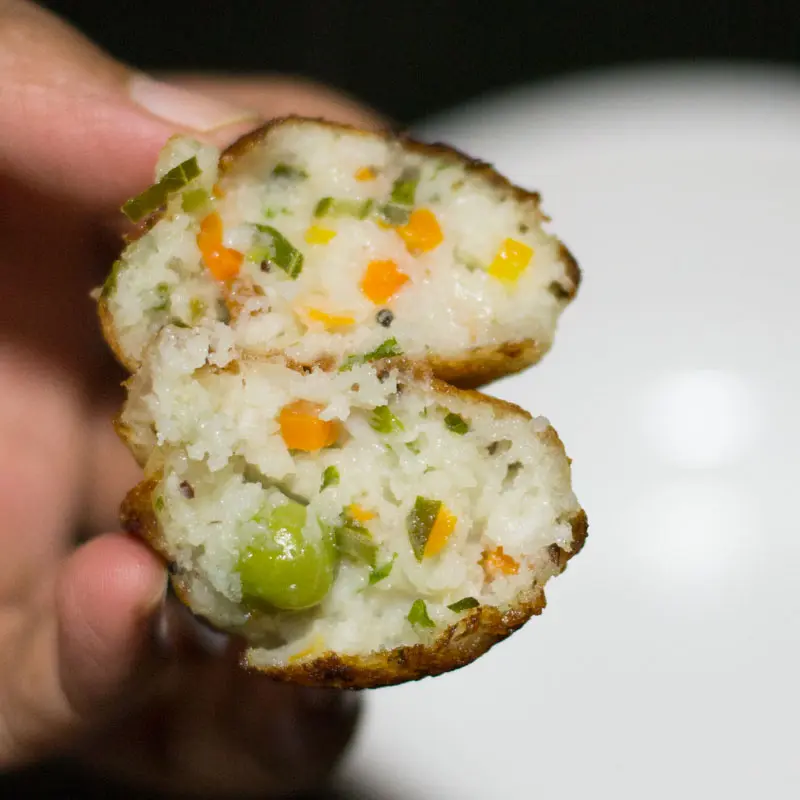
We will now make the vegetable mixture ready. Boil 1/3 cup each of finely chopped carrots, beans and peas. Set aside. Heat oil in a pan and add in mustard seeds, chana dal and cumin seeds. Let it splutter. Add in the finely chopped curry leaves, finely chopped onions and finely chopped green chillies. Add in the salt too. Fry till the onions are soft. Add in the fresh shredded coconut and the coriander leaves. Remove from heat and set aside.

Add the boiled vegetables and the fried mixture to the batter and mix well.

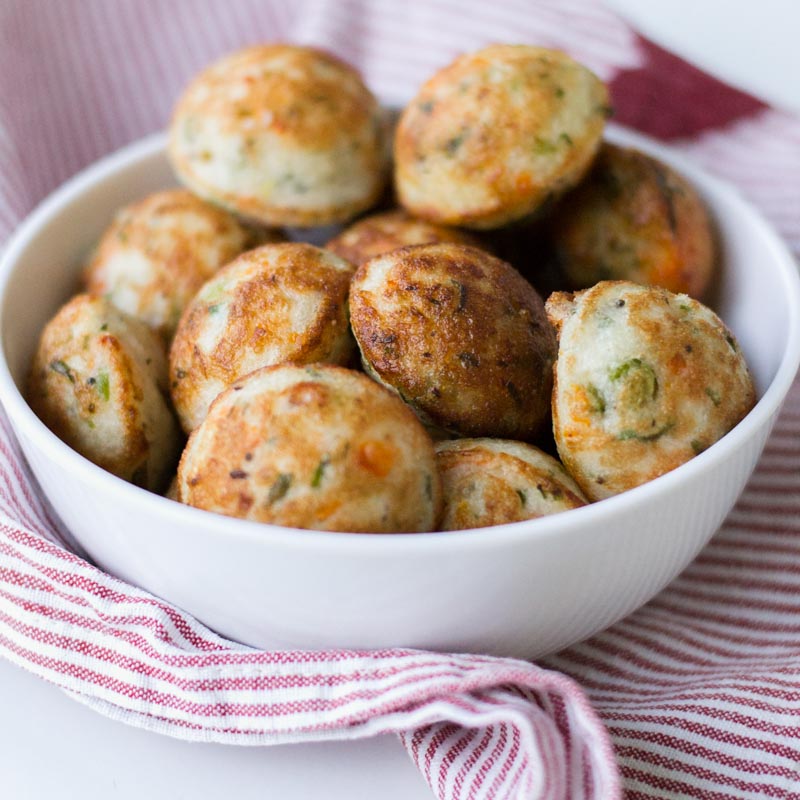
Heat the paniyaram pan / paniyarakkal until hot. Add 3/4 teaspoon of vegetable oil into each mold. Drop the batter to fill the mold. Cook for a minute. Then turn and cook on the other side. Turn again if necessary to make sure the paniyaram is evenly cooked on both sides and its nicely golden in colour.

The paniyaram is ready if it has become crispy and golden on both sides. Have the paniyarams hot.
- Measurements Used – 1 Cup = 250ml
For the Batter
- 3/4 cup Idly Rice
- 1/4 cup Raw Rice
- 1/3 cup Urad Dal
- 1/4 teaspoon Fenugreek seeds
For the tempering
- 1 tablespoon Coconut oil
- 1/4 teaspoon Mustard seeds
- 1/4 teaspoon Cumin seeds
- 1 teaspoon Chana Dal
- 3 green Chillies, finely chopped
- 3 springs Curry leaves, finely chopped
- 1 Onions, finely chopped
- 1 teaspoon Salt
- 1/2 cup Shredded Coconut
- 4 sprigs Coriander leaves, finely chopped
Other Ingredients
- 1/3 cup carrots
- 1/3 cup beans
- 1/3 cup peas
- Vegetable Oil for frying Paniyaram
- Wash the idly rice, raw rice, fenugreek seeds and whole urad dal in water for couple of times. You can wash them together. After washing, soak the mixture in lots of water. Let it soak for 6-8 hours.
- Grind the soaked mixture with the water used for soaking to a smooth batter.
- Transfer the ground batter to a clean vessel and cover it and keep it in a warm place for 6-8 hours.
- Boil 1/3 cup each of finely chopped carrots, beans and peas. Set aside.
- Heat oil in a pan and add in mustard seeds, chana dal and cumin seeds. Let it splutter. Add in the finely chopped curry leaves, finely chopped onions and finely chopped green chillies. Add in the salt too. Fry till the onions are soft. Add in the fresh shredded coconut and the coriander leaves. Remove from heat and set aside.
- Add the boiled vegetables and the fried mixture to the batter and mix well.
- Heat the paniyaram pan / paniyarakkal until hot. Add 3/4 teaspoon of vegetable oil into each mold. Drop the batter to fill the mold. Cook for a minute. Then turn and cook on the other side. Turn again if necessary to make sure the paniyaram is evenly cooked on both sides and its nicely golden in colour.
- The paniyaram is ready if it has become crispy and golden on both sides. Have the paniyarams hot.
- Author: Kannamma - Suguna Vinodh
- Prep Time: 10 hours
- Cook Time: 20 mins
- Category: Breakfast
- Cuisine: South Indian, Tamilnadu
Find it online : https://www.kannammacooks.com/kuzhi-paniyaram-paniyaram-batter-recipe/
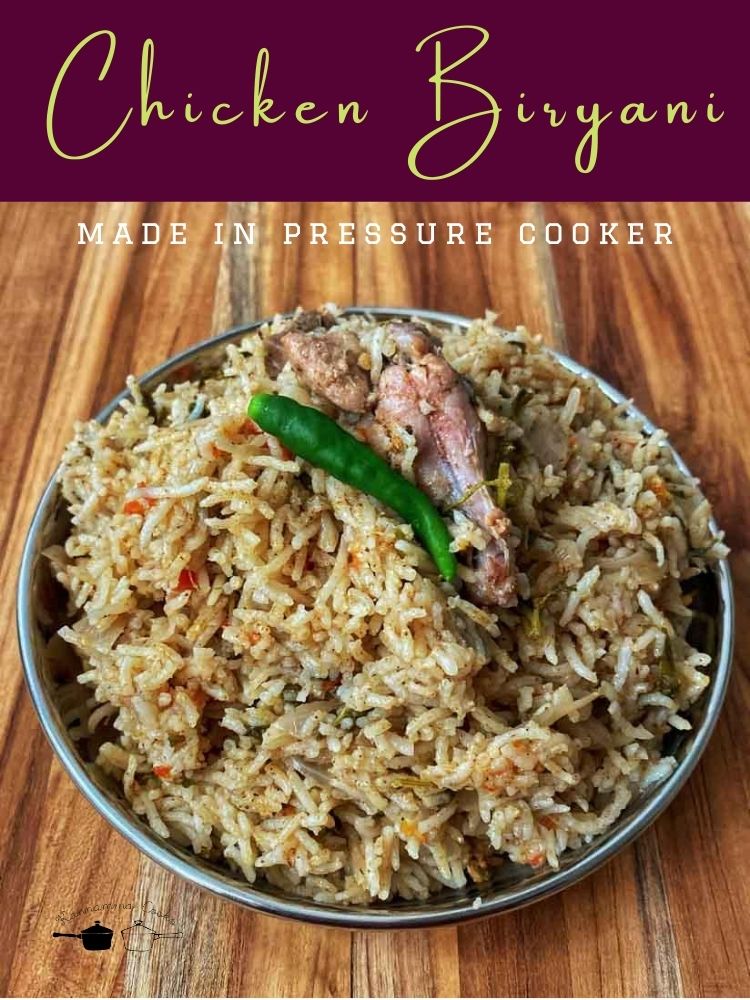
How to make chicken biryani in pressure cooker. Recipe for pressure cooker chicken biryani made with the addition of coconut milk. Recipe with step by step pictures and video.
This is the Sunday Biryani my mom used to make for us. Its very simple to make and one of the easiest Biryani recipes. The different thing about this Biryani is the addition of coconut milk. It gives a nice richness and flavor to the Biryani. Green chillies is the only spice used and there is no spice powders used in this recipe. The flavour is so unique. This biryani always brings me so many memories and is one of my favorites.
Here is the video of how to do Pressure Cooker Chicken Biryani
Rice I like to use the following brands for making biryani as the rice does not break while cooking and stays fluffy.
Gently wash the basmati rice in running water and let the rice soak in the water. Soaking the rice in water is one of the key steps in making biryani in pressure cooker. It helps in keeping the rice intact while cooking without becoming mushy. Soak the rice in water before starting to cook. Let the rice soak for 20 minutes. Drain the rice and set aside.
We will need the following two pastes for the biryani. First Paste: Grind ginger, garlic and shallots to a smooth paste adding little water. (add upto 1/4 cup of water) Second Paste: Grind Cinnamon, Cardamom, Cloves, Fennel Seeds and Green Chillies to a smooth paste adding little water. If you want a spicy biryani, you can add one or two green chillies more. Adjust the spice levels according to your taste. (add upto 1/4 cup of water)

Heat oil in a pan (and ghee if using) and add in the sliced onions and green chillies. Fry well till the onions are soft. Add in the first paste and fry for a couple of minutes. Note: The ghee is optional as the coconut milk is also rich. I add it if I make it for a party or for friends. If making at home, you can omit the ghee.
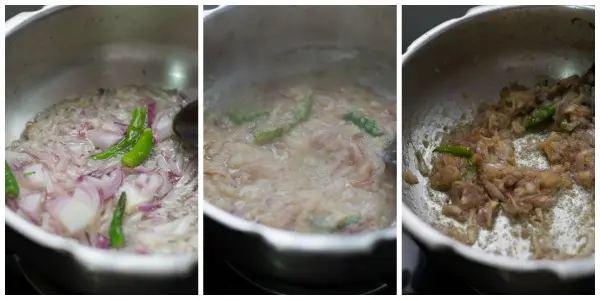
Add in the second paste and fry till the mixture is dry and streaks of oil appear on top.
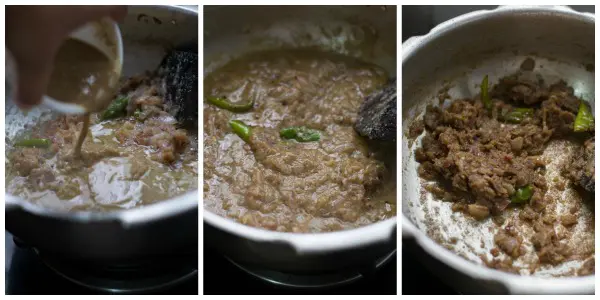
Add in the chopped tomatoes, chopped coriander leaves and chopped mint leaves. Fry for a couple of minutes. Add in the cleaned chicken pieces and the salt. Let the chicken cook on low flame for 12-15 minutes. Keep sauteing every two minutes once to avoid the chicken from burning at the bottom. Don’t add any water. The water from the chicken will be enough to cook.

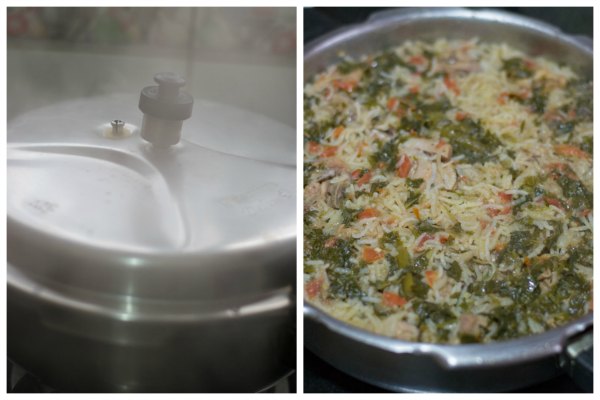
Add in the coconut milk and water. The ratio of liquid to rice is one rice : 1.5 liquid . Add a combination of coconut milk (first and second pressed) and water. Add in the lemon juice. Let the liquid come to a boil. Once the liquid is boiling, drain the rice and add it to the pan. Here is how to do coconut milk. Note: If you are in a hurry, you can use canned coconut milk and it works equally well too! If using canned coconut milk, use 200 – 250 ml canned milk for this recipe.

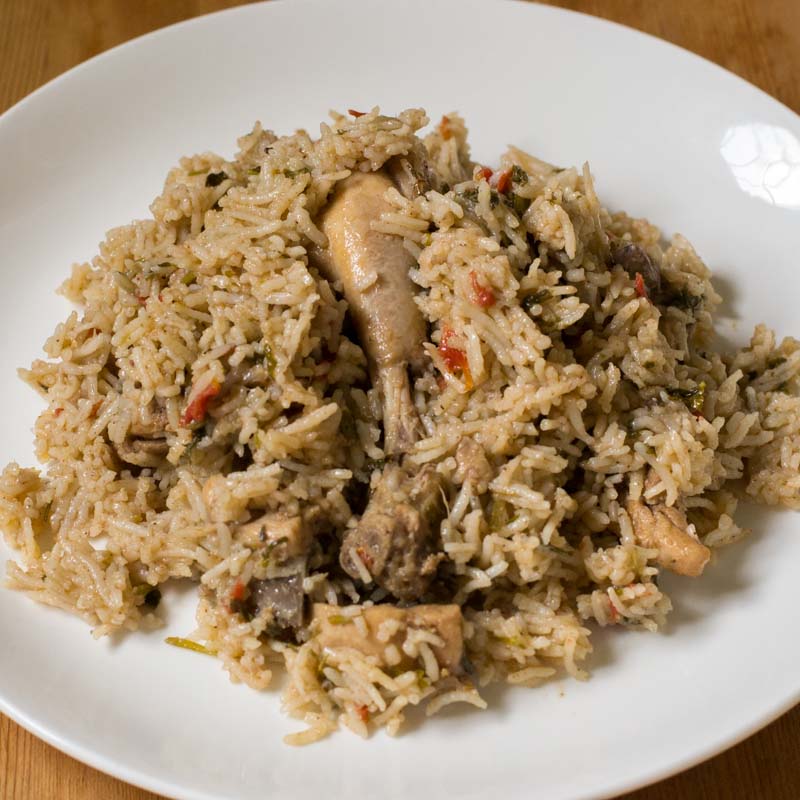
Close the pan and cook on medium flame for first whistle and on low flame for the next whistle (about 3-4 minutes). After the two whistles, switch off the flame and wait for pressure in the cooker to release naturally. Open the pan and fluff up the rice gently. Serve Pressure Cooker Chicken Biryani hot.
First Paste
- 10 cloves garlic
- 10 shallots (small onions)
- 2 inch piece ginger
Second Paste
- 3 green chillies
- 2 teaspoon fennel seeds
- 2 inch piece cinnamon
- 2 cardamom
- 2 clove
Other Ingredients
- 2 tablespoon vegetable oil
- 3 tablespoon ghee (optional) – (add along with oil)
- 1 cup onions, sliced
- 3 green chillies
- 3/4 cup tomatoes, chopped
- 6 sprigs coriander leaves, chopped
- 8 sprigs mint leaves, chopped
- 500 grams chicken
- 2 teaspoon salt
- Juice of one lime
- 2 cups Basmati Rice
- 2 cups Coconut Milk (first and second pressed)
- 1 cup water
Gently wash the basmati rice in running water and let the rice soak in the water. Soaking the rice in water is one of the key steps in making biryani in pressure cooker. It helps in keeping the rice intact while cooking without becoming mushy. Soak the rice in water before starting to cook. Let the rice soak for 20 minutes. Drain the rice and set aside.
We will need the following two pastes for the biryani. First Paste: Grind ginger, garlic and shallots to a smooth paste adding 1/4 cup of water. Second Paste: Grind Cinnamon, Cardamom, Cloves, Fennel Seeds and Green Chillies to a smooth paste adding 1/4 cup of water. If you want a spicy biryani, you can add one or two green chillies more. Adjust the spice levels according to your taste.
Heat oil in a pan (and ghee if using) and add in the sliced onions and green chillies. Fry well till the onions are soft. Add in the first paste and fry for a couple of minutes. Note: The ghee is optional as the coconut milk is also rich. I add it if I make it for a party or for friends. If making at home, you can omit the ghee.
Add in the second paste and fry till the mixture is dry and streaks of oil appear on top.
Add in the chopped tomatoes, chopped coriander leaves and chopped mint leaves. Fry for a couple of minutes. Add in the cleaned chicken pieces and the salt. Let the chicken cook on low flame for 12-15 minutes. Keep sauteing every two minutes once to avoid the chicken from burning at the bottom. Don’t add any water. The water from the chicken will be enough to cook.
Add in the coconut milk and water. The ratio of liquid to rice is one rice : 1.5 liquid. Add a combination of coconut milk (first and second pressed) and water. Add in the lemon juice. Let the liquid come to a boil. Once the liquid is boiling, drain the rice and add it to the pan. Here is how to do coconut milk.
Close the pan and cook on medium flame for first whistle and on low flame for the next whistle (about 3-4 minutes). After the two whistles, switch off the flame and wait for pressure in the cooker to release naturally. Open the pan and fluff up the rice gently. Serve Pressure Cooker Chicken Biryani hot.
Notes
Add a combination of coconut milk (first and second pressed) and water for making this biryani. If you are in a hurry, you can use canned coconut milk and it works equally well too! If using canned coconut milk, use 200 – 250 ml canned milk for this recipe.
- Author: Kannamma - Suguna Vinodh
- Prep Time: 15 mins
- Cook Time: 40 mins
- Category: Main Course
- Cuisine: South Indian, Tamilnadu

