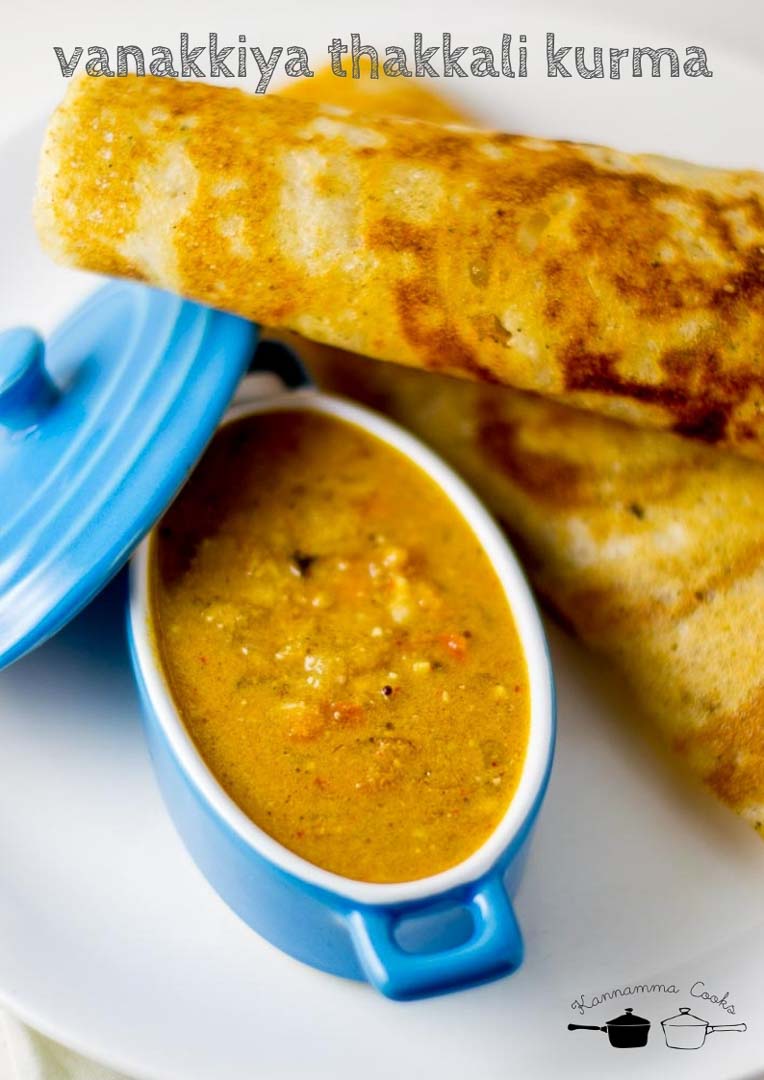
Recipe for Vanakkiya thakkali kurma. Kurma made with fried tomatoes. Recipe with step by step pictures.
This recipe is a slight variation of the Tomato Kadaindha Kurma that I shared some time back. Its perfect as a side dish for everyday breakfast of idli and dosa.
Here is how to do it.
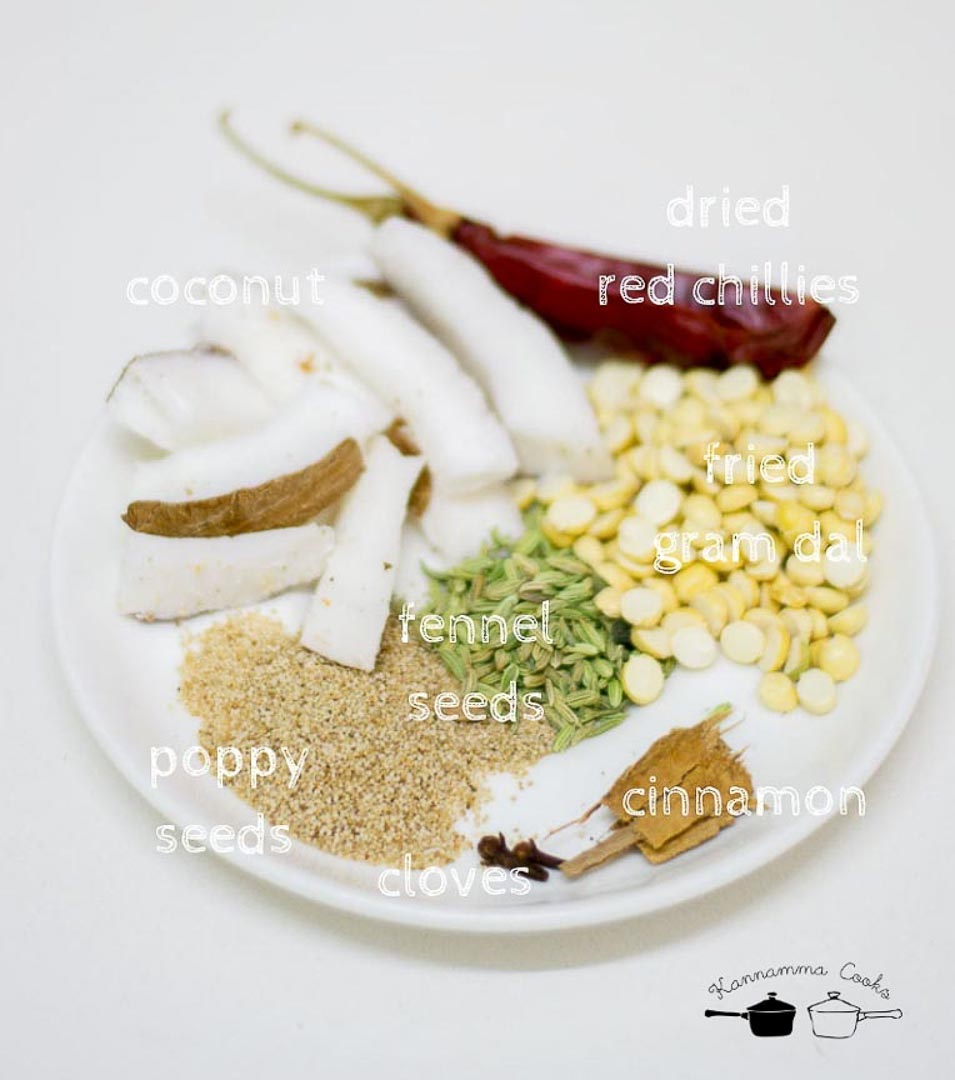
We will have to make a raw masala paste for this kurma. Here is what you will need.
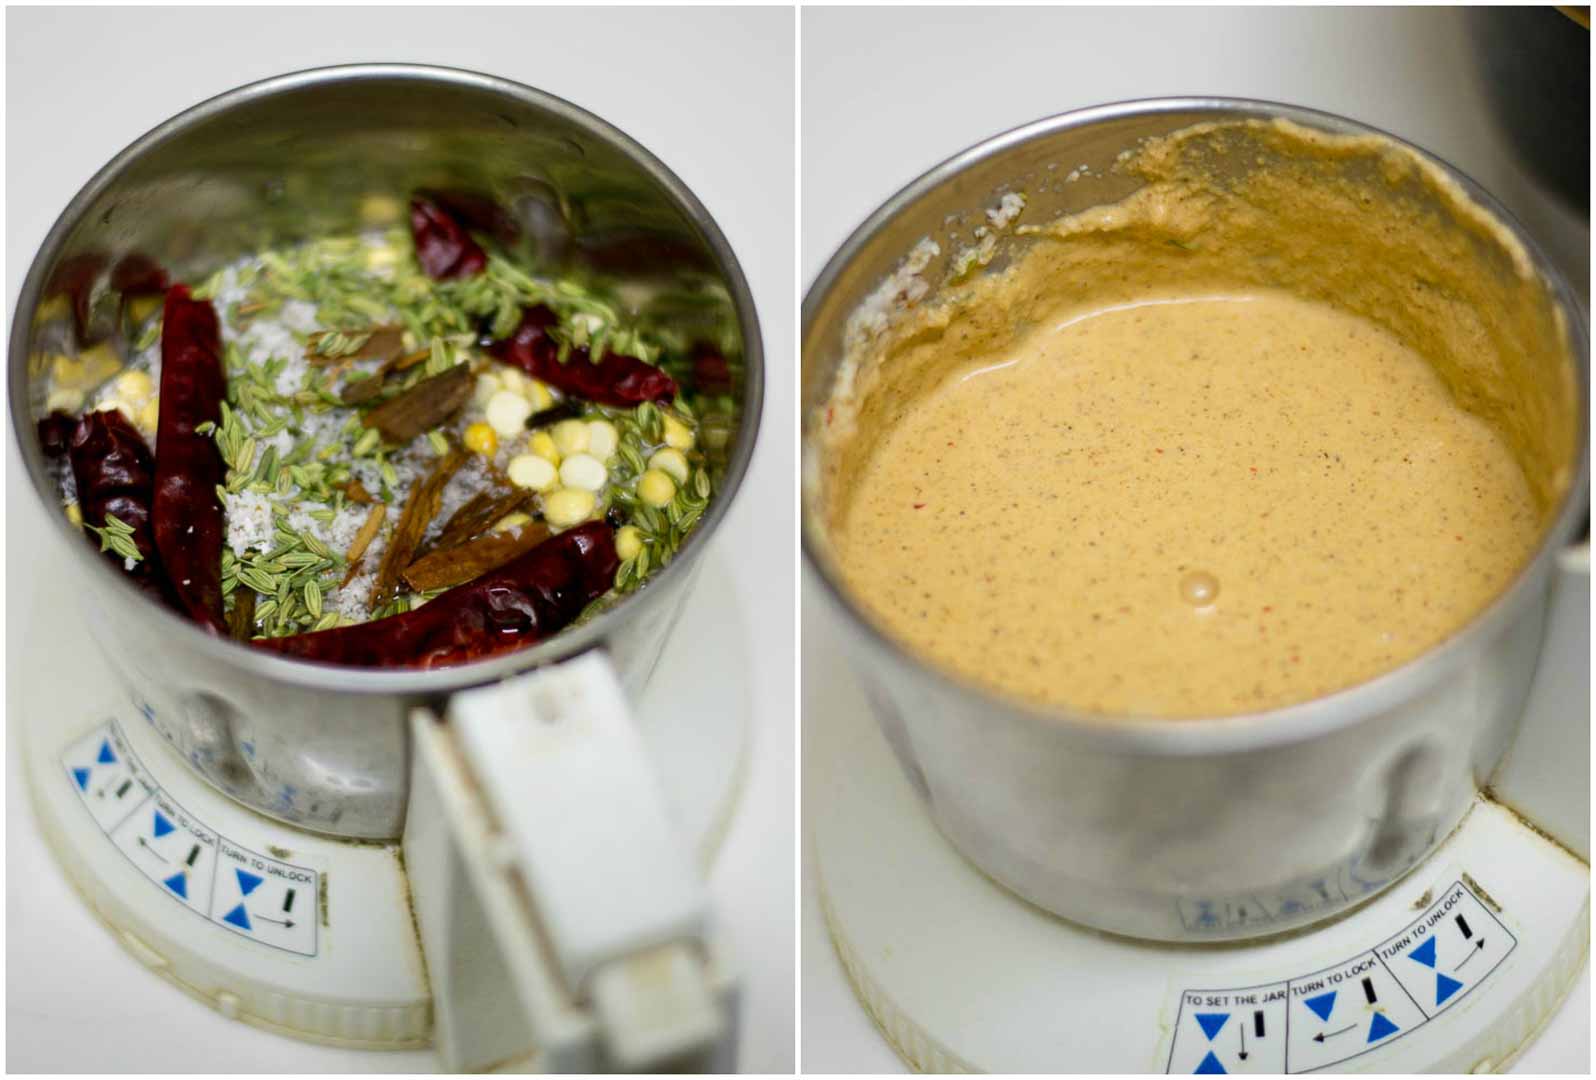
Take a mixie and add in all the masala ingredients to it. Add in half a cup of water and grind to a smooth paste. Set aside.
For Indian curries, you will need a heavy duty mixie and here is what I recommend.
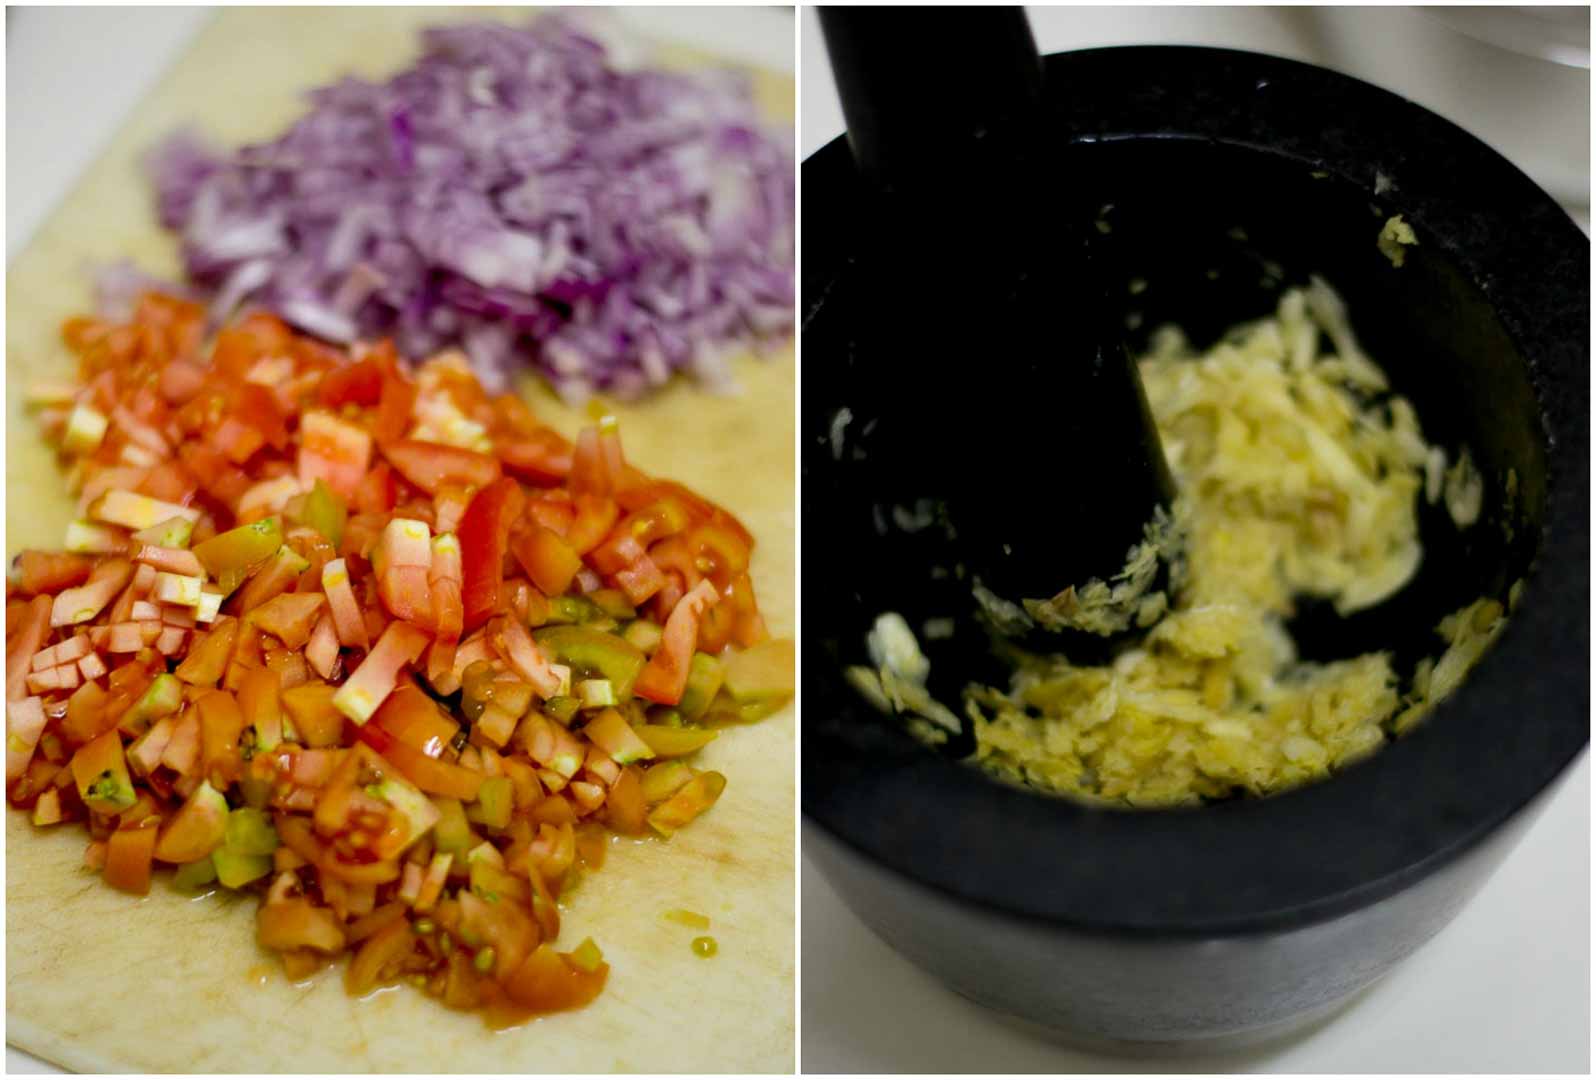
Making the Kurma Chop the onions, tomatoes and set aside. Crush the ginger and garlic in a mortar and pestle. Set aside.

Heat Indian sesame oil / gingely oil in a pan. (Be generous with the oil as we will need to saute the tomatoes and onion till golden.) Add in the mustard seeds, curry leaves and chopped green chillies. If you want a spicy kurma, add more green chillies according to your taste. Let the mustard seeds crackle. Add in the chopped onions.
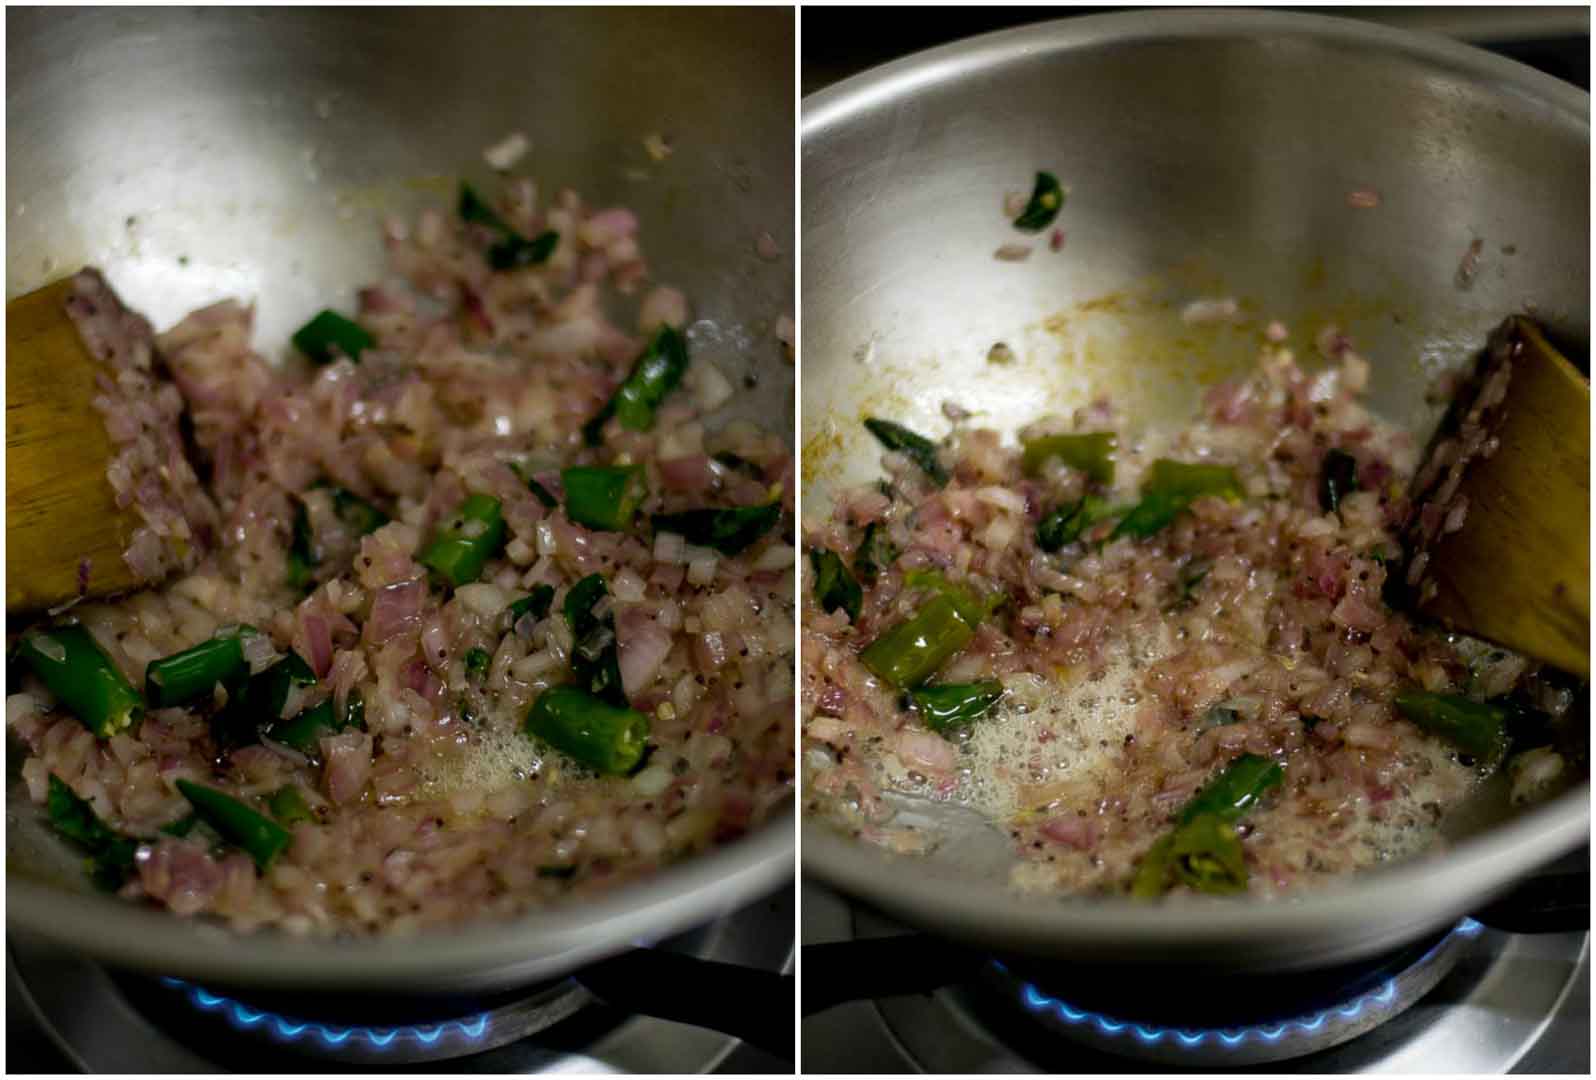
Add in the salt and saute till the onions are soft and starting to brown. About five minutes on medium flame.
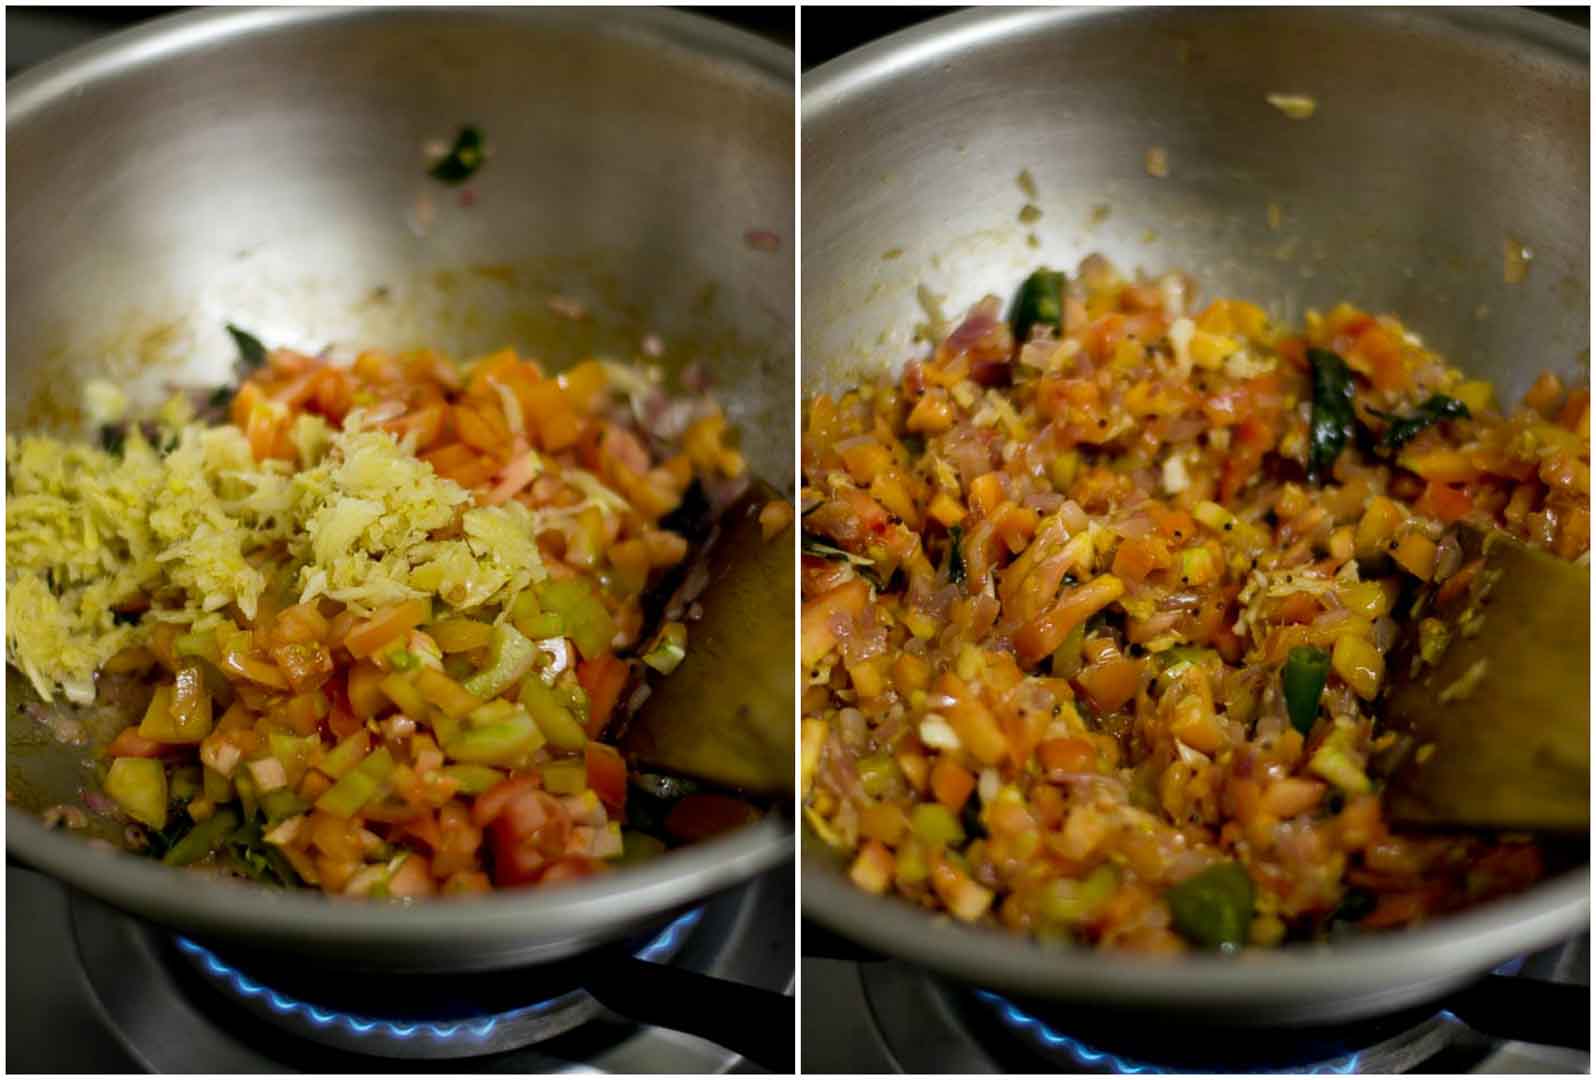
Add in the crushed ginger and garlic along with the tomatoes. I prefer using “naatu thakkali” – country tomatoes for this recipe.
Saute for a good 7-8 minutes till the tomatoes are cooked and juiced down.
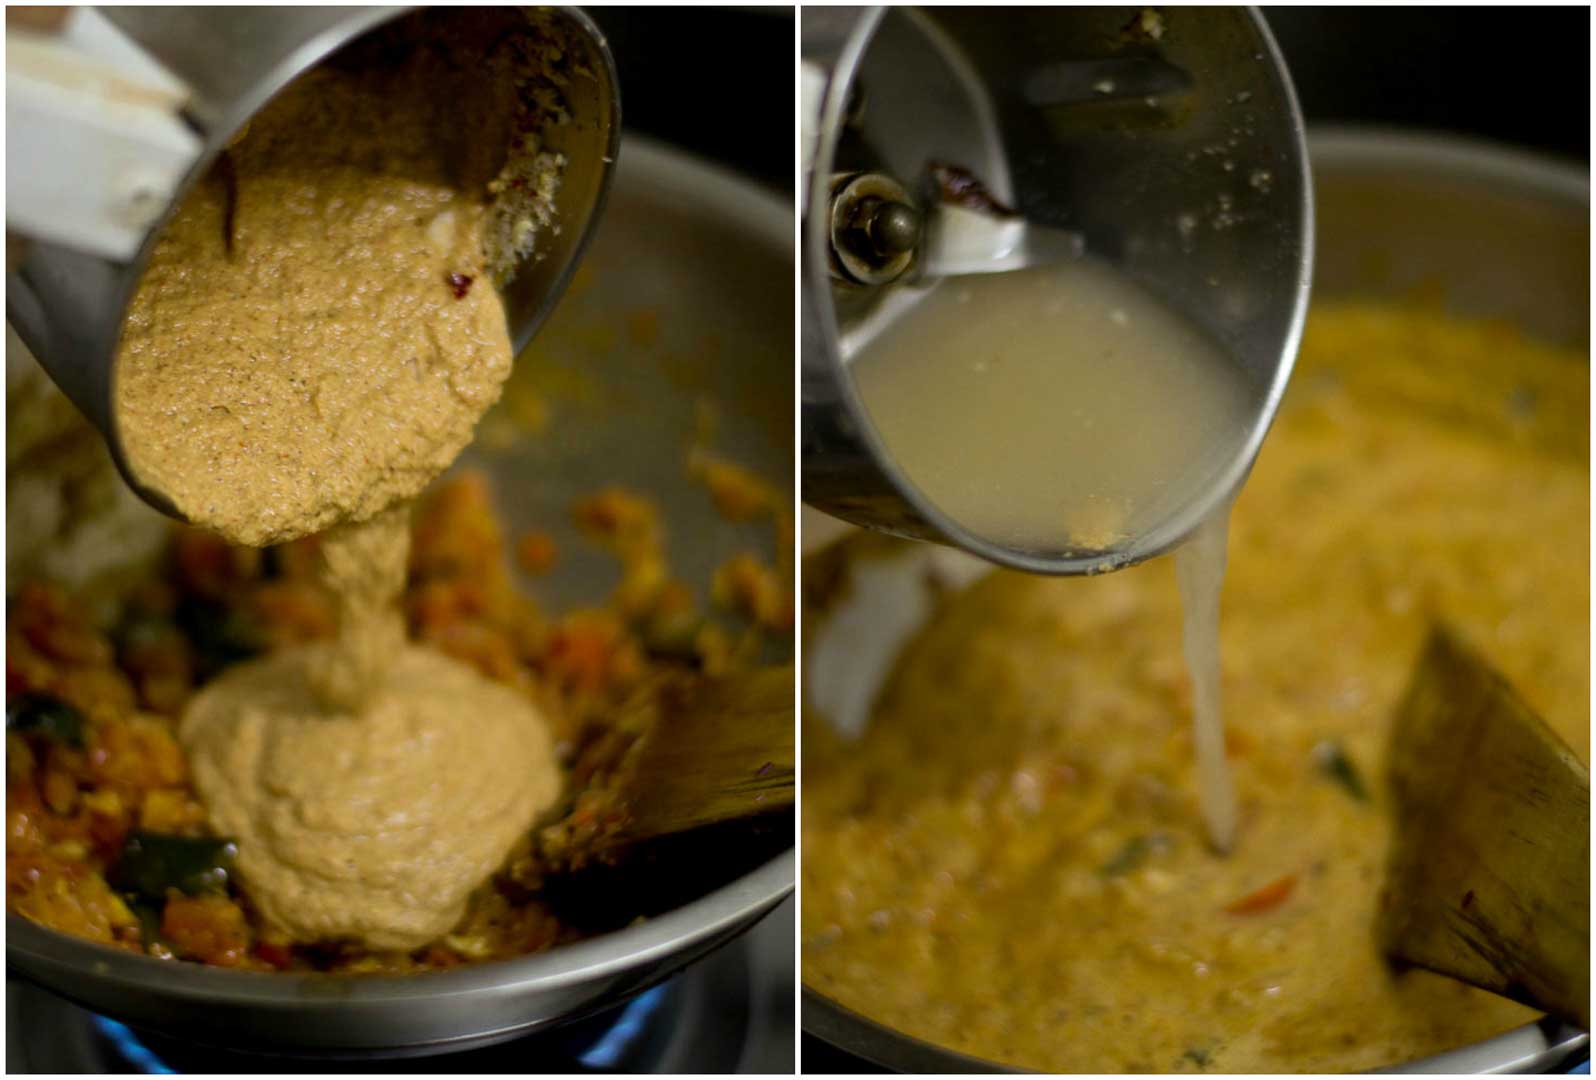
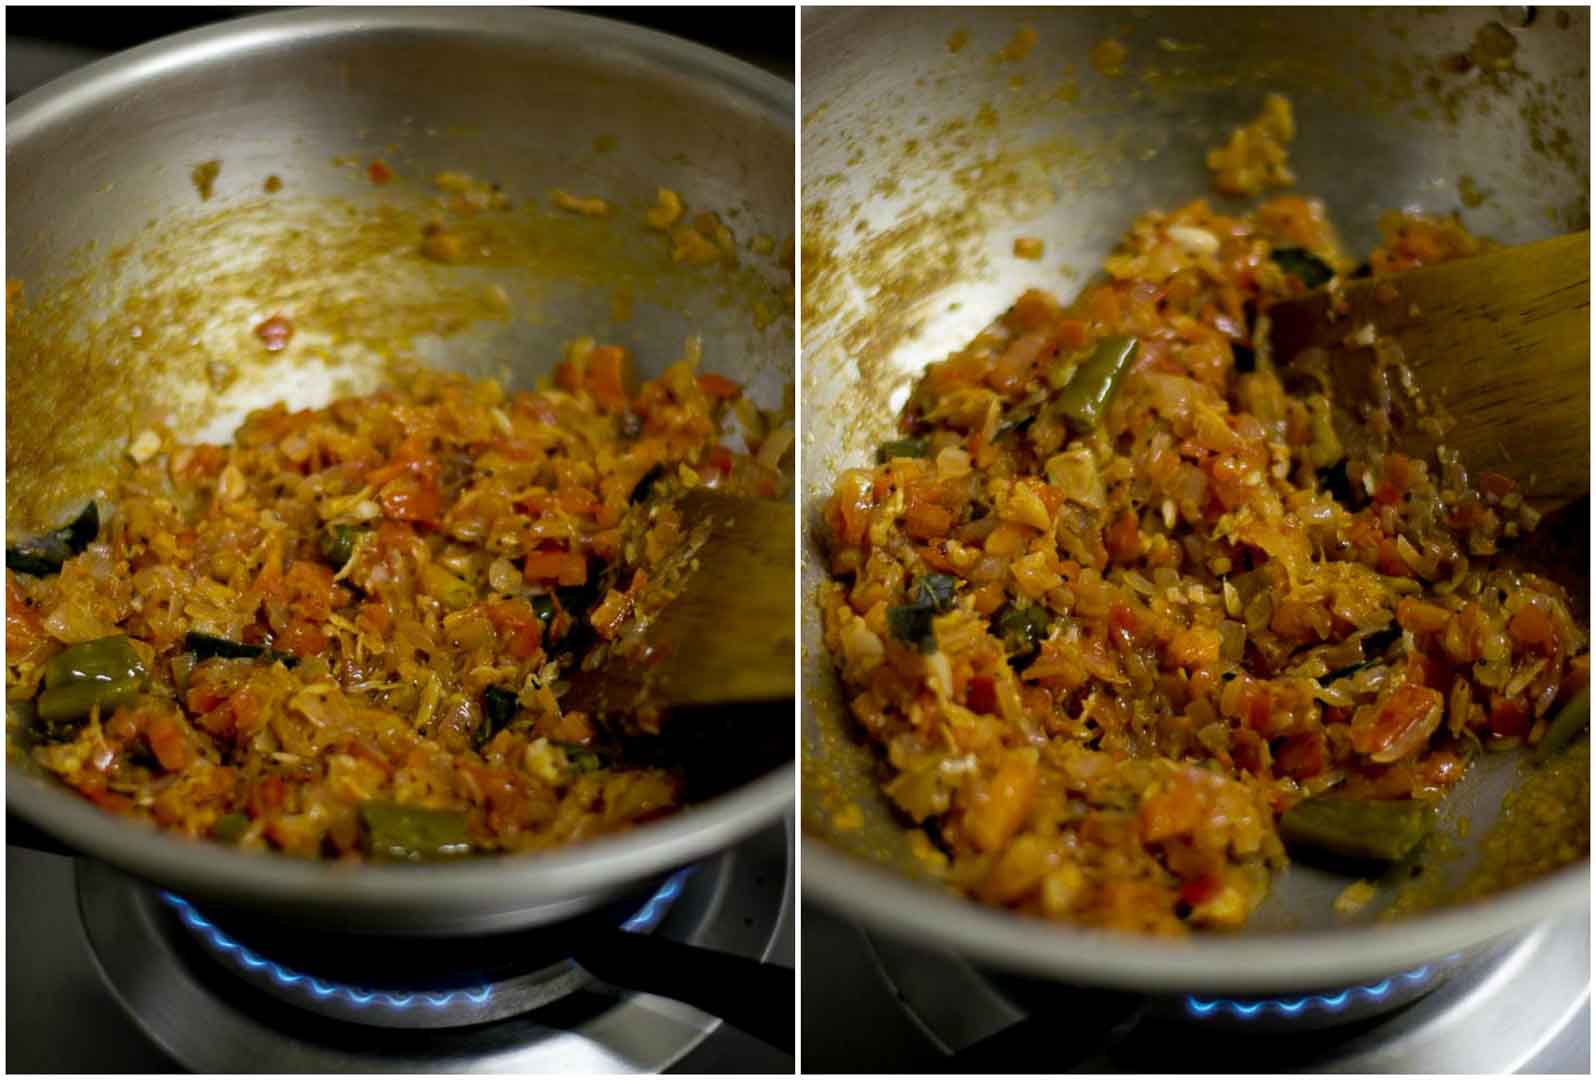
Add in the ground masala paste. Wash the mixie with half a cup of water and add the masalas back to the pan.
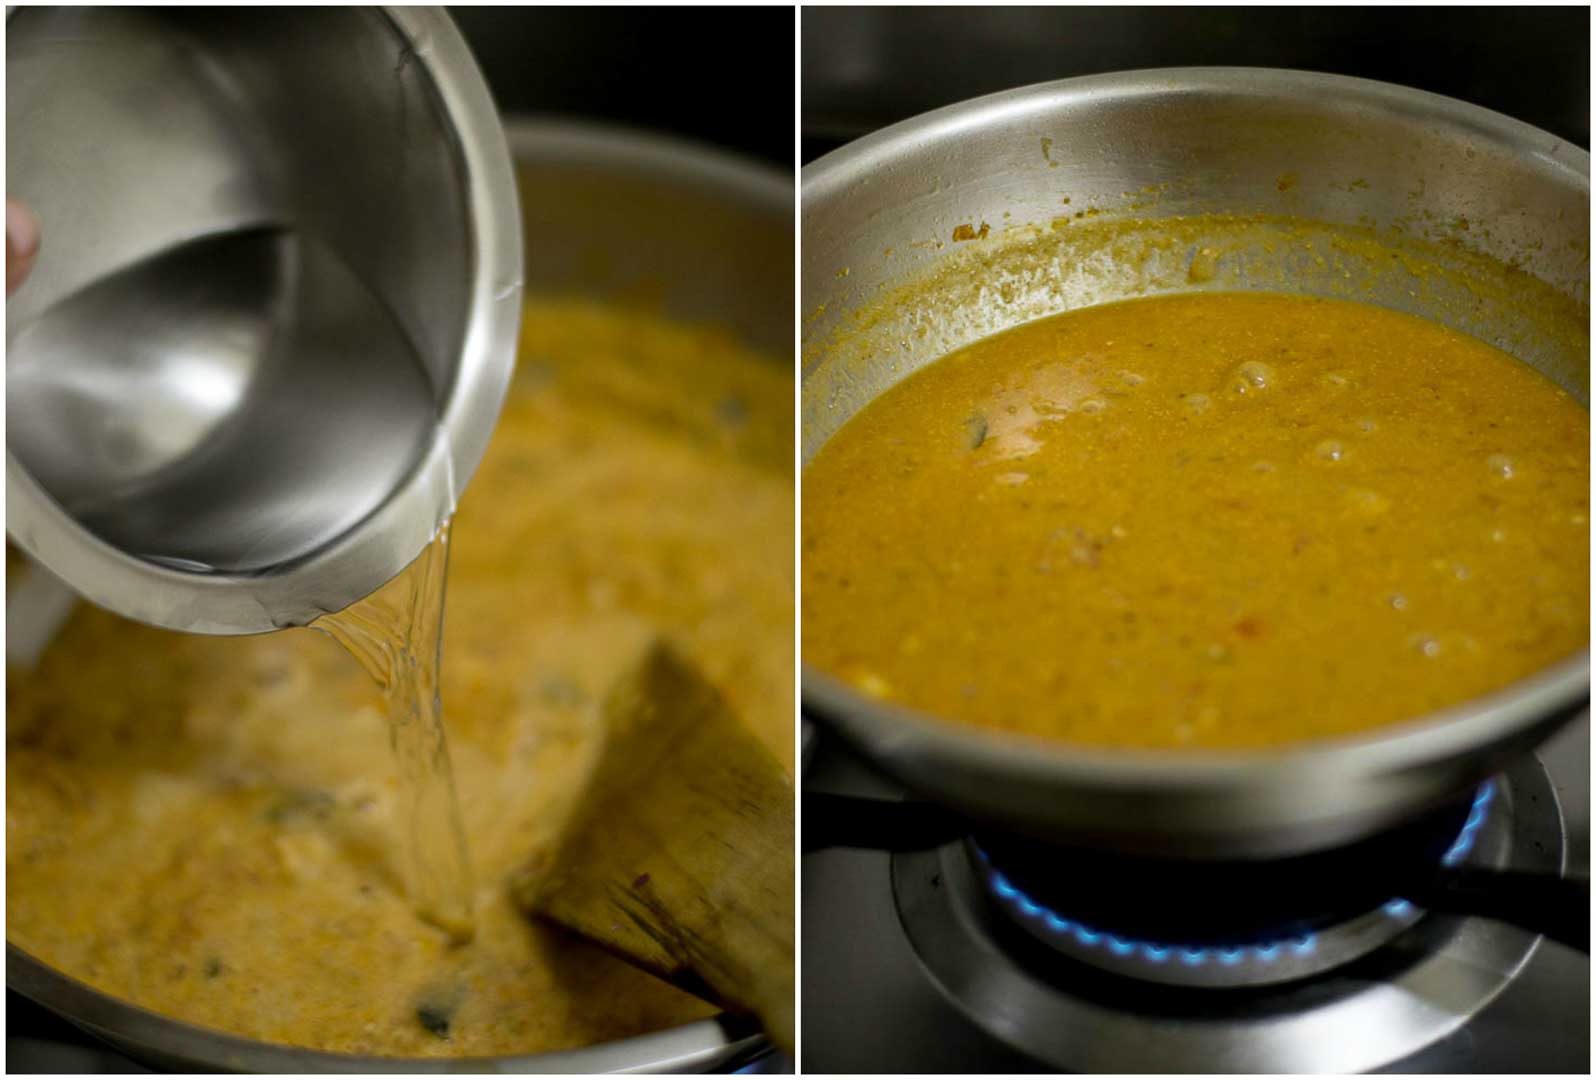
Add in a cup of water. Close the pan with a lid and let the gravy simmer for 15 minutes on a low flame. Mix once every five minutes to avoid scorching the pan at the bottom. The tomato kurma is ready.
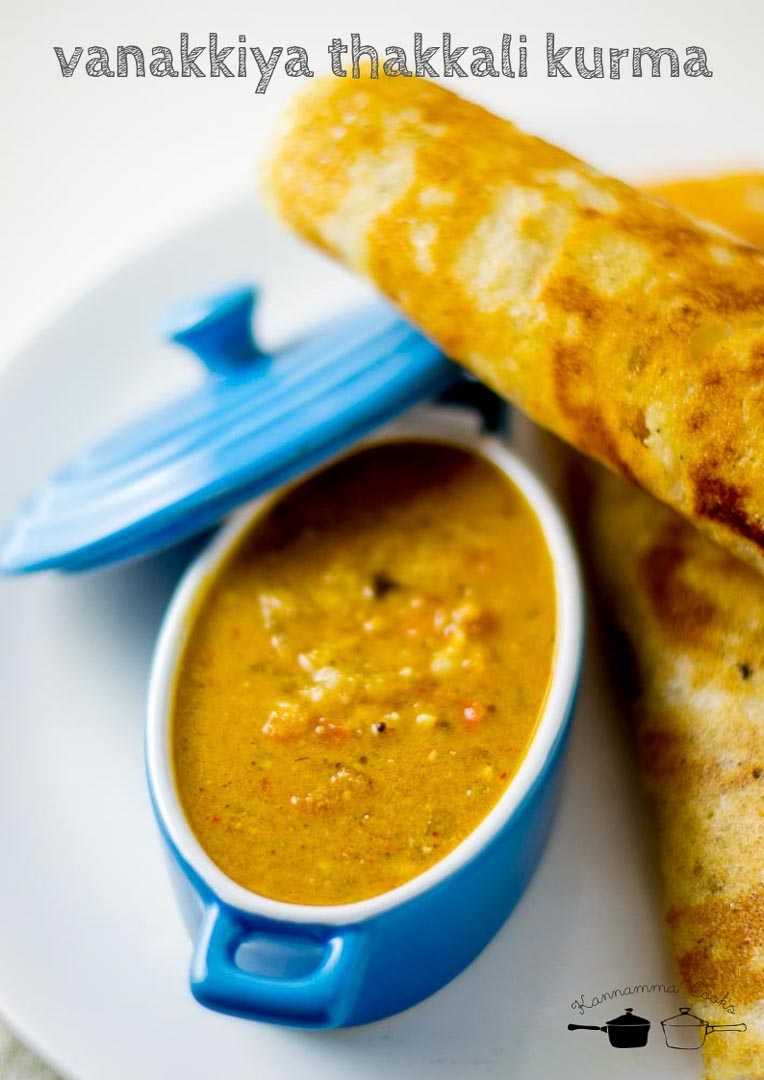
Serve with idli or dosa.

For the Masala
- ⅓ cup fresh coconut
- 1 tablespoon fried gram
- 1 teaspoon white poppy seed (gasa gasa)
- 1 teaspoon fennel seeds (sombu)
- 2 cloves
- ¼ inch piece cinnamon
- 3 dried red chillies
Other Ingredients
- 4 - 5 tomatoes
- 2 - 3 tablespoon Indian sesame oil (gingely oil)
- ¼ teaspoon mustard seeds
- 1 sprig curry leaves
- 3 chopped green chillies
- ½ cup chopped onion
- 1 teaspoon salt
- 1/4 inch piece ginger
- 5 cloves garlic
- Take a mixie and add in all the masala ingredients to it. Add in half a cup of water and grind to a smooth paste. Set aside.
- Heat Indian sesame oil / gingely oil in a pan. Add in the mustard seeds, curry leaves and chopped green chillies. If you want a spicy kurma, add more green chillies according to your taste. Let the mustard seeds crackle. Add in the chopped onions.
- Add in the salt and saute till the onions are soft and starting to brown. About five minutes on medium flame.
- Add in the crushed ginger and garlic along with the tomatoes.
- Saute for a good 7-8 minutes till the tomatoes are cooked and juiced down.
- Add in the ground masala paste. Wash the mixie with half a cup of water and add the masalas back to the pan.
- Add in a cup of water. Close the pan with a lid and let the gravy simmer for 15 minutes on a low flame. Mix once every five minutes to avoid scorching the pan at the bottom. The tomato kurma is ready.
- Serve with idli or dosa.
- Author: Kannamma - Suguna Vinodh
- Prep Time: 20 mins
- Cook Time: 25 mins
- Category: Side Dish
- Cuisine: Tamilnadu
Find it online : https://www.kannammacooks.com/vanakkiya-thakkali-kurma-fried-tomato-kurma/
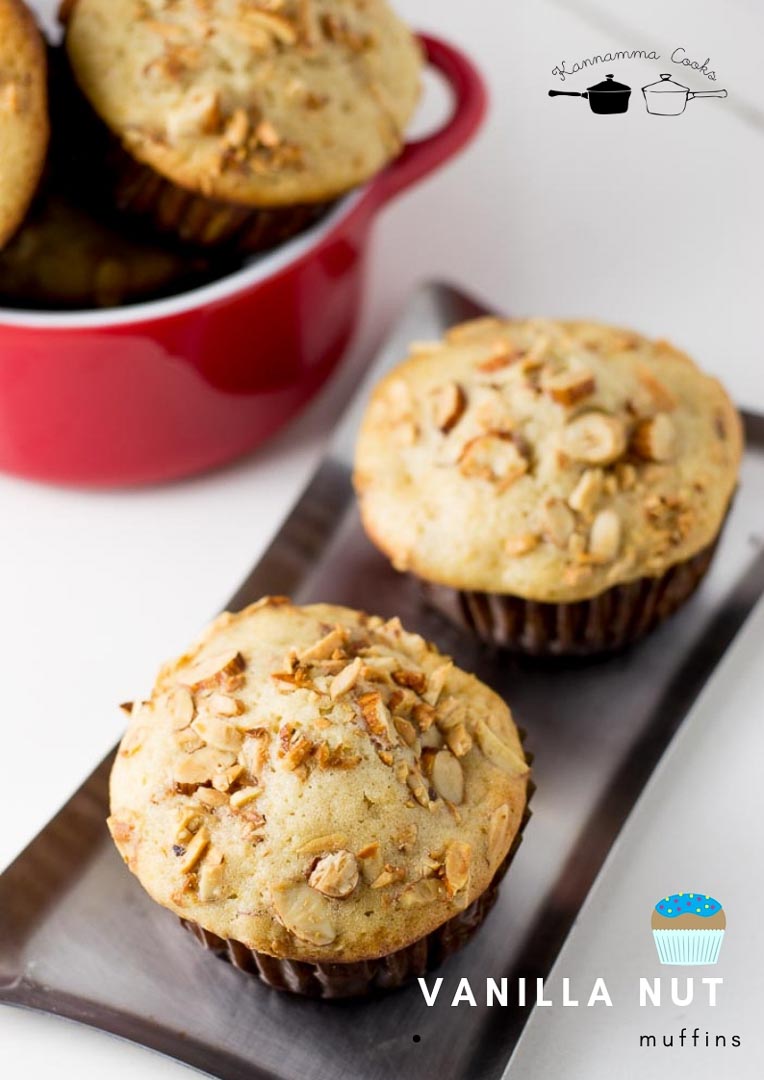
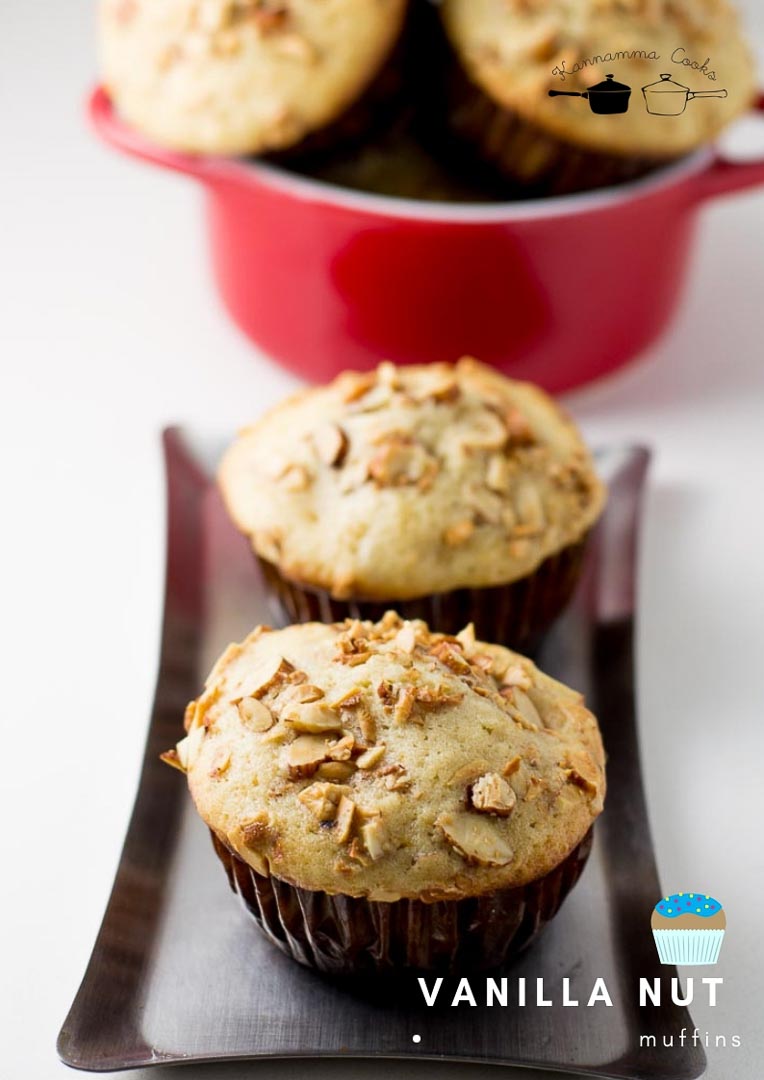
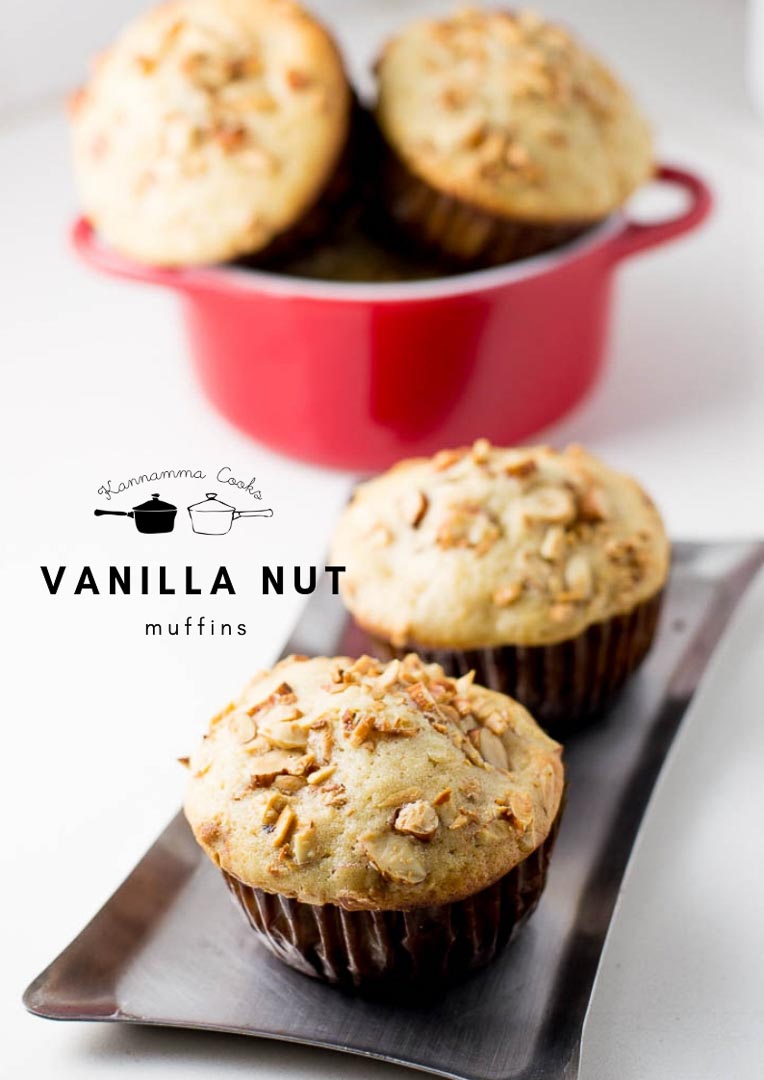
Recipe for easy beginners vanilla nut muffins recipe. Perfect for beginners and an easy fuss free recipe.
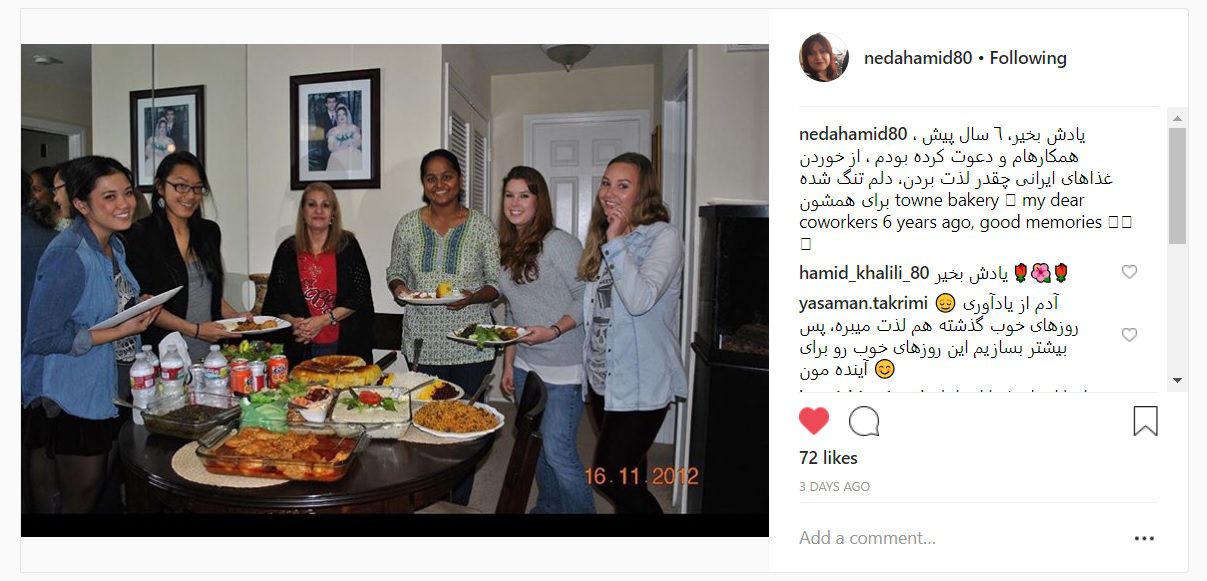
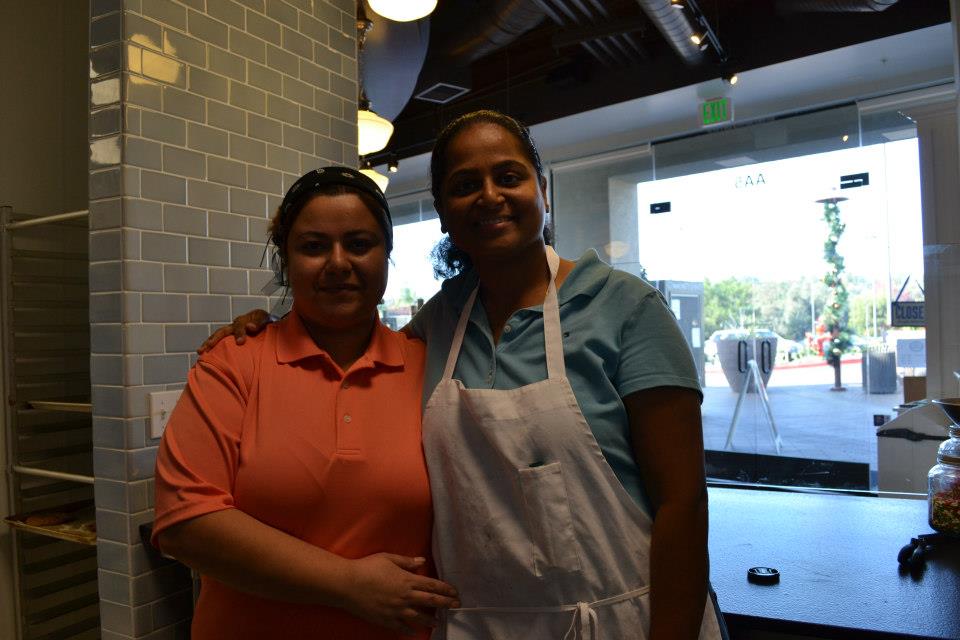
As some of you might know, I worked at a bakery for a little sometime during our days in San Diego. My co-worker and good friend Neda posted a picture couple of days back. It was a picture where she had thrown a party just before Thanksgiving years back. Those days are still so fresh in my mind. She was my next door neighbor too. I baked these nut muffins today as the smell of something baking in the oven is always nostalgic for me!!! These nut muffins are a classic. Neda is a good friend of ours. Her husband Hamid is the most handsome man (inside and out) on this planet that I know of. He used to keep small treats in his coat pocket for my little baby son everyday when he came back in the evening from work. My son would wait in the balcony to get his treat. A very kind, gentle and caring couple both of them are. Not to mention her amazing Iranian food. Her Persian rice and tahdig is to die for. After our tiresome day at the bakery, most of the time, Hamid will pick Neda and me from work and drop us back home. I should say that we are blessed to have known people like them who are nothing but blessings in our life. This thanksgiving day, I remember all the good days of America!!! Neda dear, I miss your tea and our conversations….What an amazing neighbor you are.
This is a very easy recipe perfect for beginners. Measuring the ingredients properly is very very important in baking. Use measuring cups and measuring spoons ALWAYS while baking. Here is where you can buy measuring cups and spoon online if you need one. This is an easy muffin recipe. Here is how to do it. I will guide you step by step. Just follow the steps diligently if you are a first time baker for proper results. Again, I want to make sure that you “measure” properly and follow the steps as given below. Do not mix up the steps.
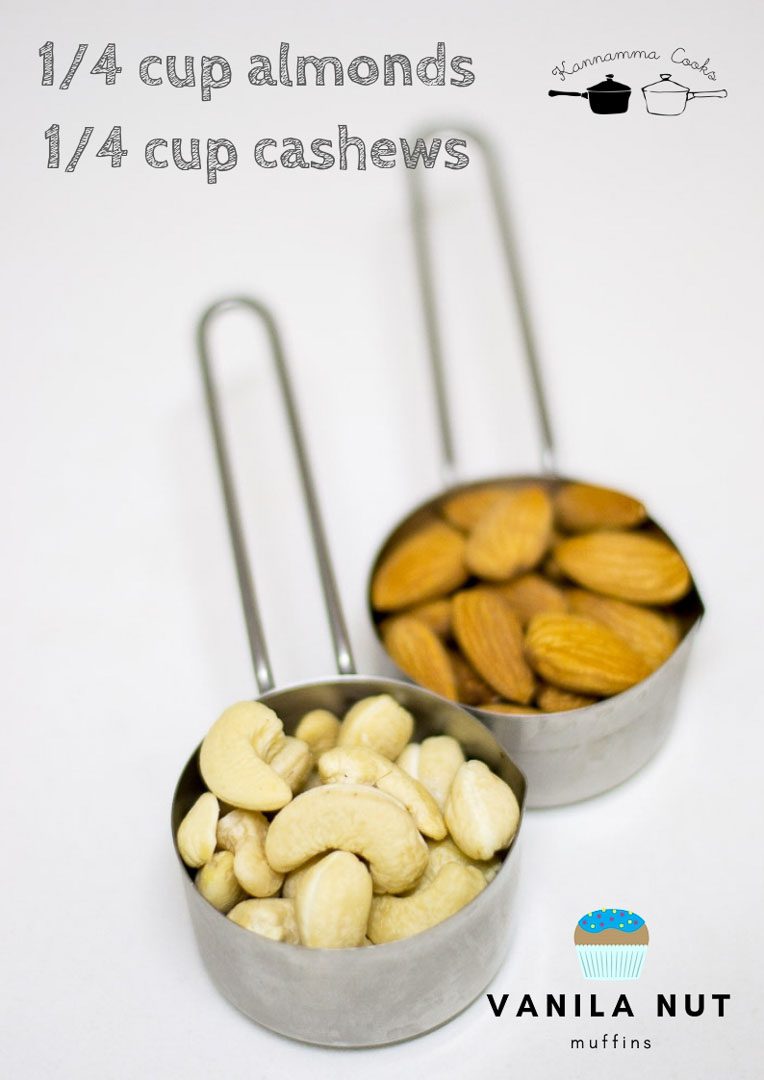
Step One: Roasting the Nuts First lets get the nuts ready. Measure the nuts and set aside. We have used 1/4 cup of almonds and 1/4 cup of whole cashews today. You can use other nuts like pistachios, walnuts etc…. Its totally up to you as to the choice of nuts you use. We will need a total of half cup of nuts for this recipe.
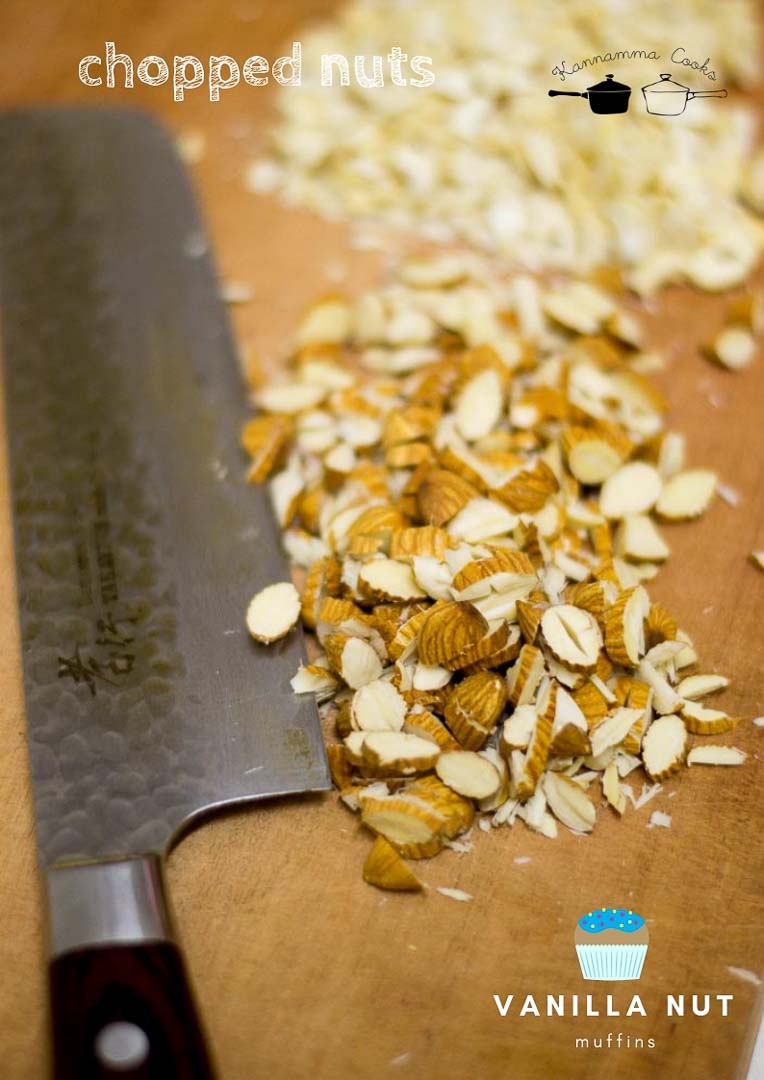
Chop the nuts into small bits.
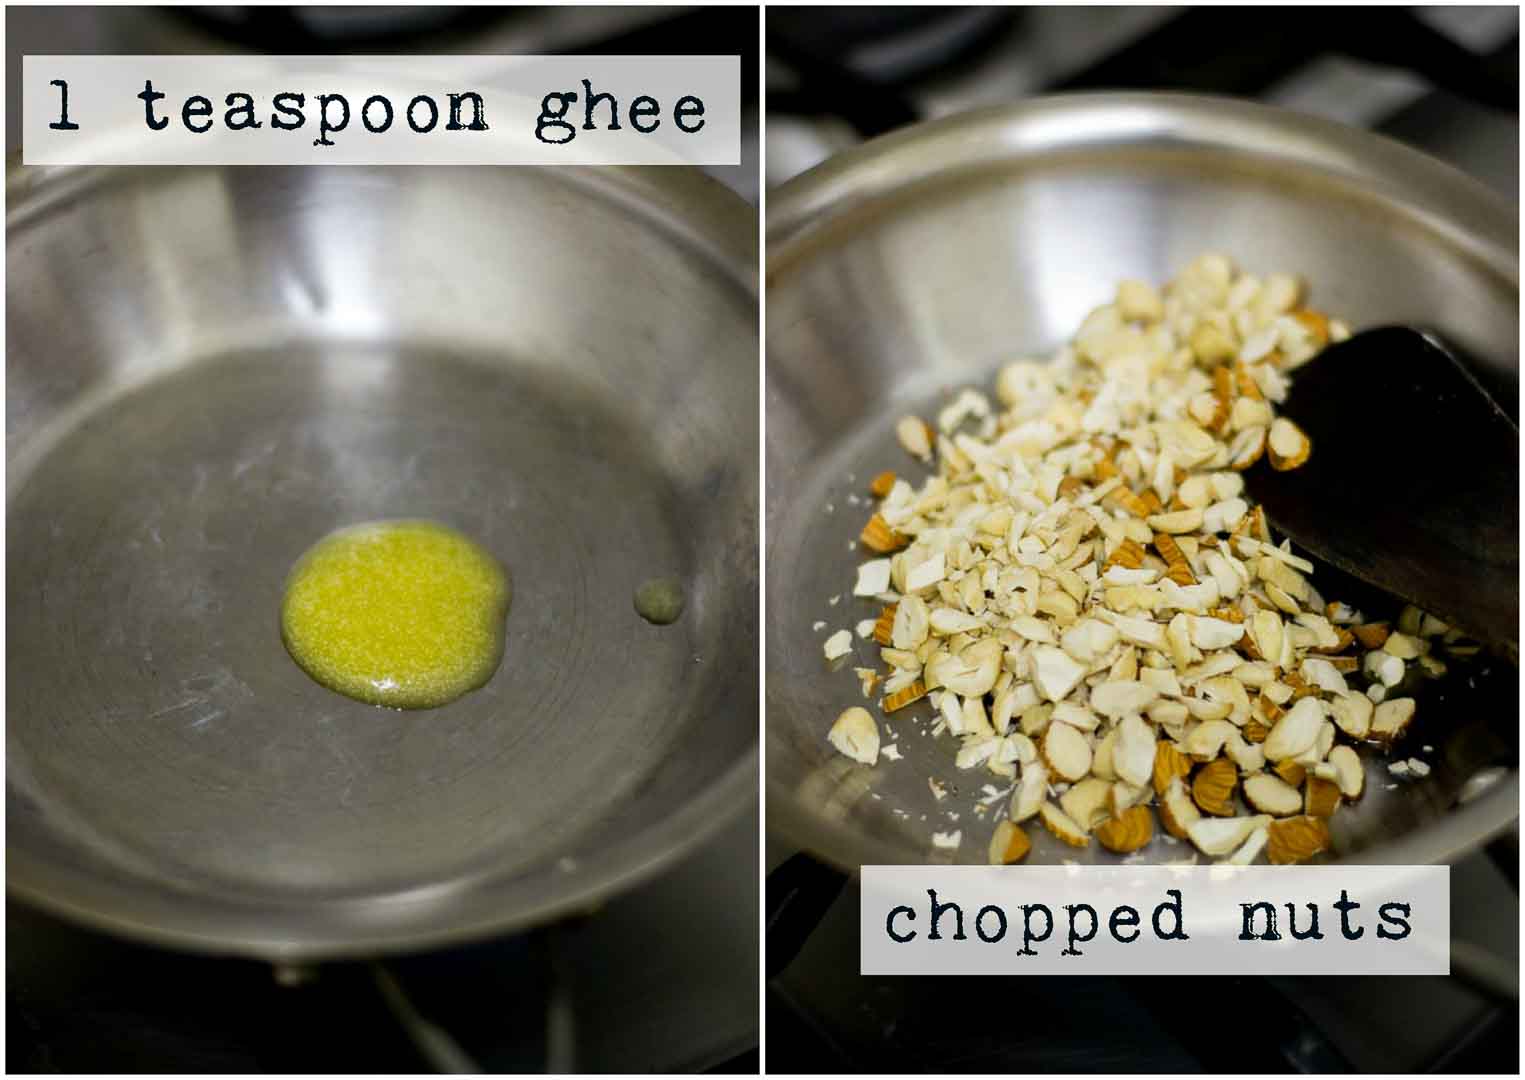
Take a pan and add in a teaspoon of ghee. Add in the chopped nuts and roast on a low flame for 5 minutes.
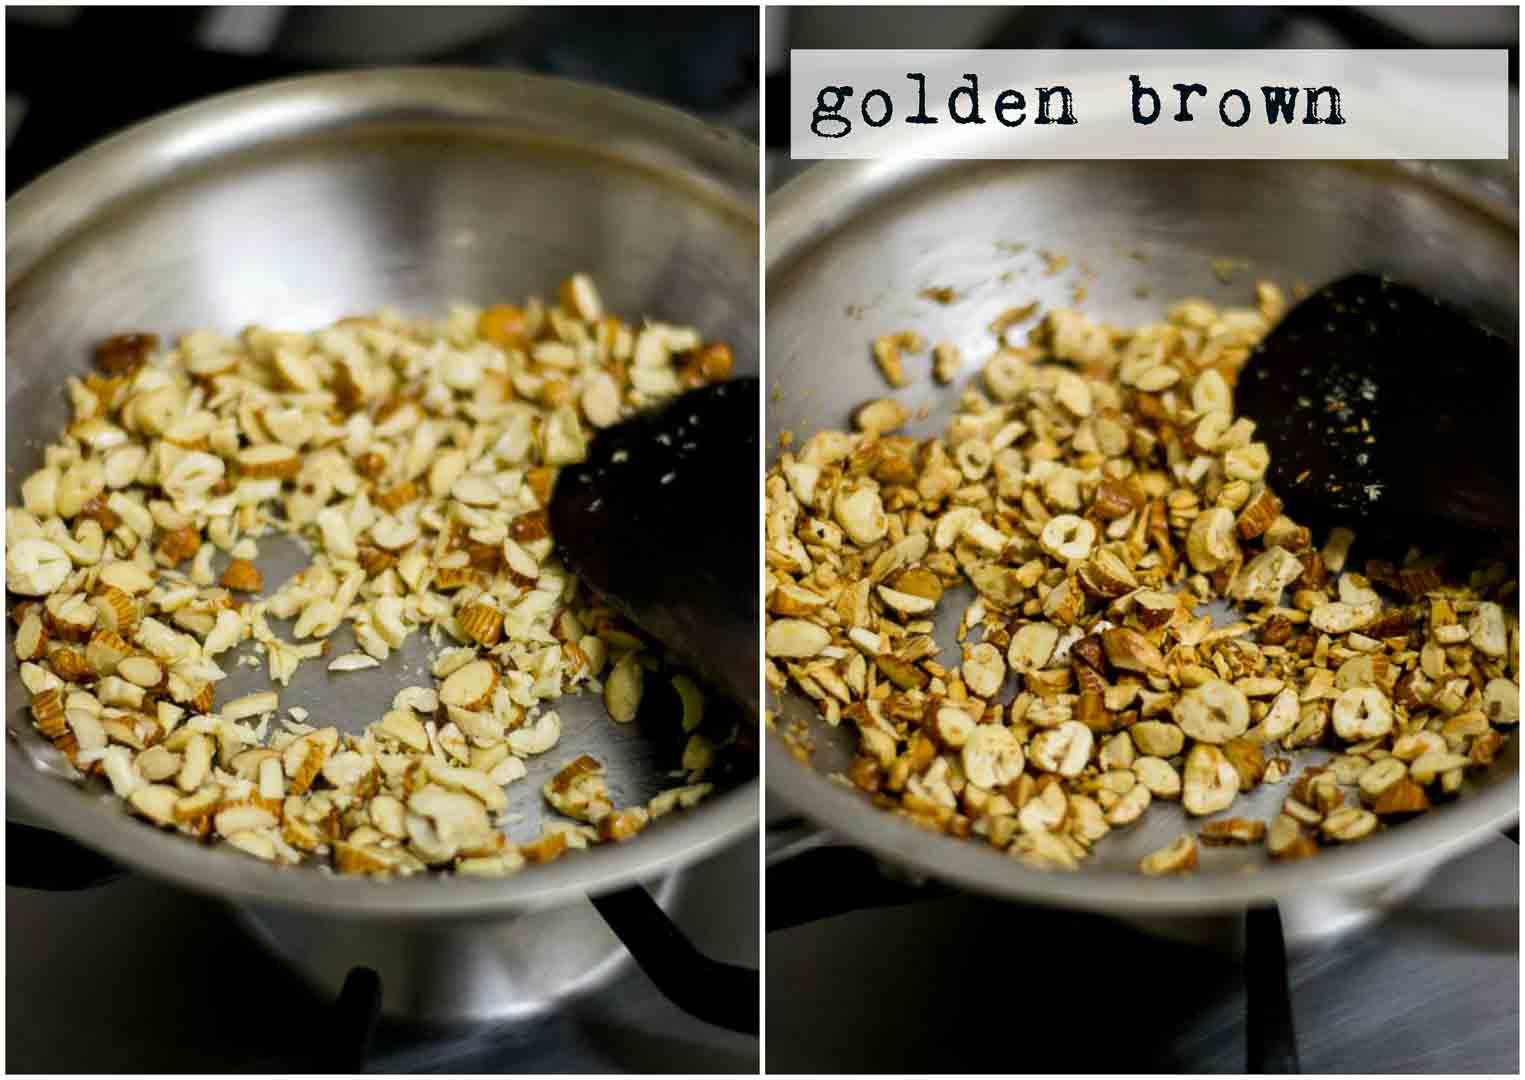
Roasting on low flame is key. Take time, have patience and roast the nuts on a low flame. Roasting on a high flame will burn the nuts and the flavor will not be very good. So take it low and slow.
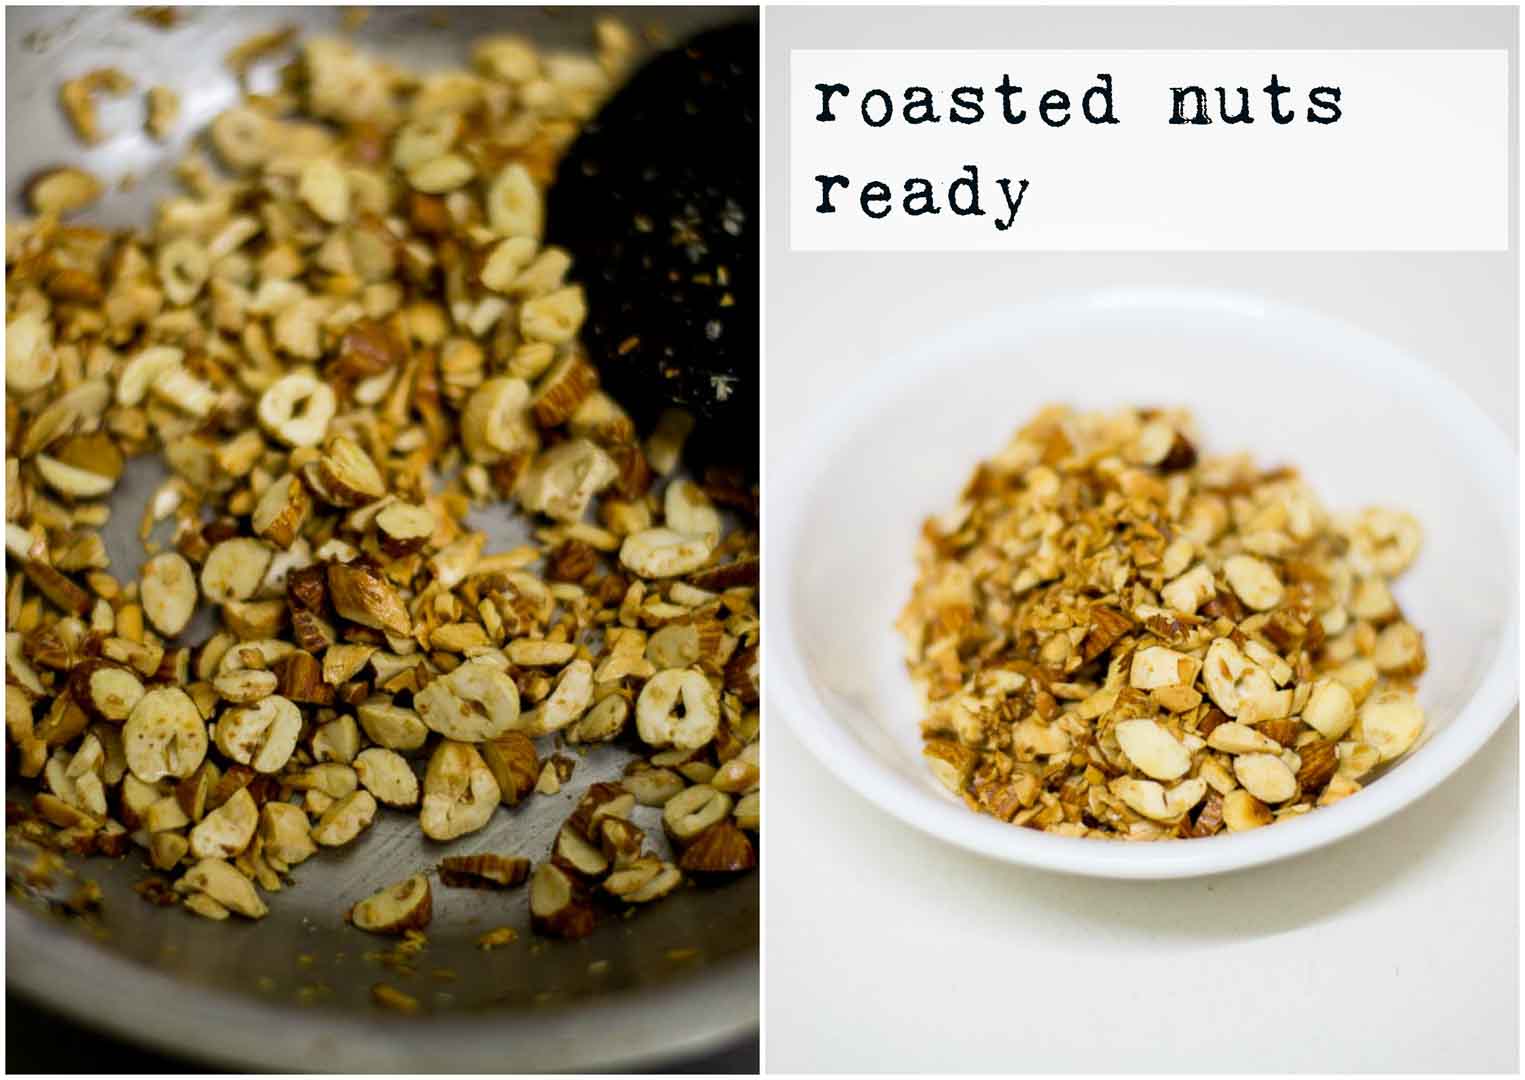
Once the nuts are light golden brown, remove from the pan and set aside to cool on a plate. Do not leave the nuts on the pan. The heat of the pan will continue to cook the nuts and that may blacken the nuts. So immediately remove and set aside on a plate to cool.
Preheat the oven At this stage , preheat the oven to 200 degrees Celsius. Let it heat for 15-20 minutes. In the mean time, we can get the batter ready. When the batter is ready, the oven will be hot and ready to bake. (Heating for a little more or less time is ok)
Get the wet ingredients ready In baking, the ingredients are generally sorted into two types namely wet ingredients and dry ingredients. Flour, baking powder etc… are dry ingredients. Milk, egg, oil, butter, etc are wet ingredients. Sugar – even though technically dry is always treated as a wet ingredient in baking.
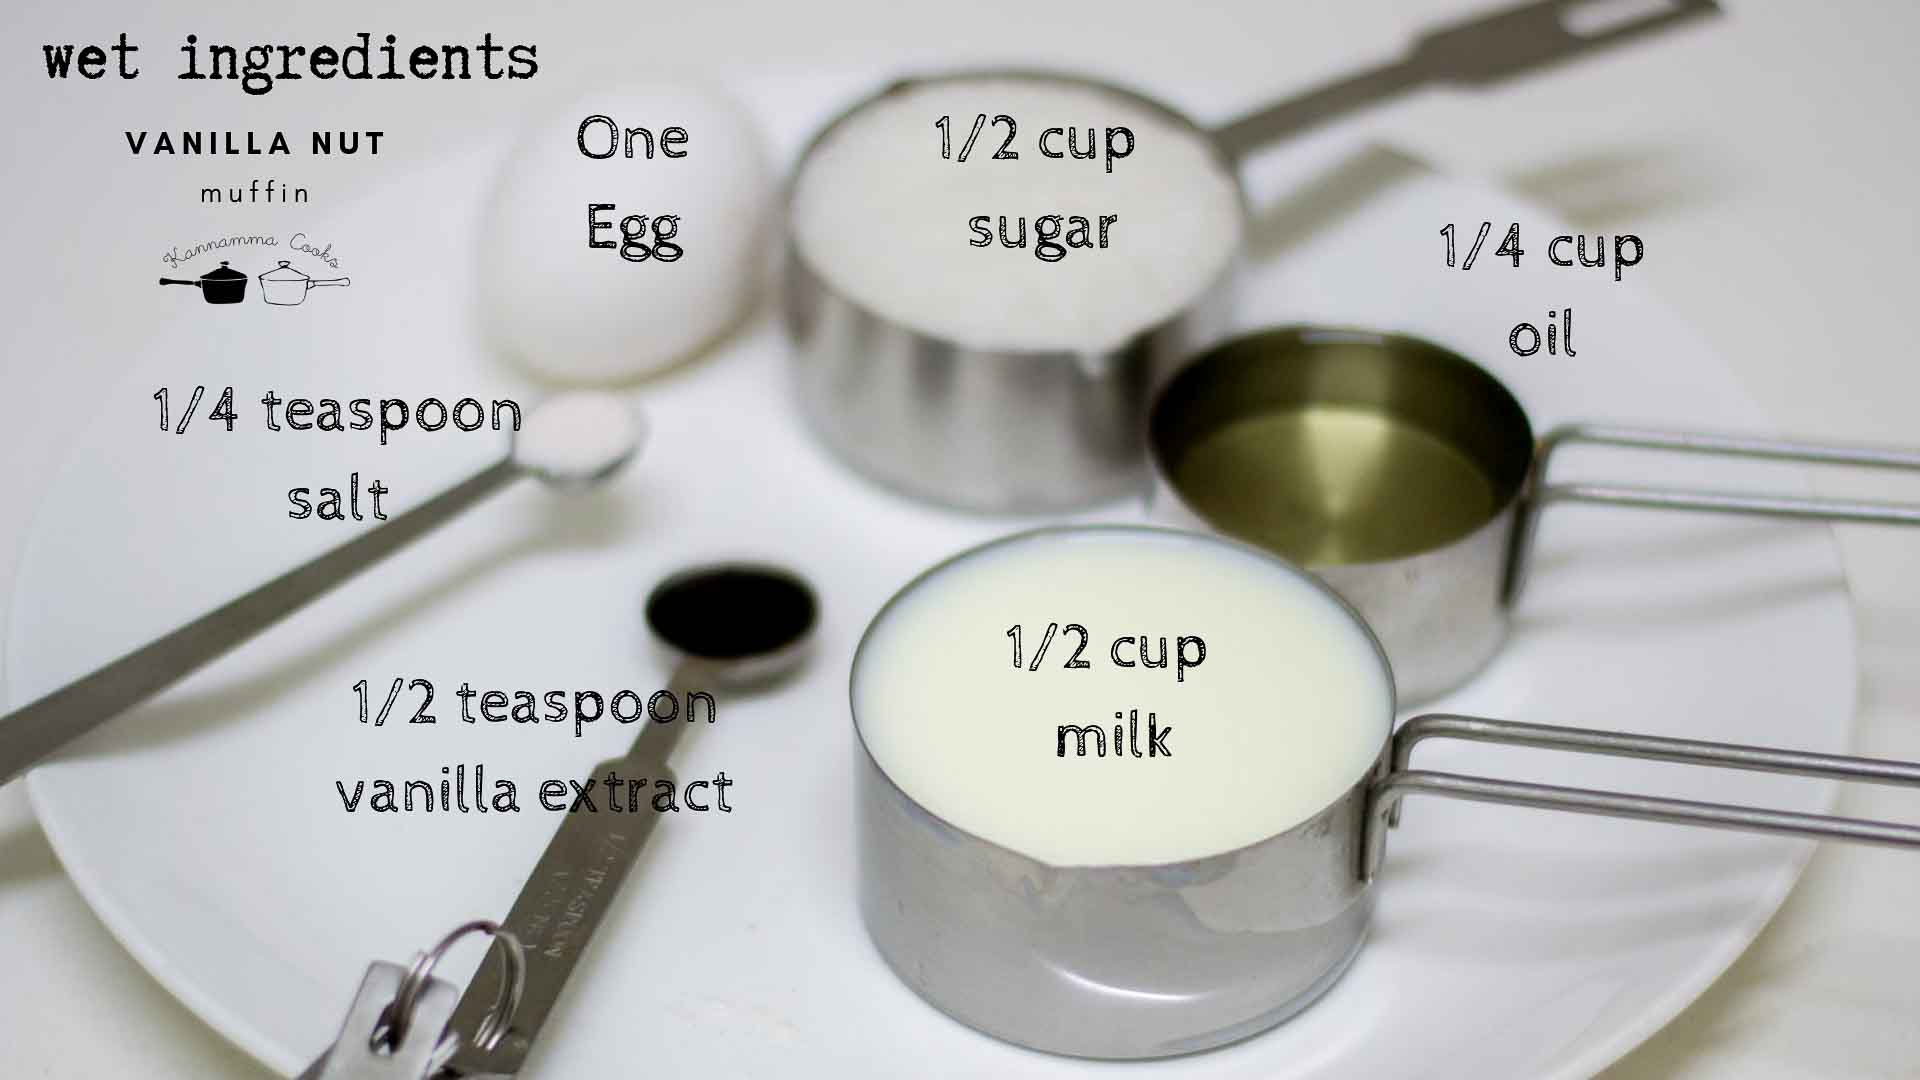
So lets properly measure the wet ingredients and get them ready.
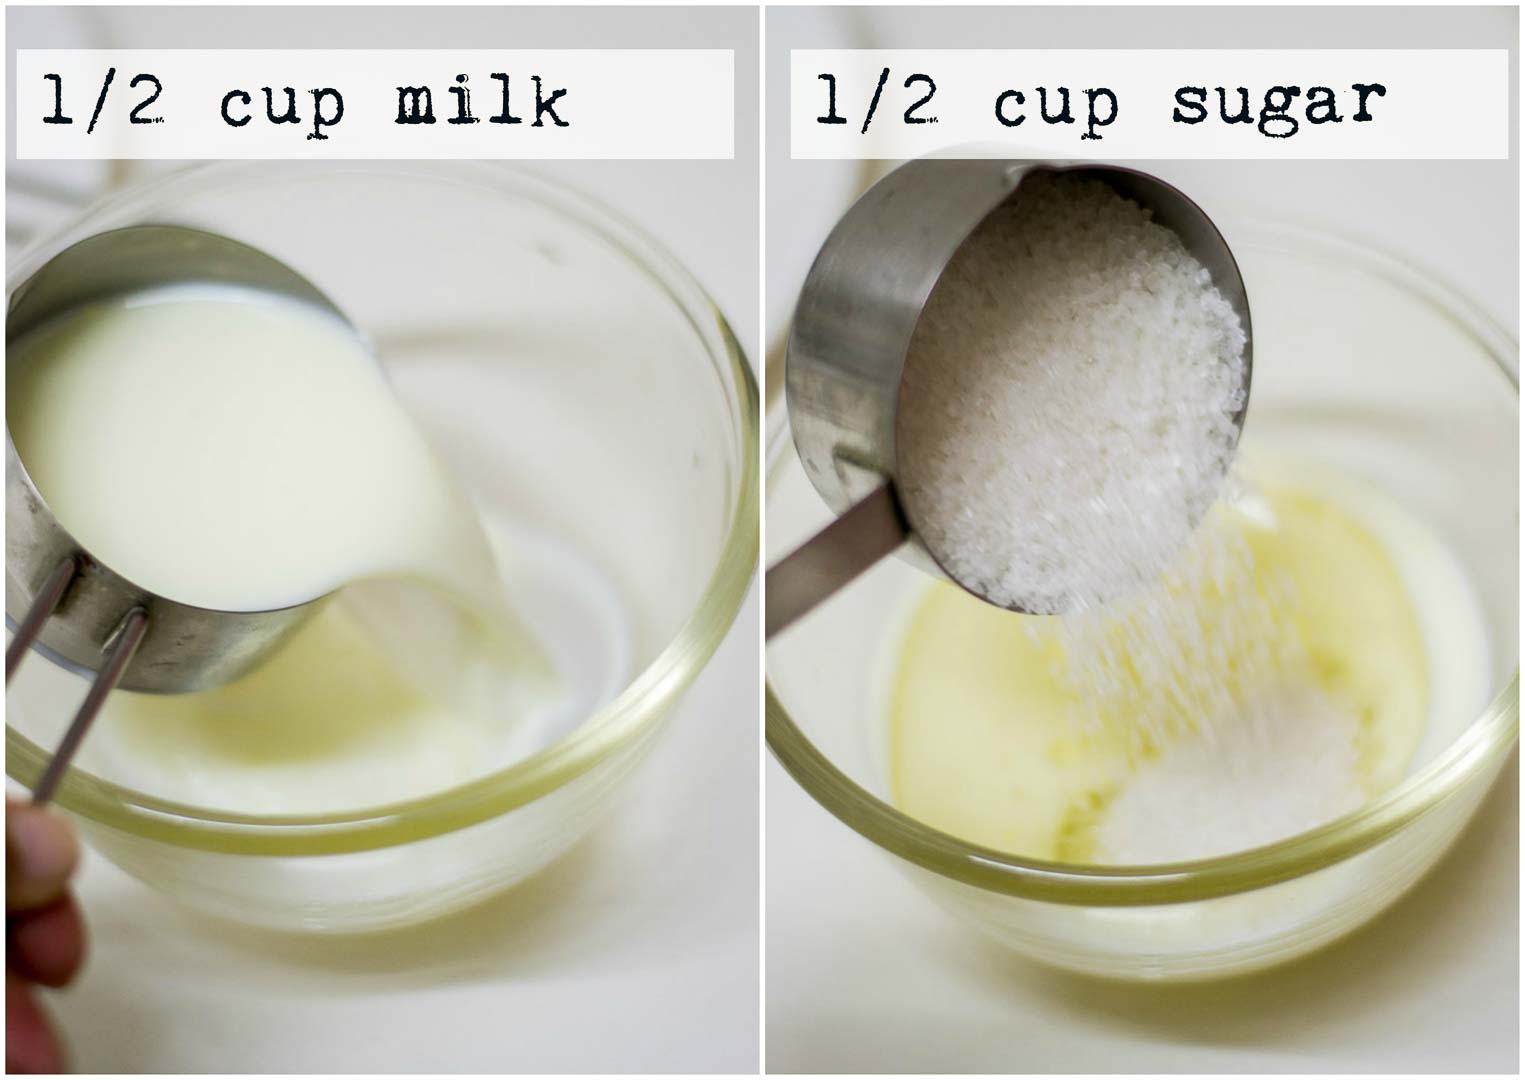
Take a bowl and add in the milk and sugar. Use boiled and cooled milk.
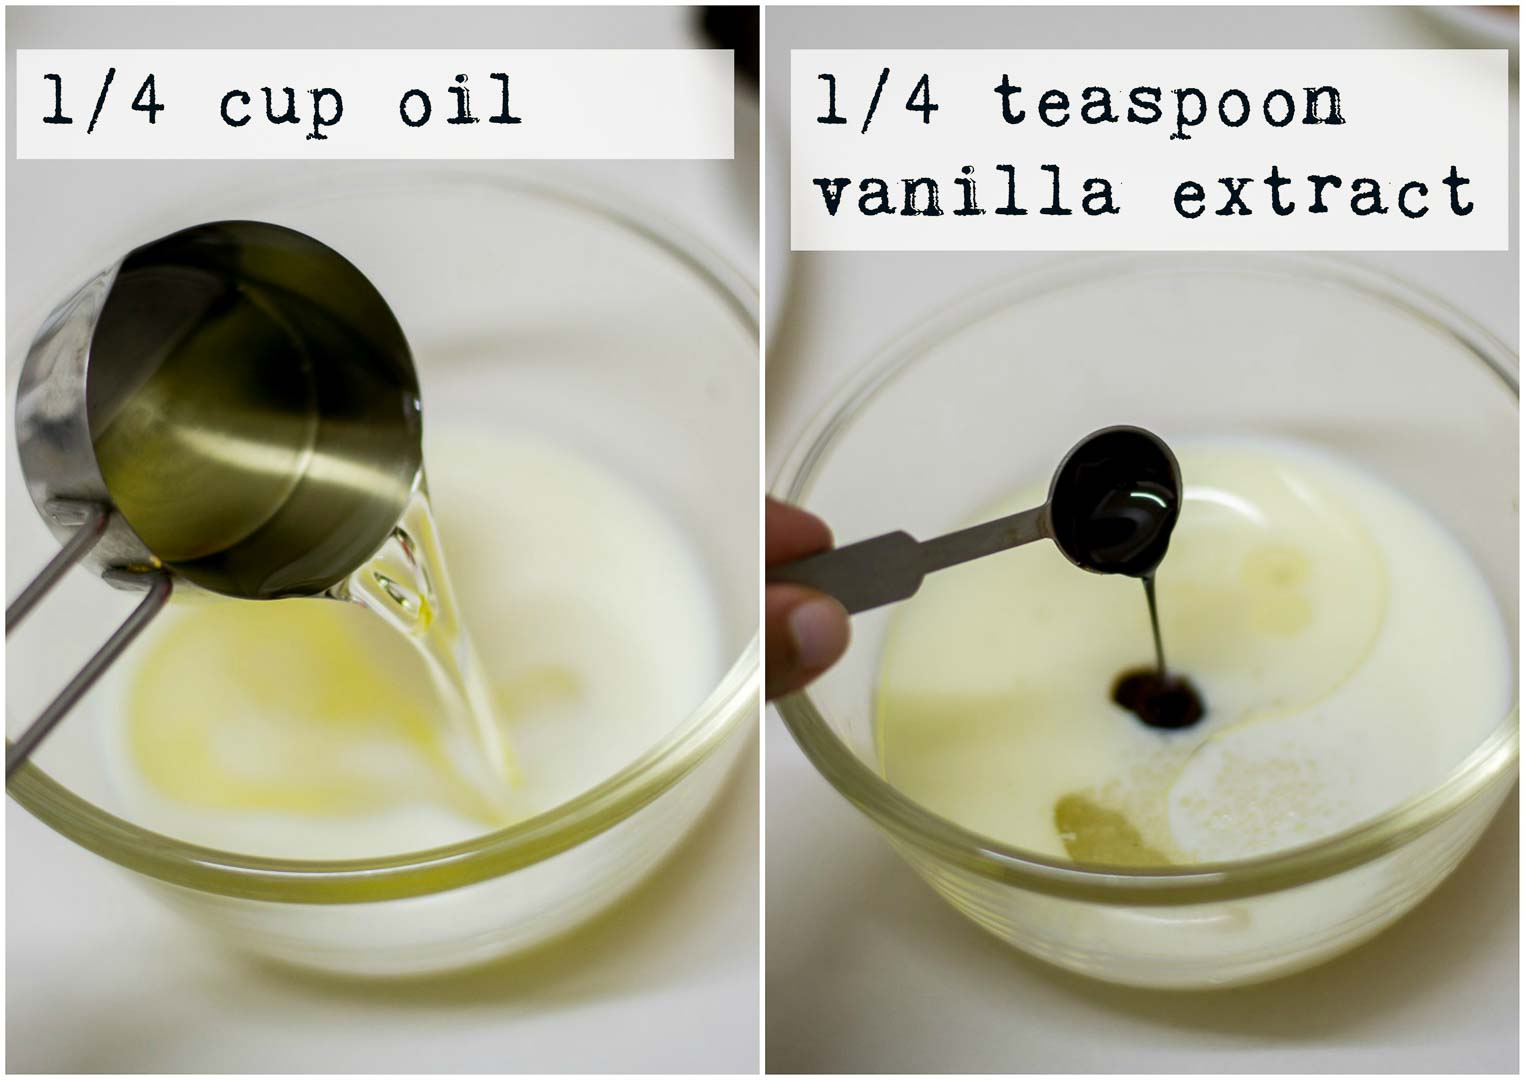
Add in the oil and vanilla extract. I have used sunflower oil today. Any neutral vegetable oil will work for this recipe. Note on Vanilla Extract – Real vanilla is expensive but a little goes a long way. The vanilla flavour available in stores as “vanilla essence” is artificial vanilla. I do not use that for my baking. The main reason we bake at home is because we can avoid the unnecessary chemicals that go into store bought foods. Artificial vanilla has ingredients like “propylene glycol” which is toxic and harmful to us. Read the ingredients before you buy anything. If your vanilla has “propylene glycol” as one of its ingredients, its probably artificial junk full of chemicals. It does not belong in the kitchen. If you are using artificial vanilla, a drop of it will work in the recipe. Do not add more. If using real vanilla, use 1/4 teaspoon of it. Even though its a little expensive, its totally worth it as the real flavour of vanilla is so divine and a little goes a long way. Here is where you can buy real vanilla online.
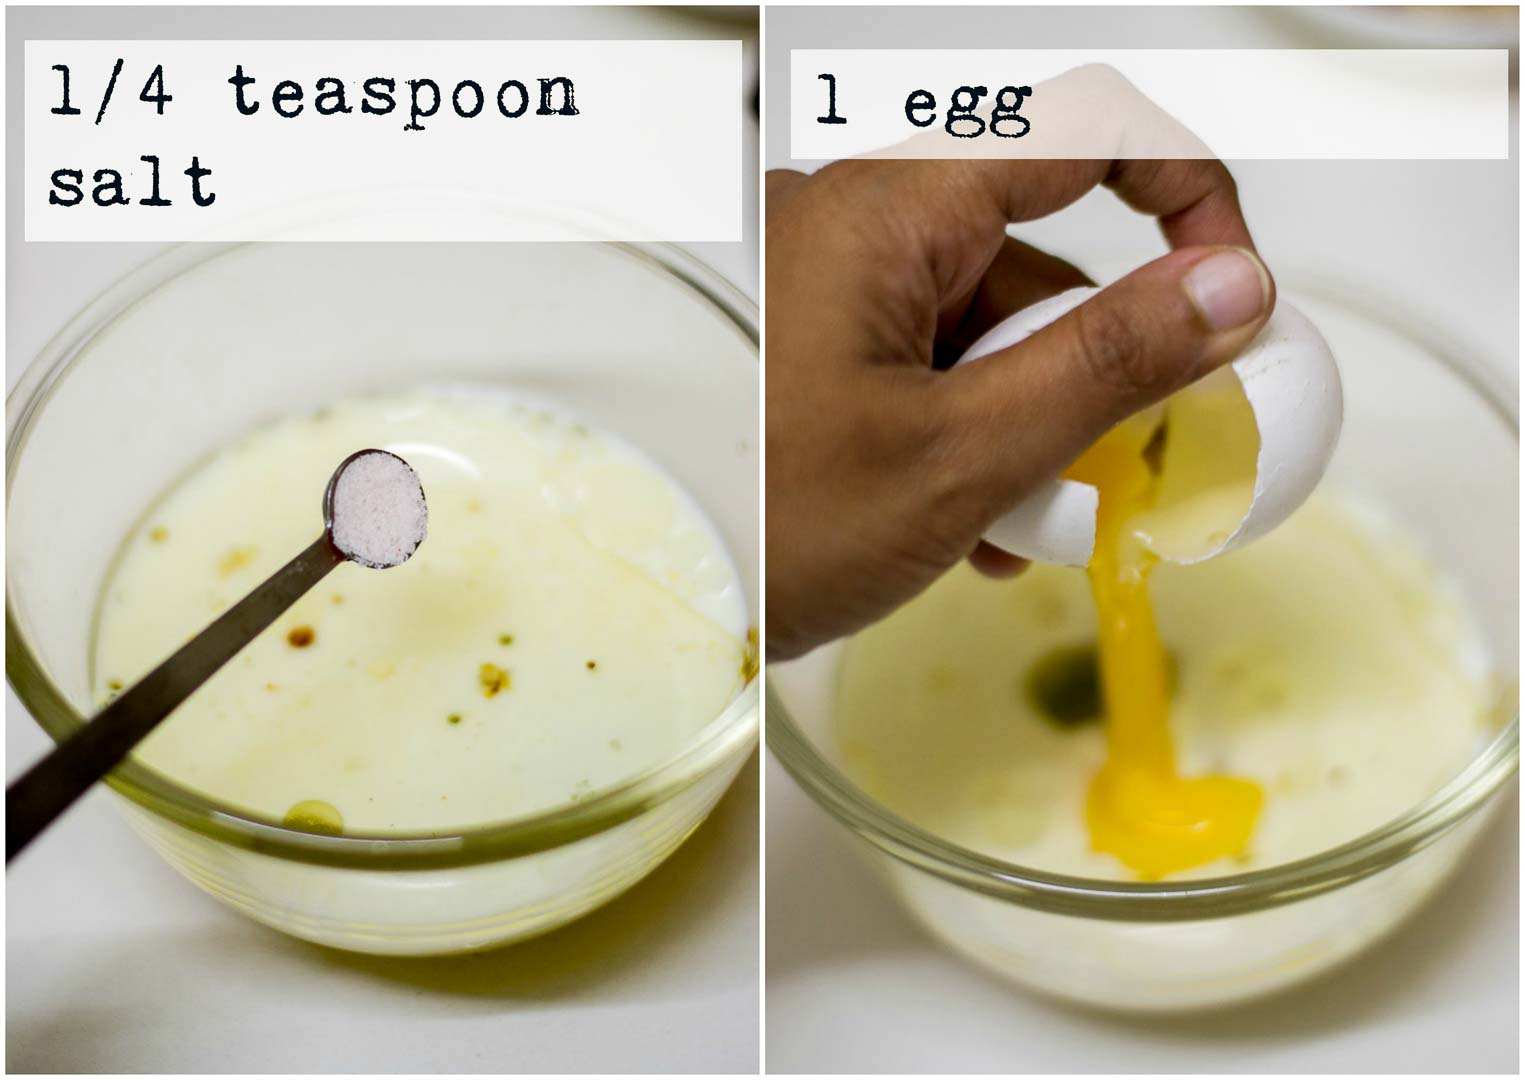
Add in the salt and the egg.
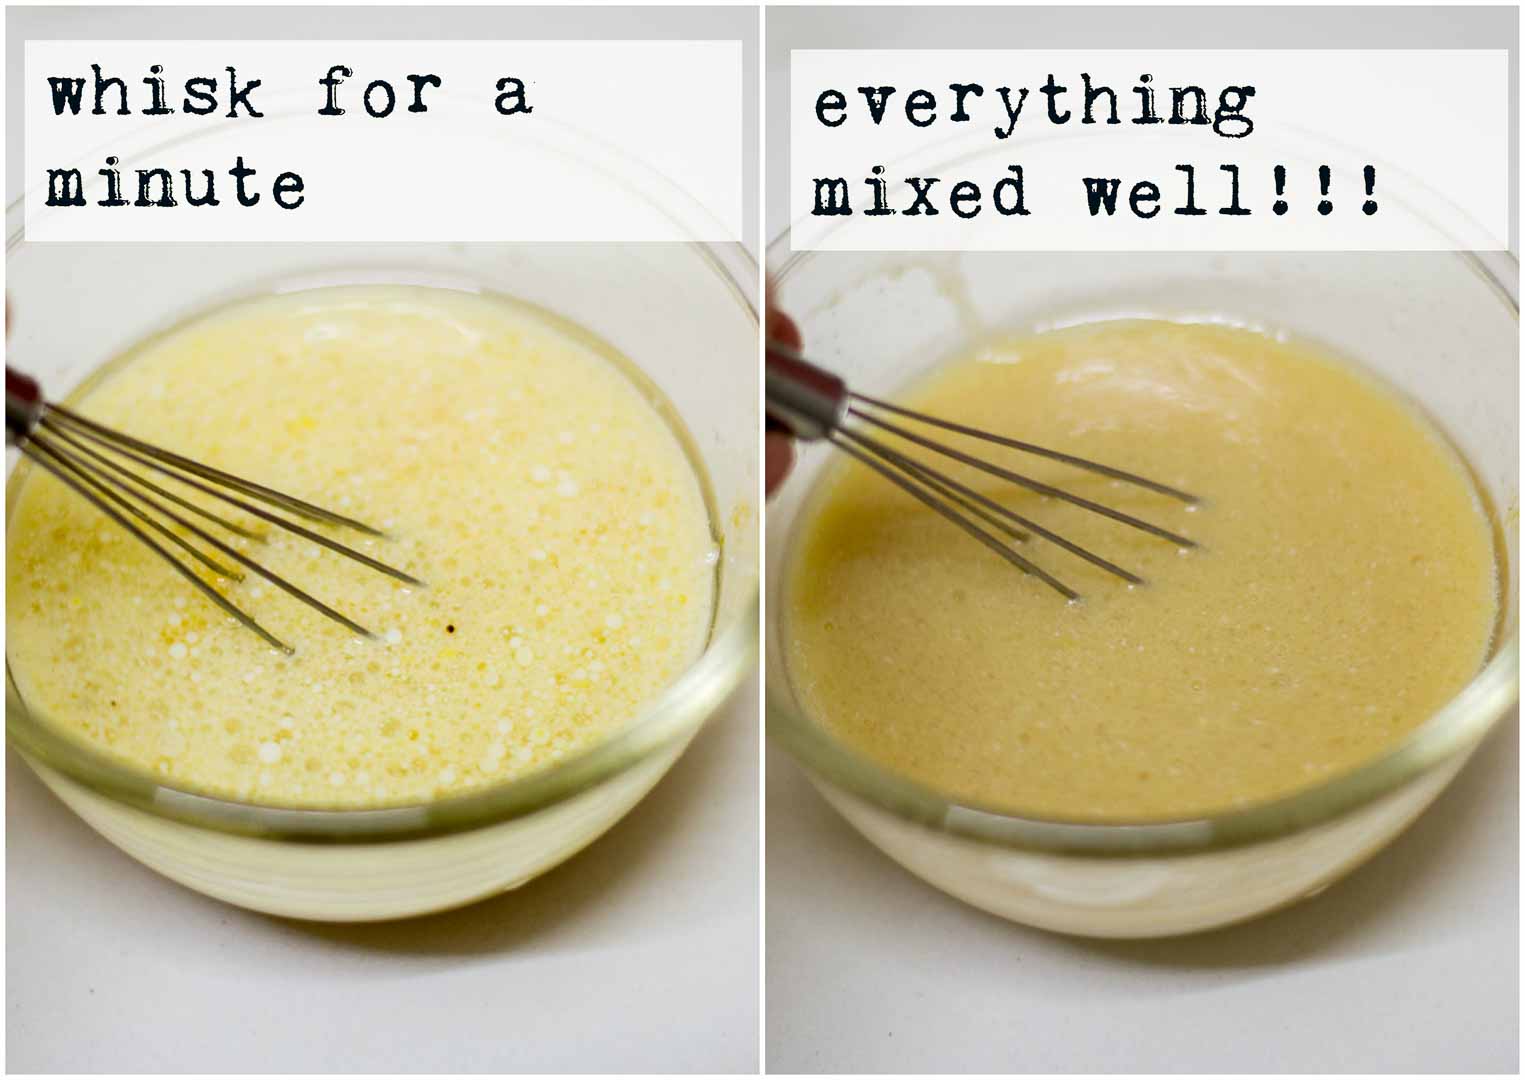
Mix the ingredients well so the sugar dissolves and the mixture is well combined. Whisk well for a minute. Our wet ingredients are ready!!!
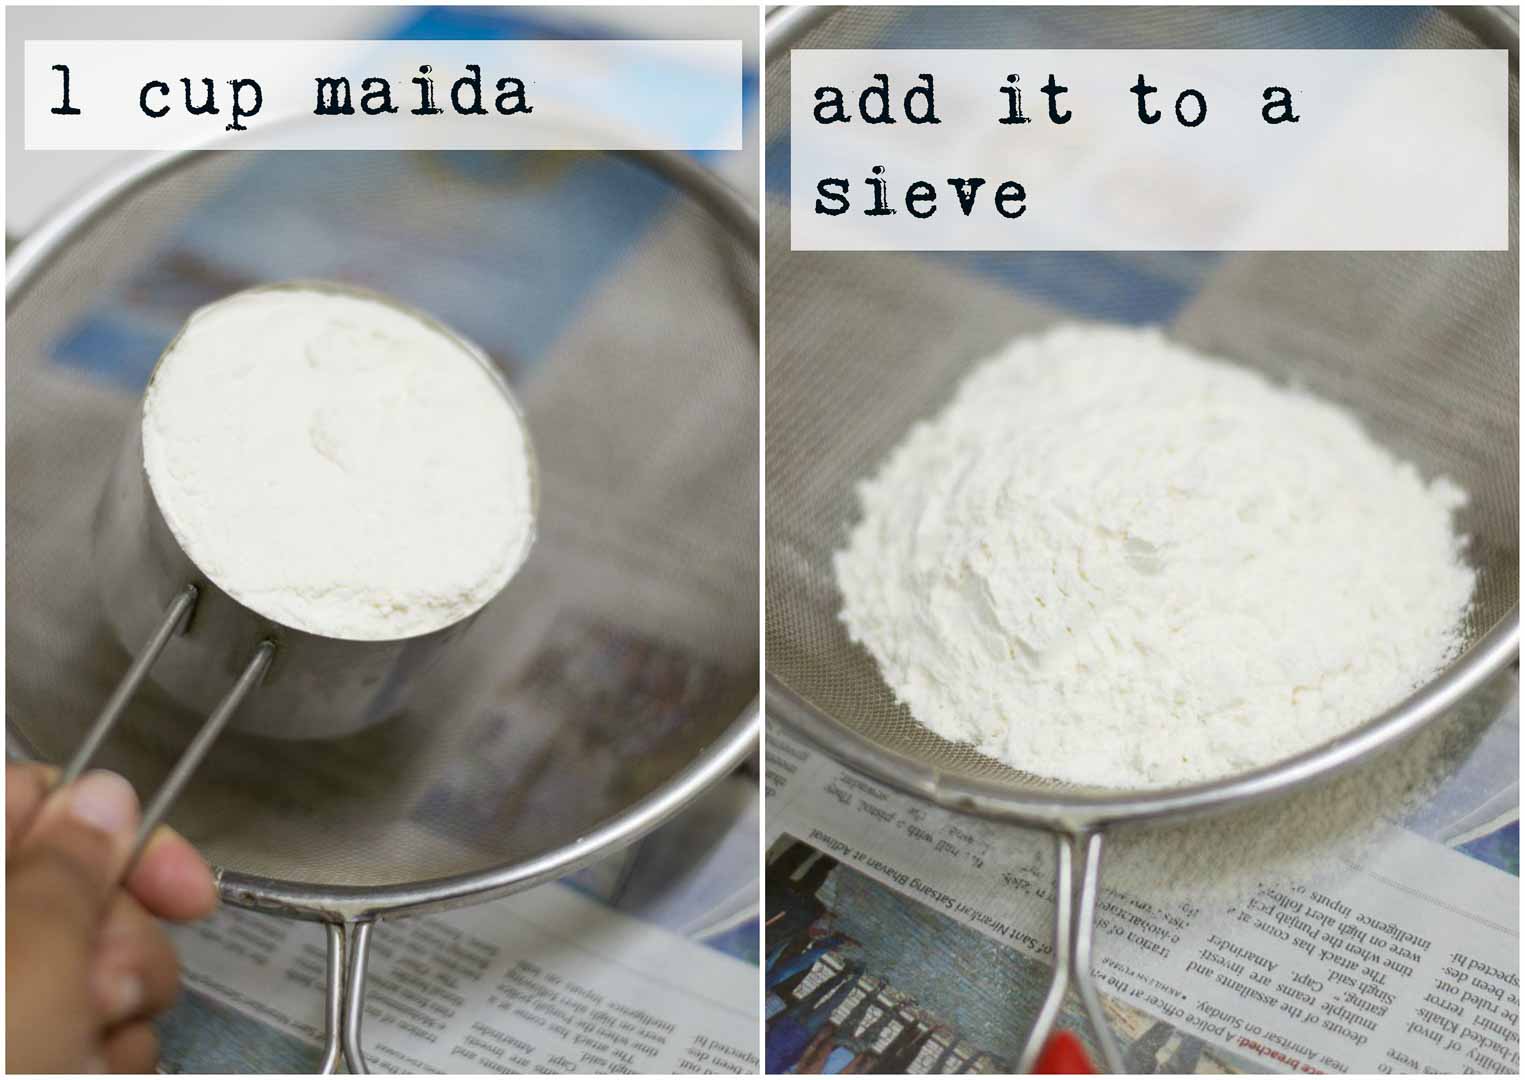
Getting the dry ingredients ready Measure one cup of maida and add it to a sieve. Do not pack the flour. Just scoop the flour from the bin and level it. Then add it to the sieve.
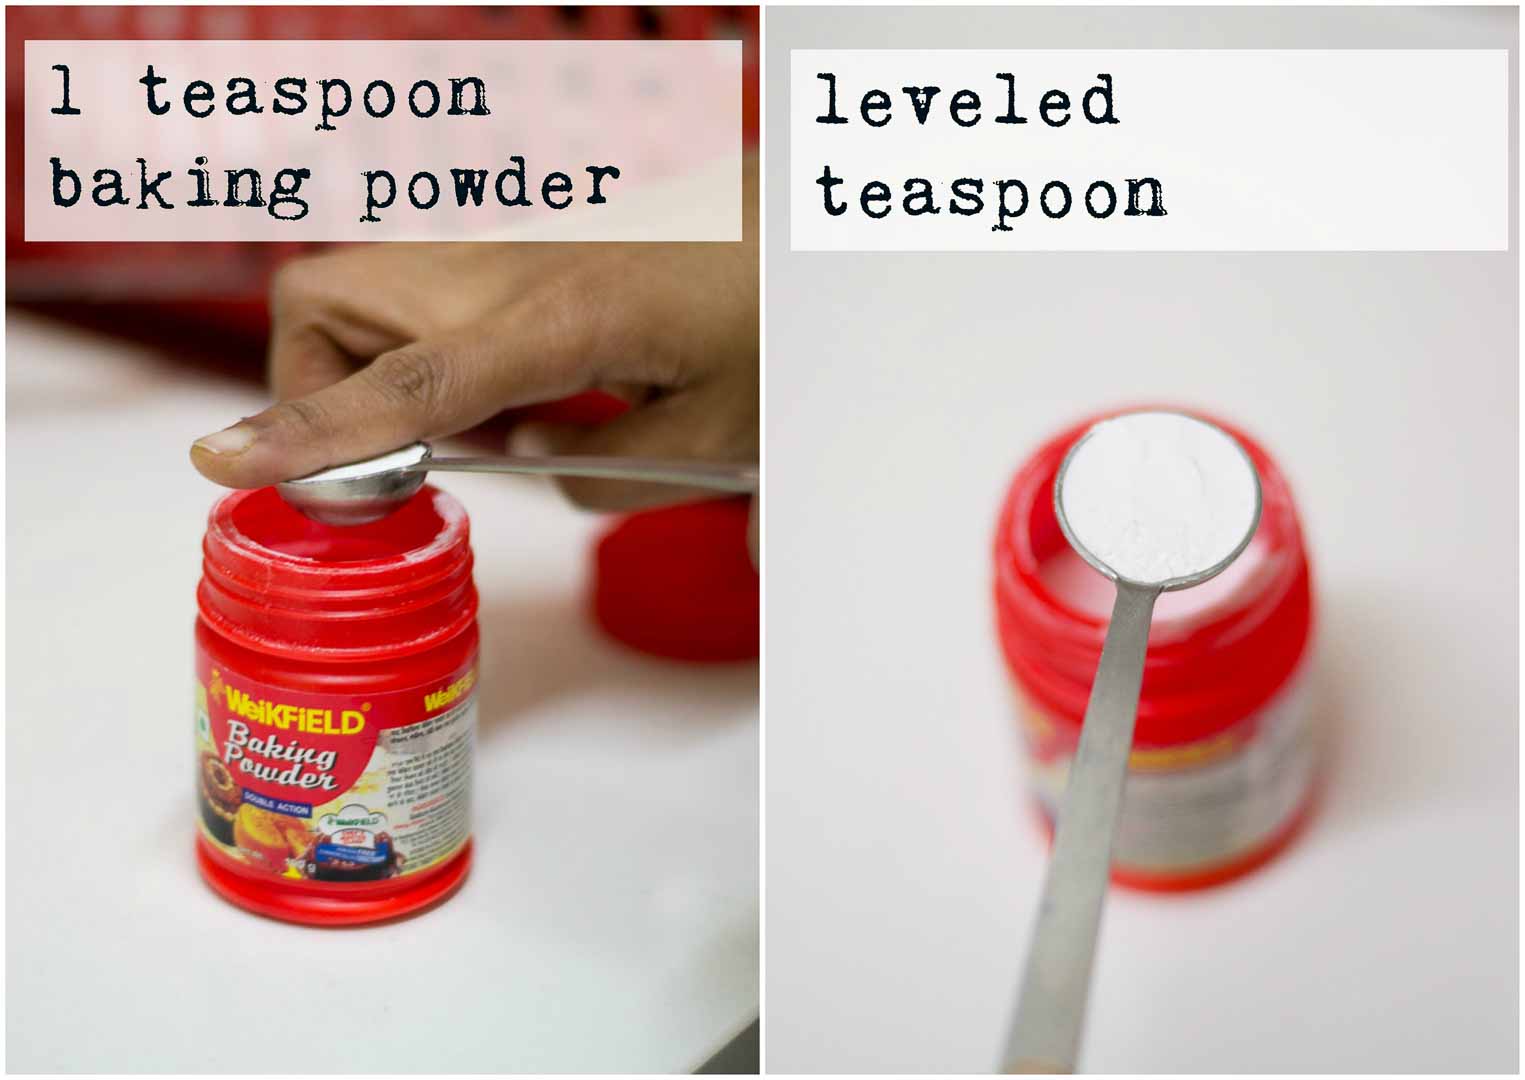
Add in a teaspoon of baking powder. Always level the teaspoon (In tamil, we call it as thalaya thatti podaradhu).
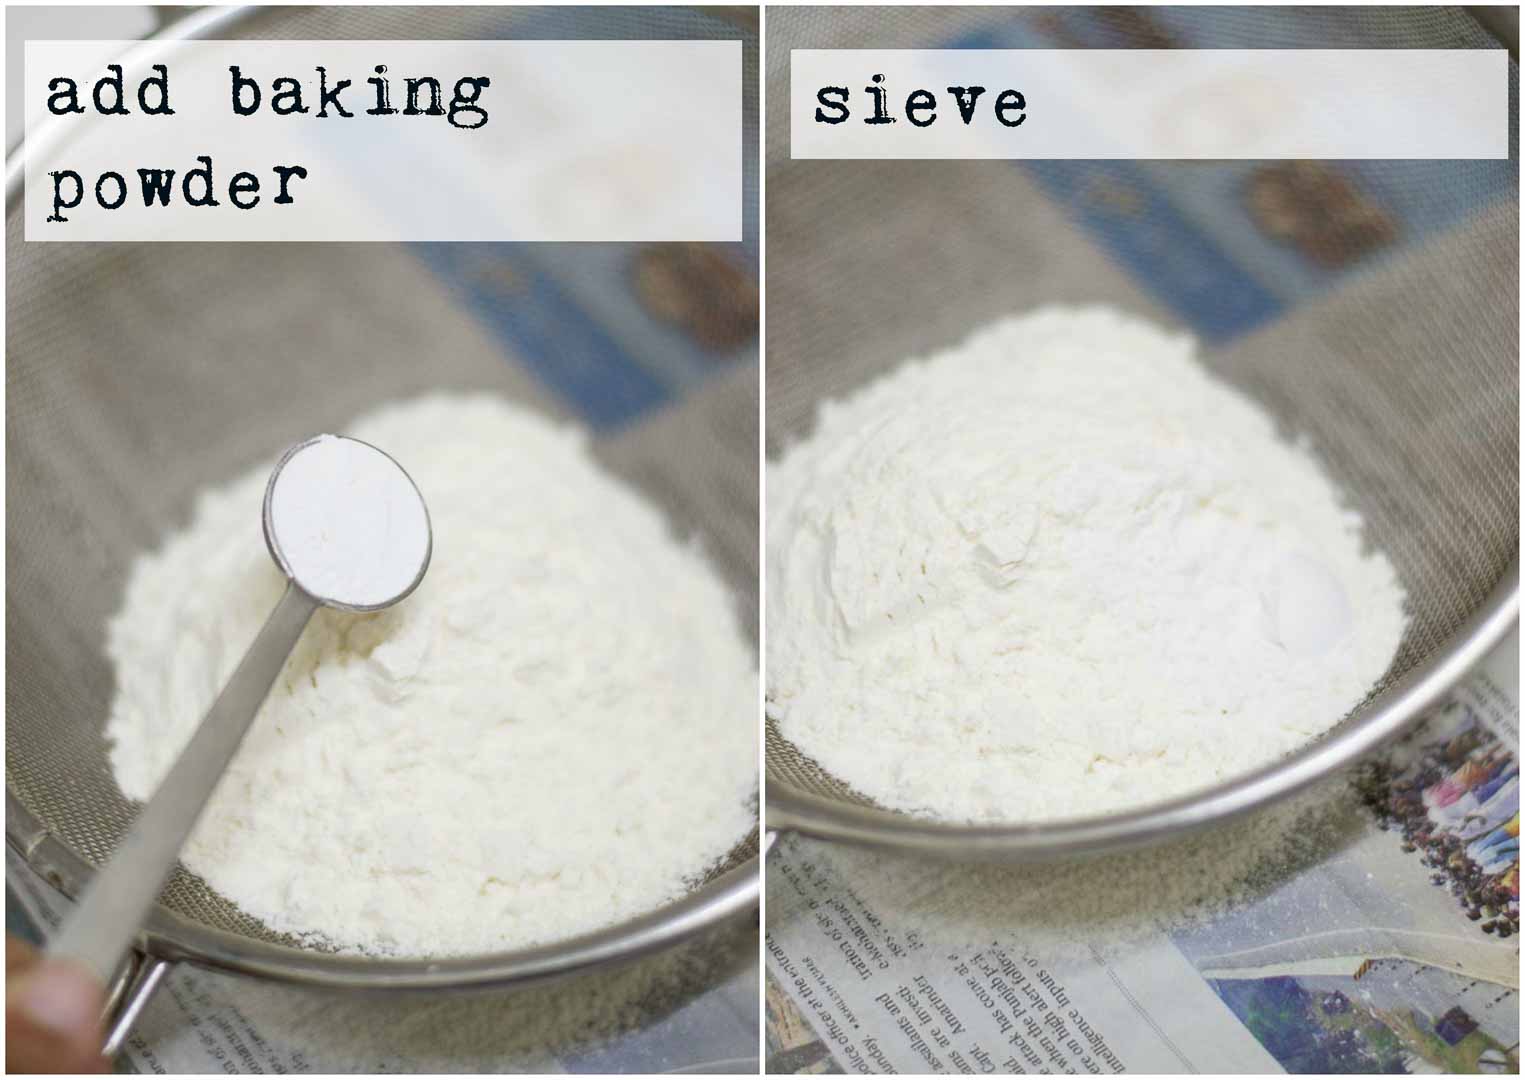
Add in the baking powder to the maida and sieve the mixture. Sieving is essential as it will mix the ingredients evenly and will get rid of lumps in the flour and baking powder if any.
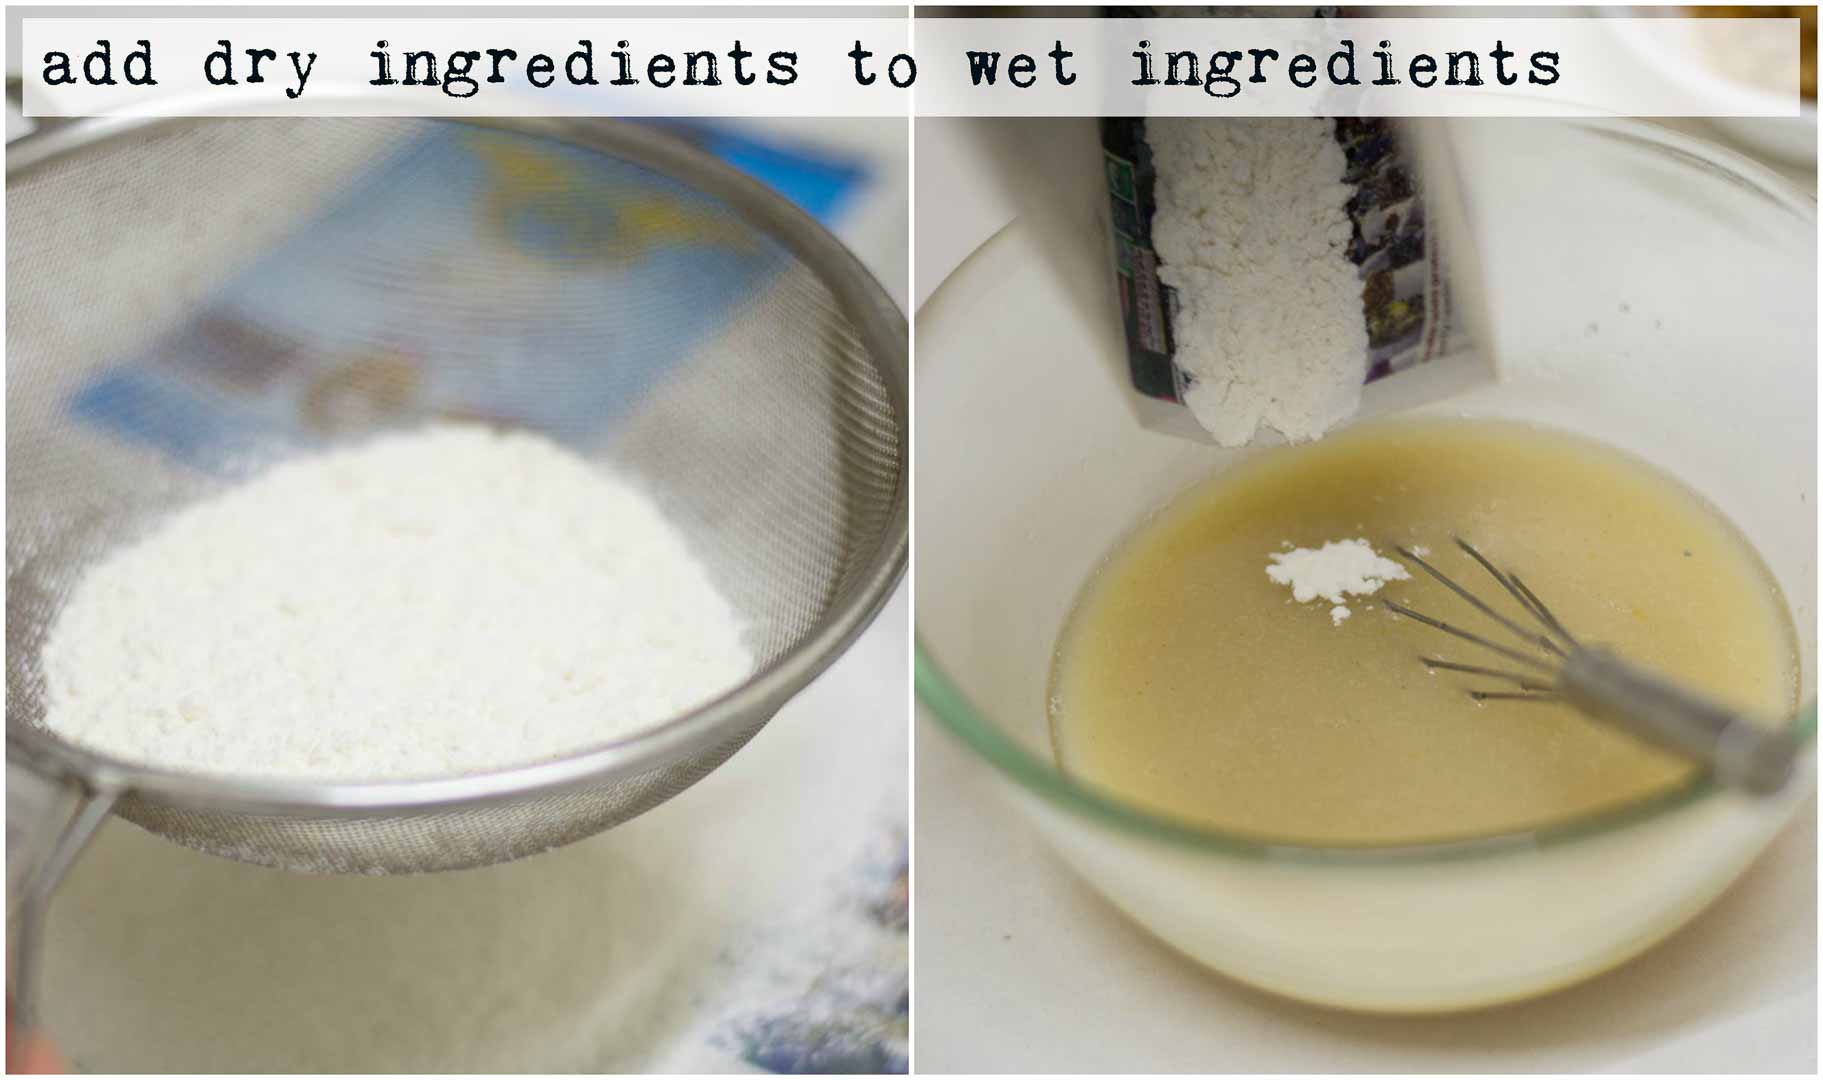
Add in the sieved flour and baking powder mixture to the wet ingredient bowl.
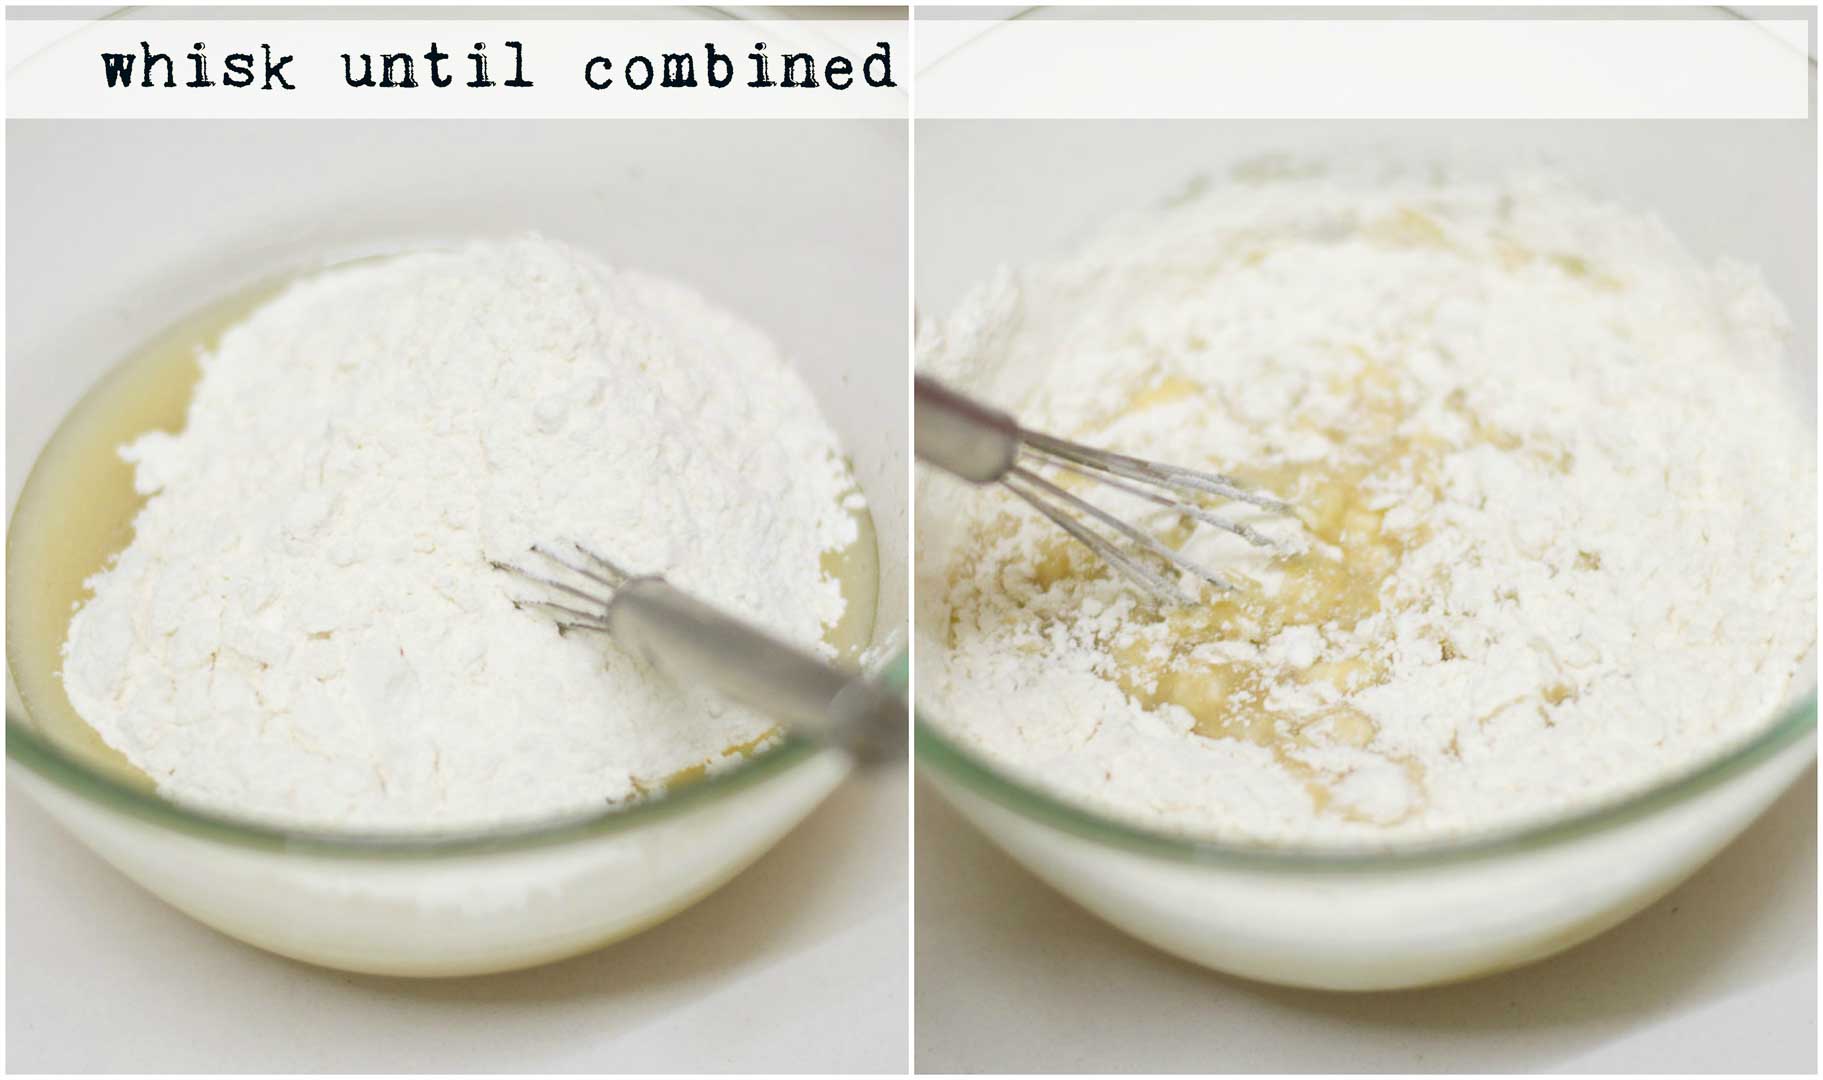
Gently start whisking with an egg beater / whisk.
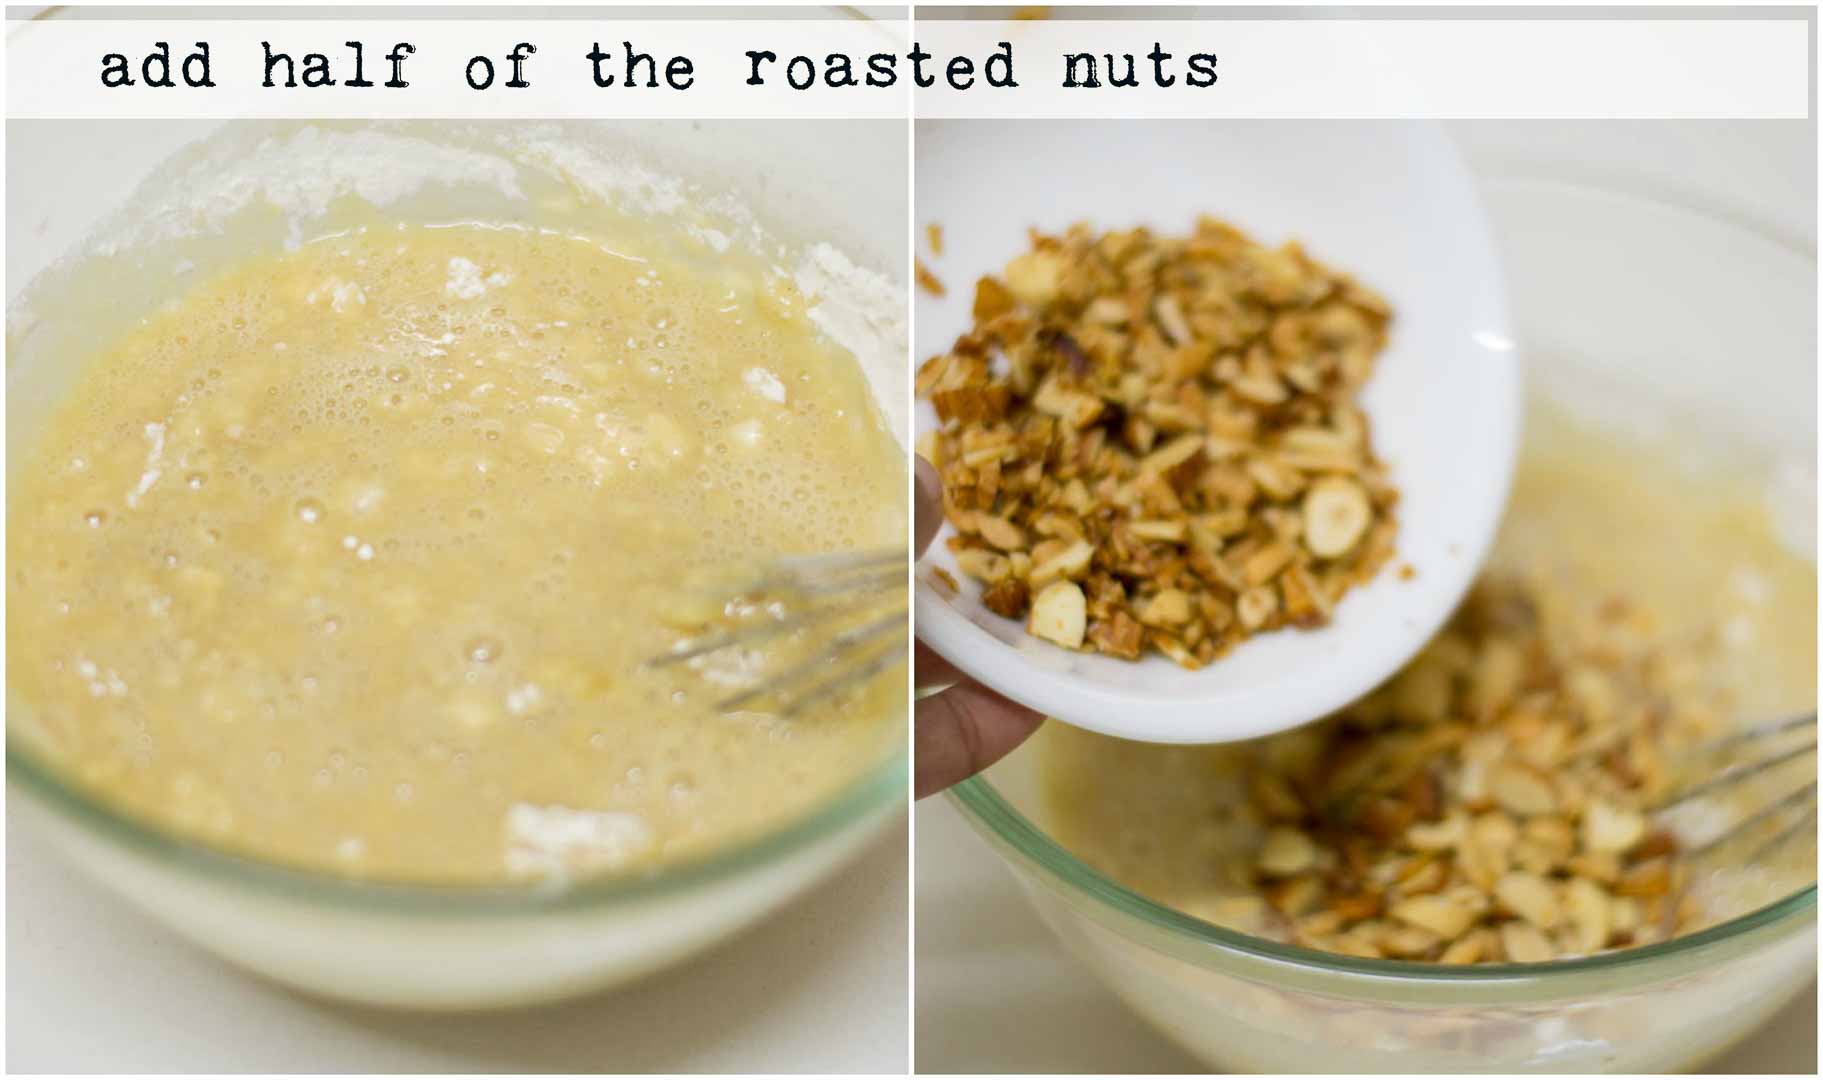
Half way while mixing, add in half of the nuts. Add only HALF of the roasted nuts.
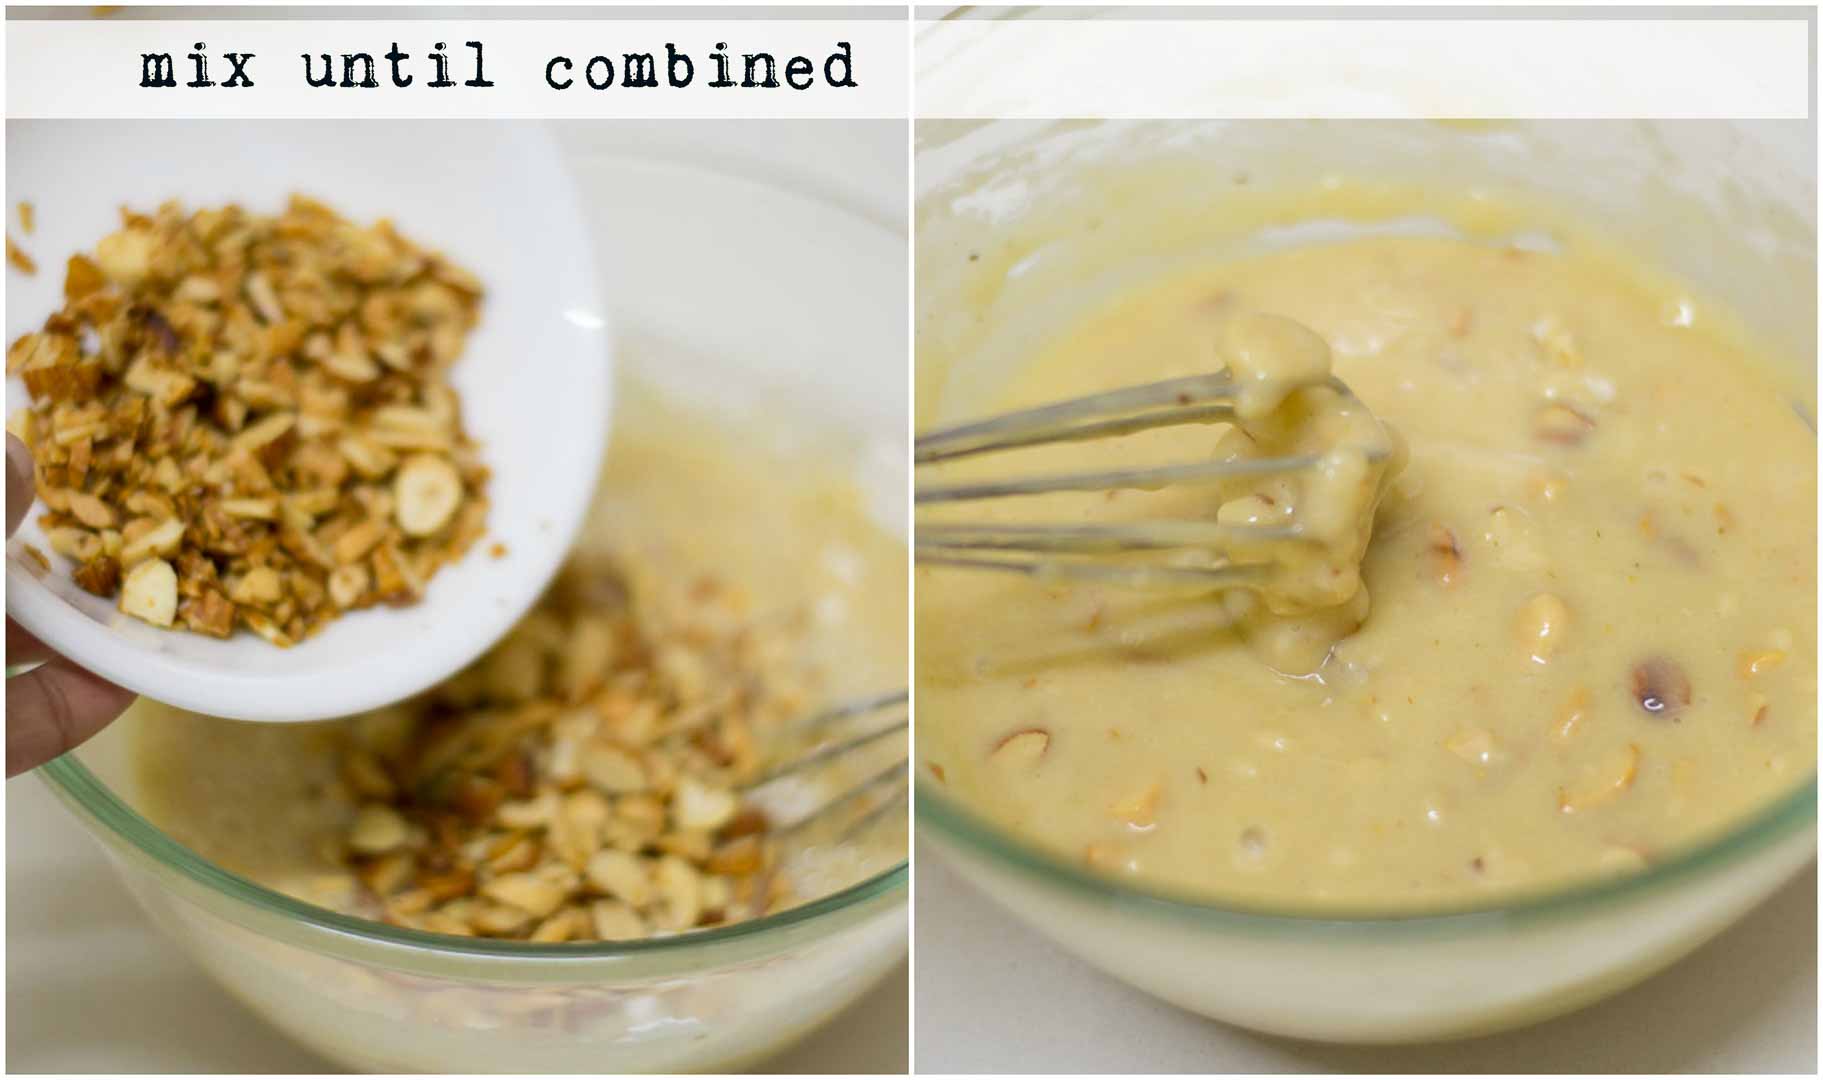
Mix well till combined. Do not keep mixing the batter. If all the dry flour is completely combined and no more flour is visible, stop mixing the batter. Mixing the batter for a long time will result in a hard cake. Keep that in mind.
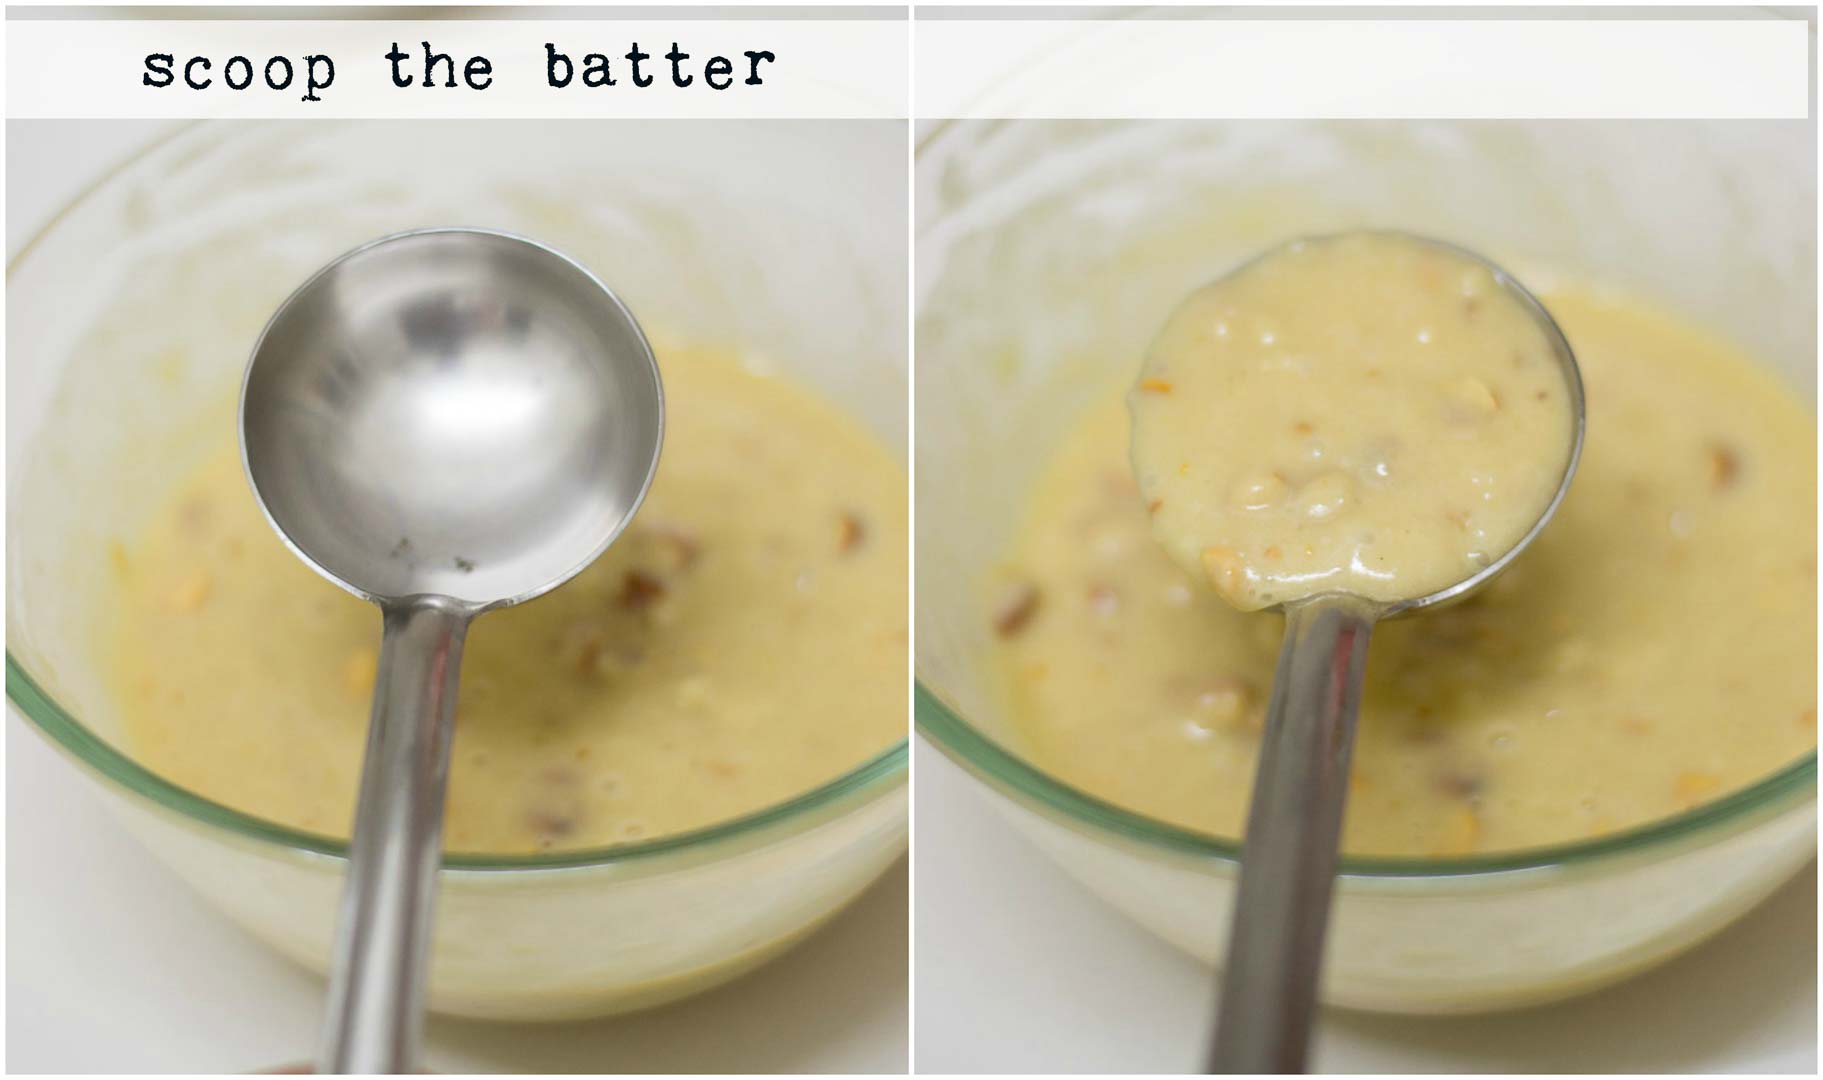
I use our trusty “idli karandi” or the idli spatula to portion out the batter into muffin cups. An icecream scoop will also do the job.
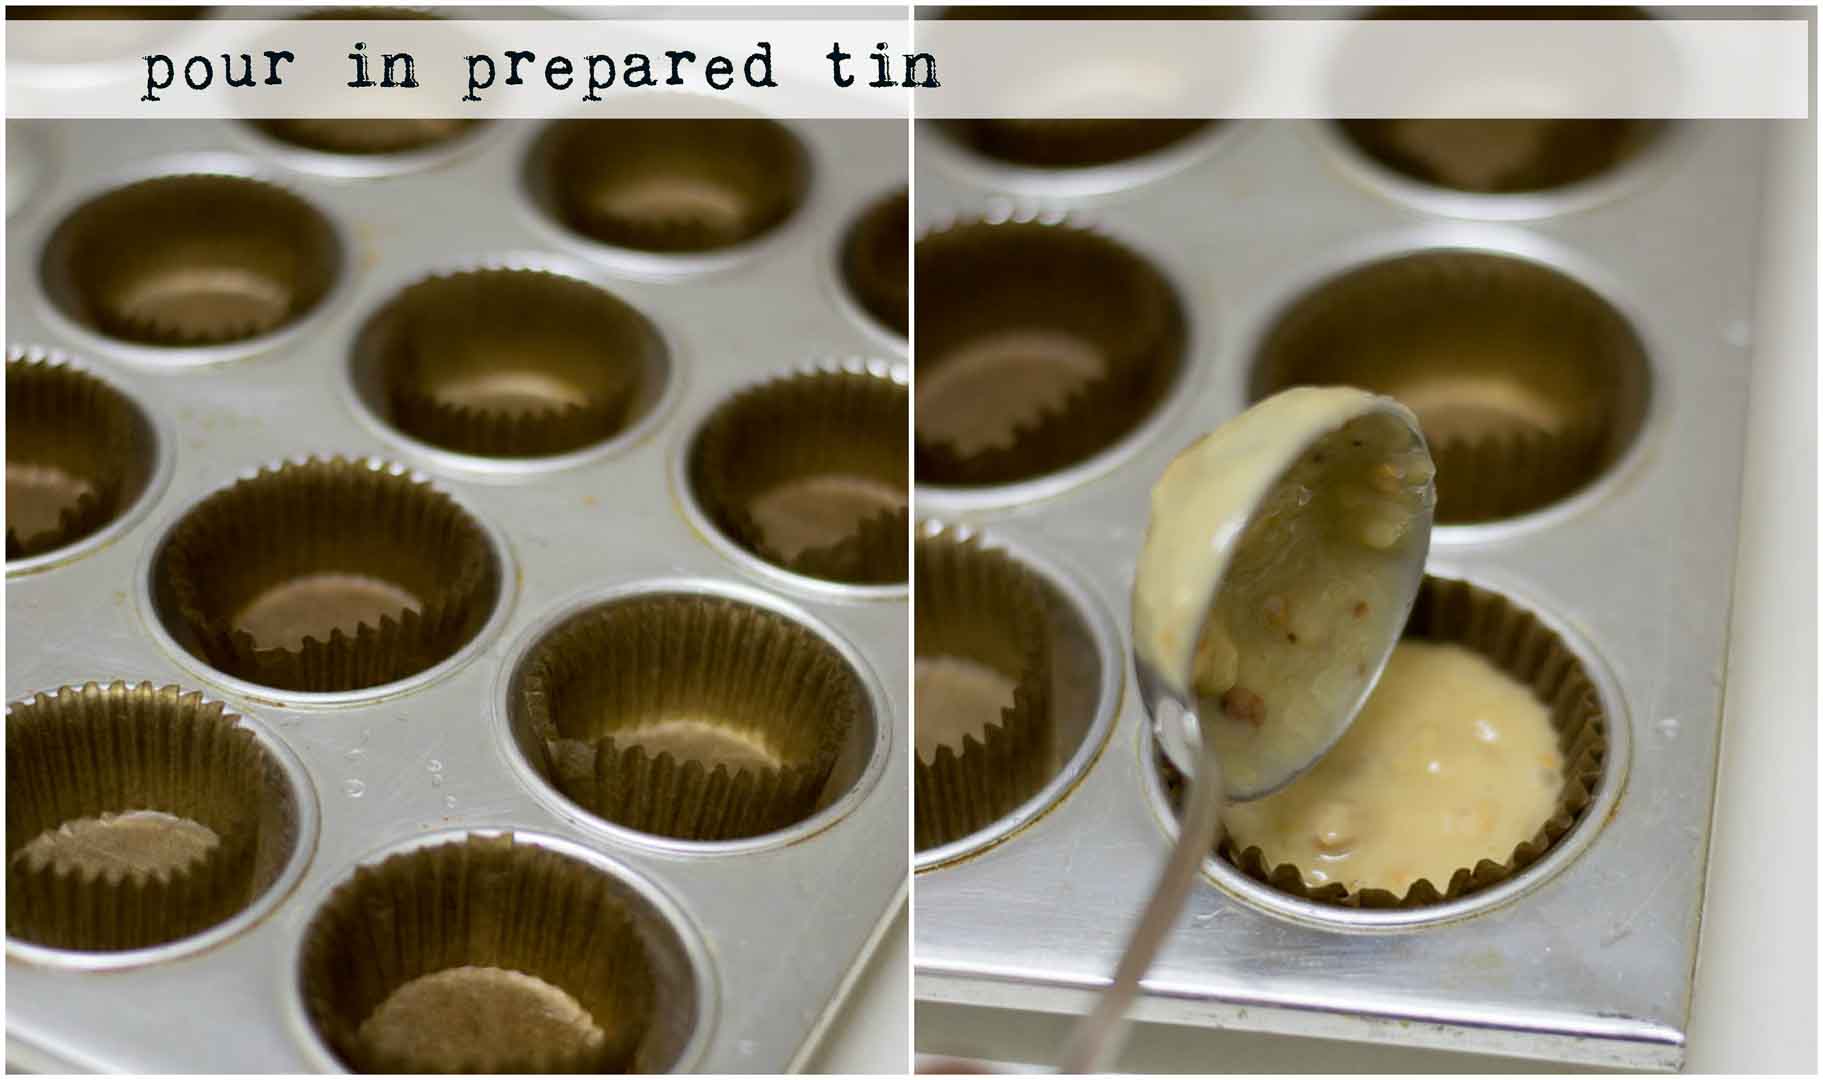
Add the batter to the prepared cupcake tins. Line the tins with cupcake liners. Pour the batter into the liners.
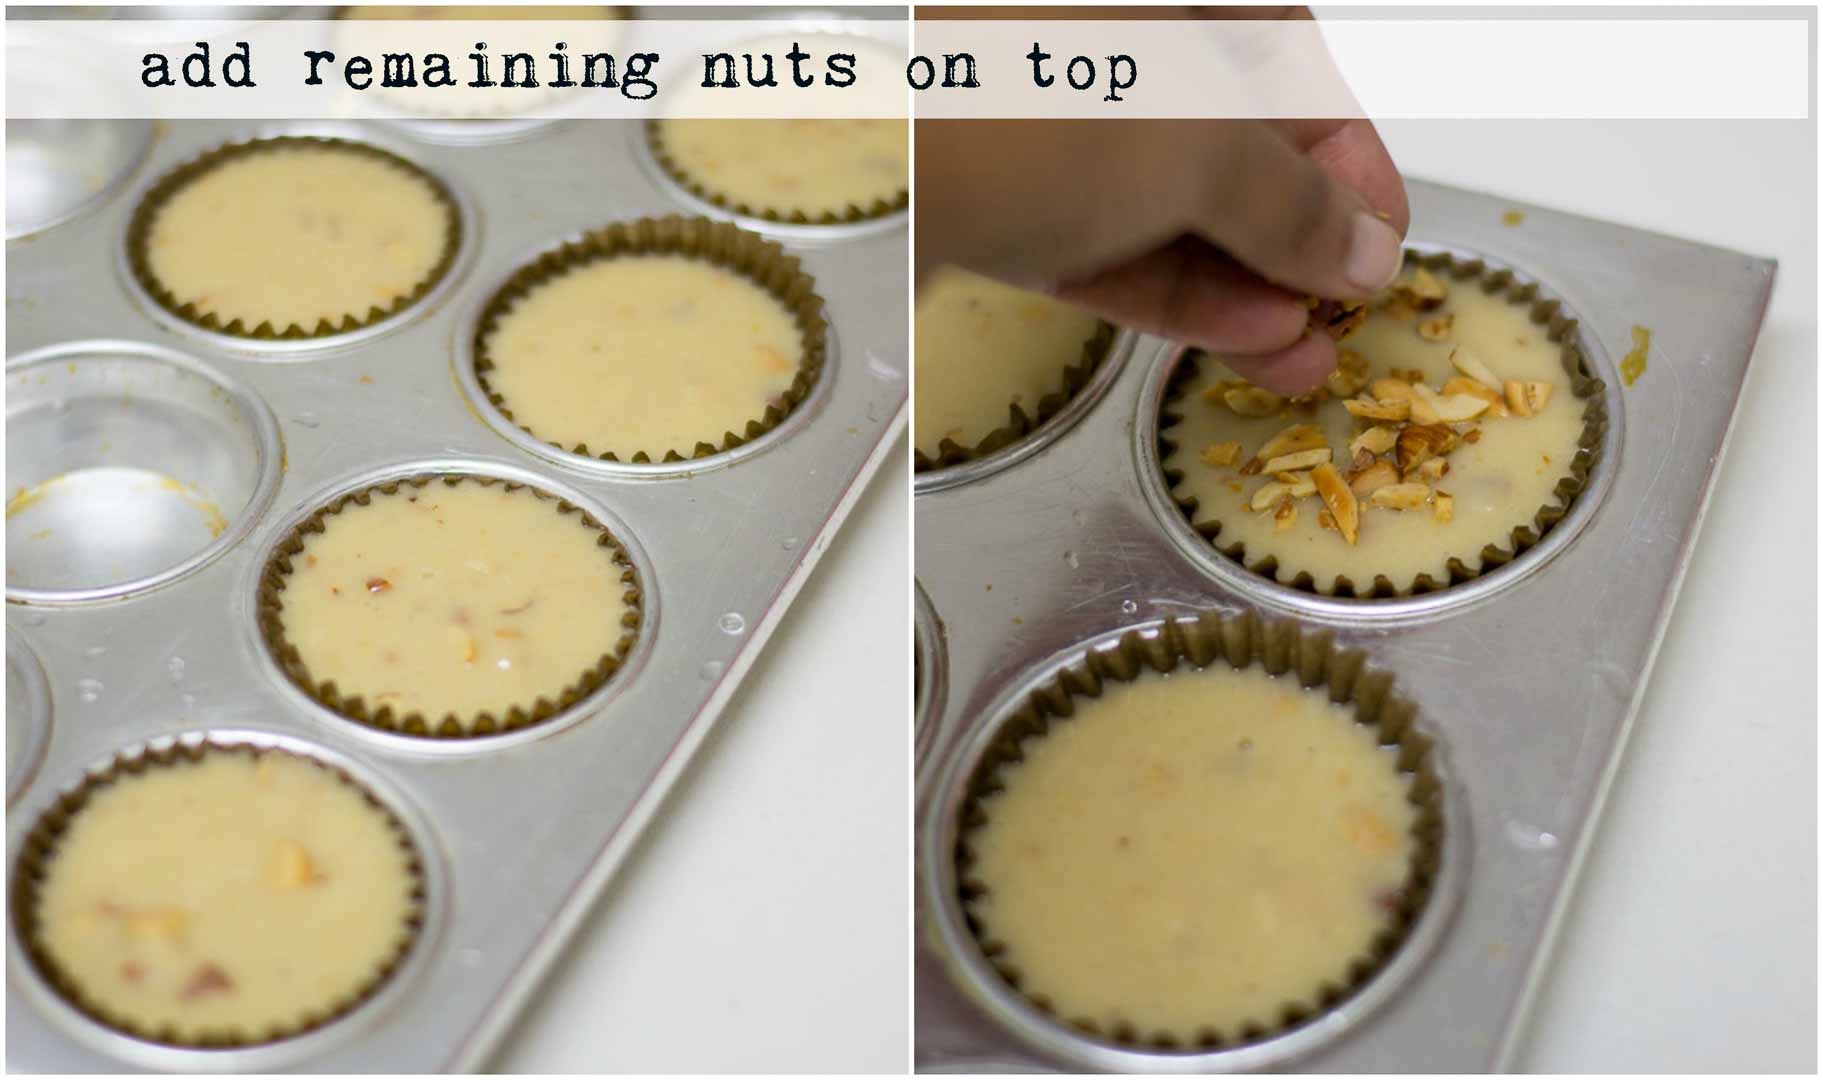
Sprinkle the remaining roasted nuts on top of the batter. (Remember, we added only half of it in the batter).
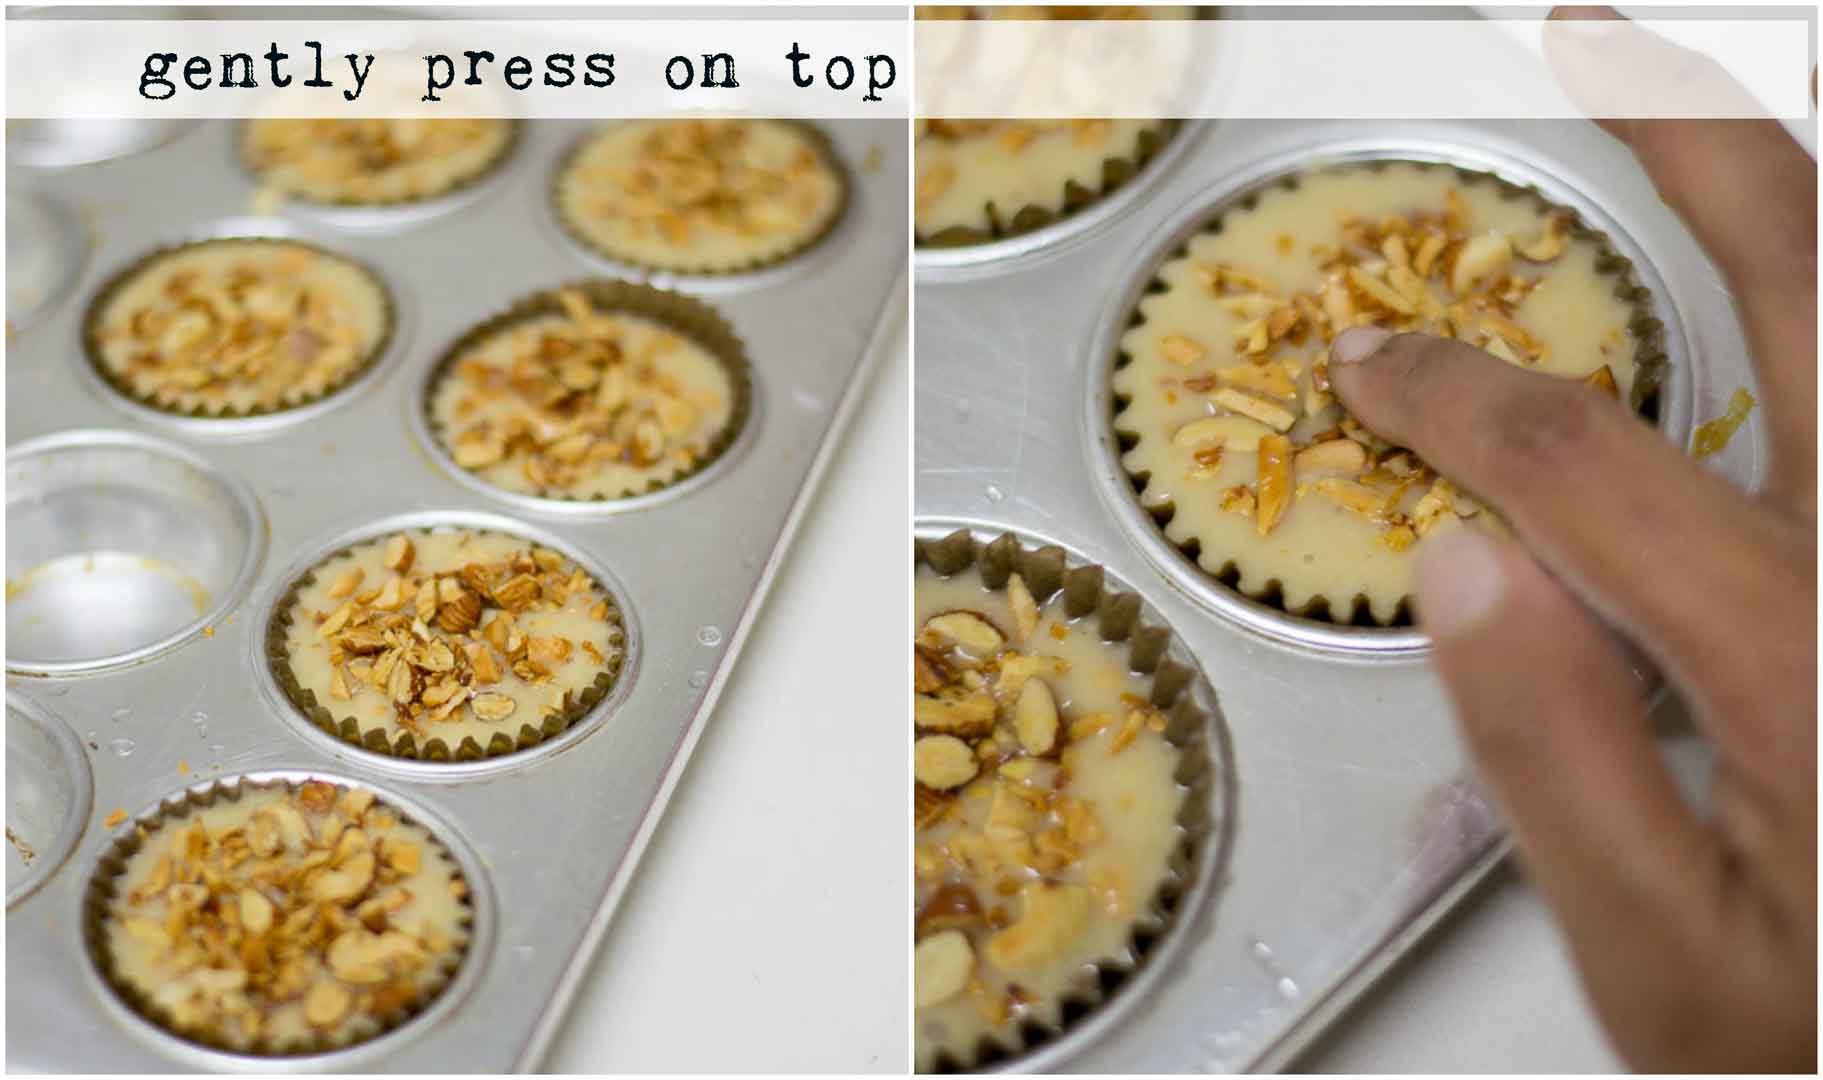
Gently using your thumb finger, press the nuts so it touches the batter. We do this so the nuts do not fall off from the muffin after baking. This step ensures that the nuts will adhere to the muffin well.
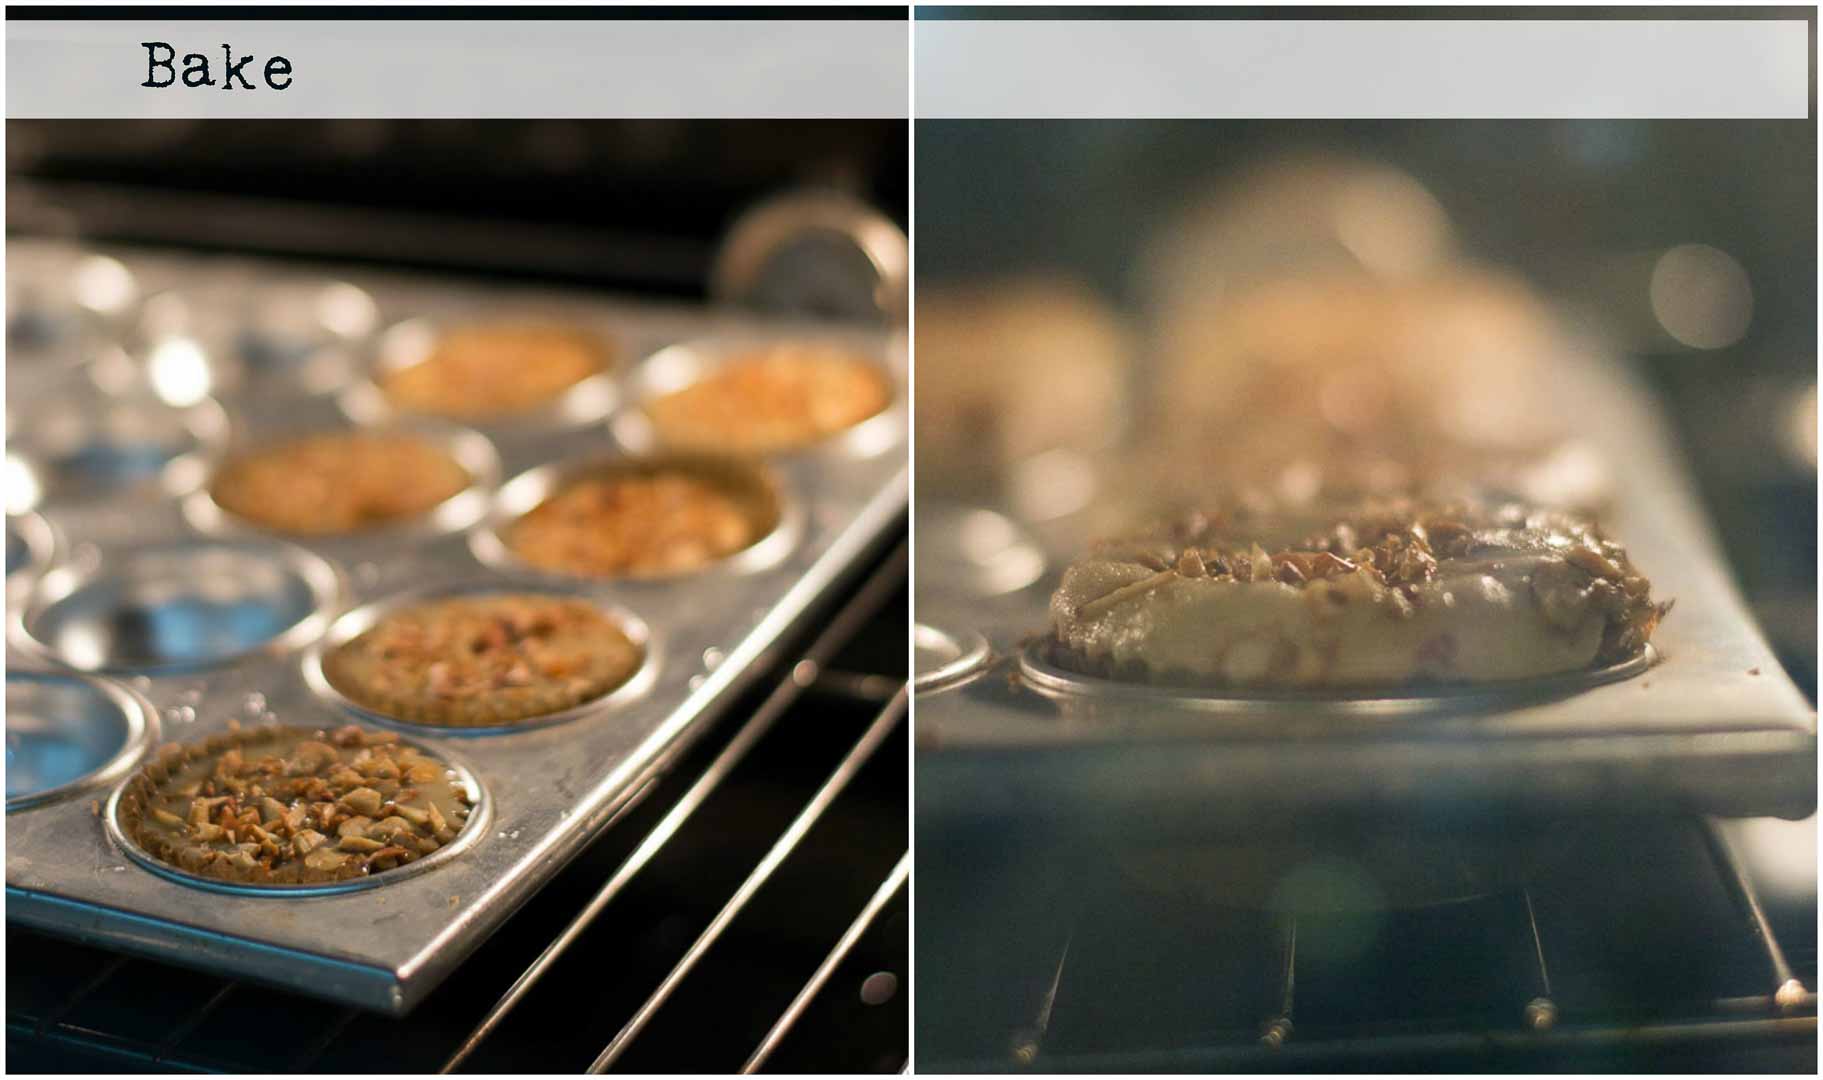
The oven is preheating and should be hot now. Place the baking tray in the oven and bake for 12 – 15 minutes.
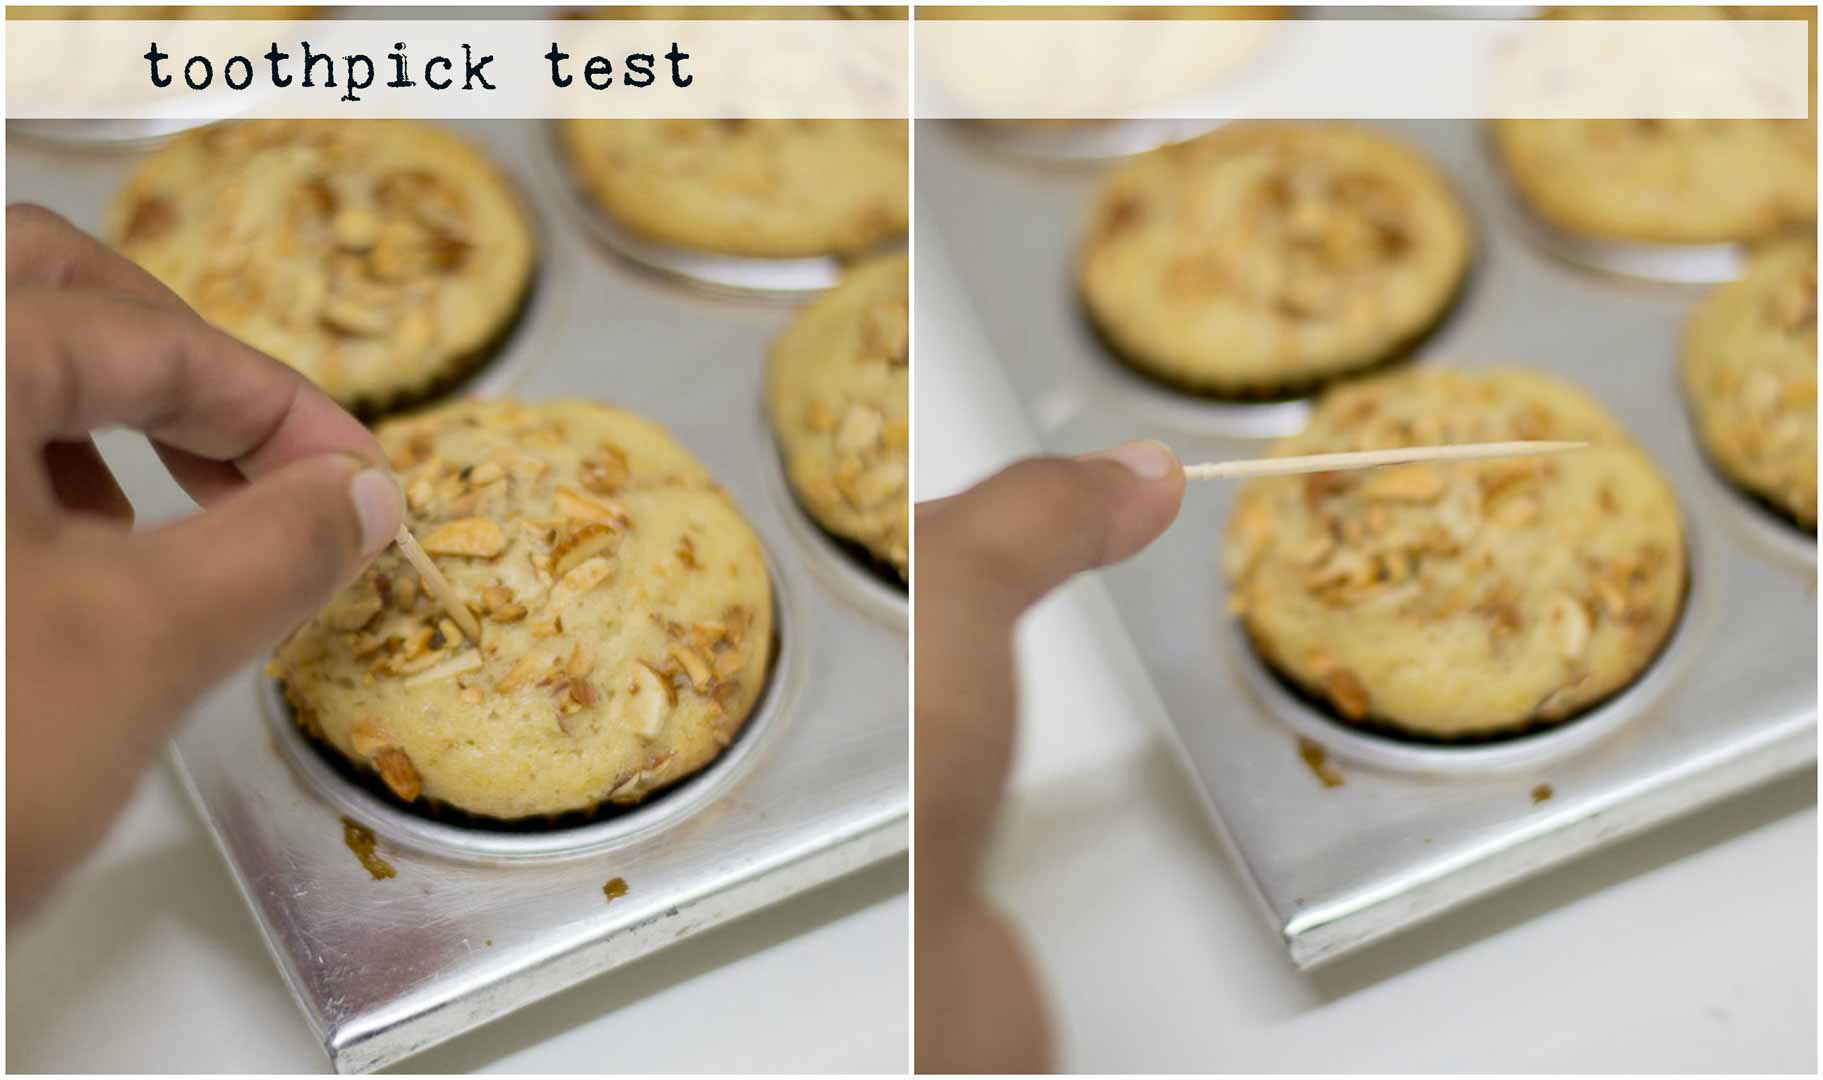
After 12 minutes, perform the toothpick test. If a toothpick inserted comes clean without any batter, the muffin is done. If you want a nicely browned muffin, bake for a minute or two more.
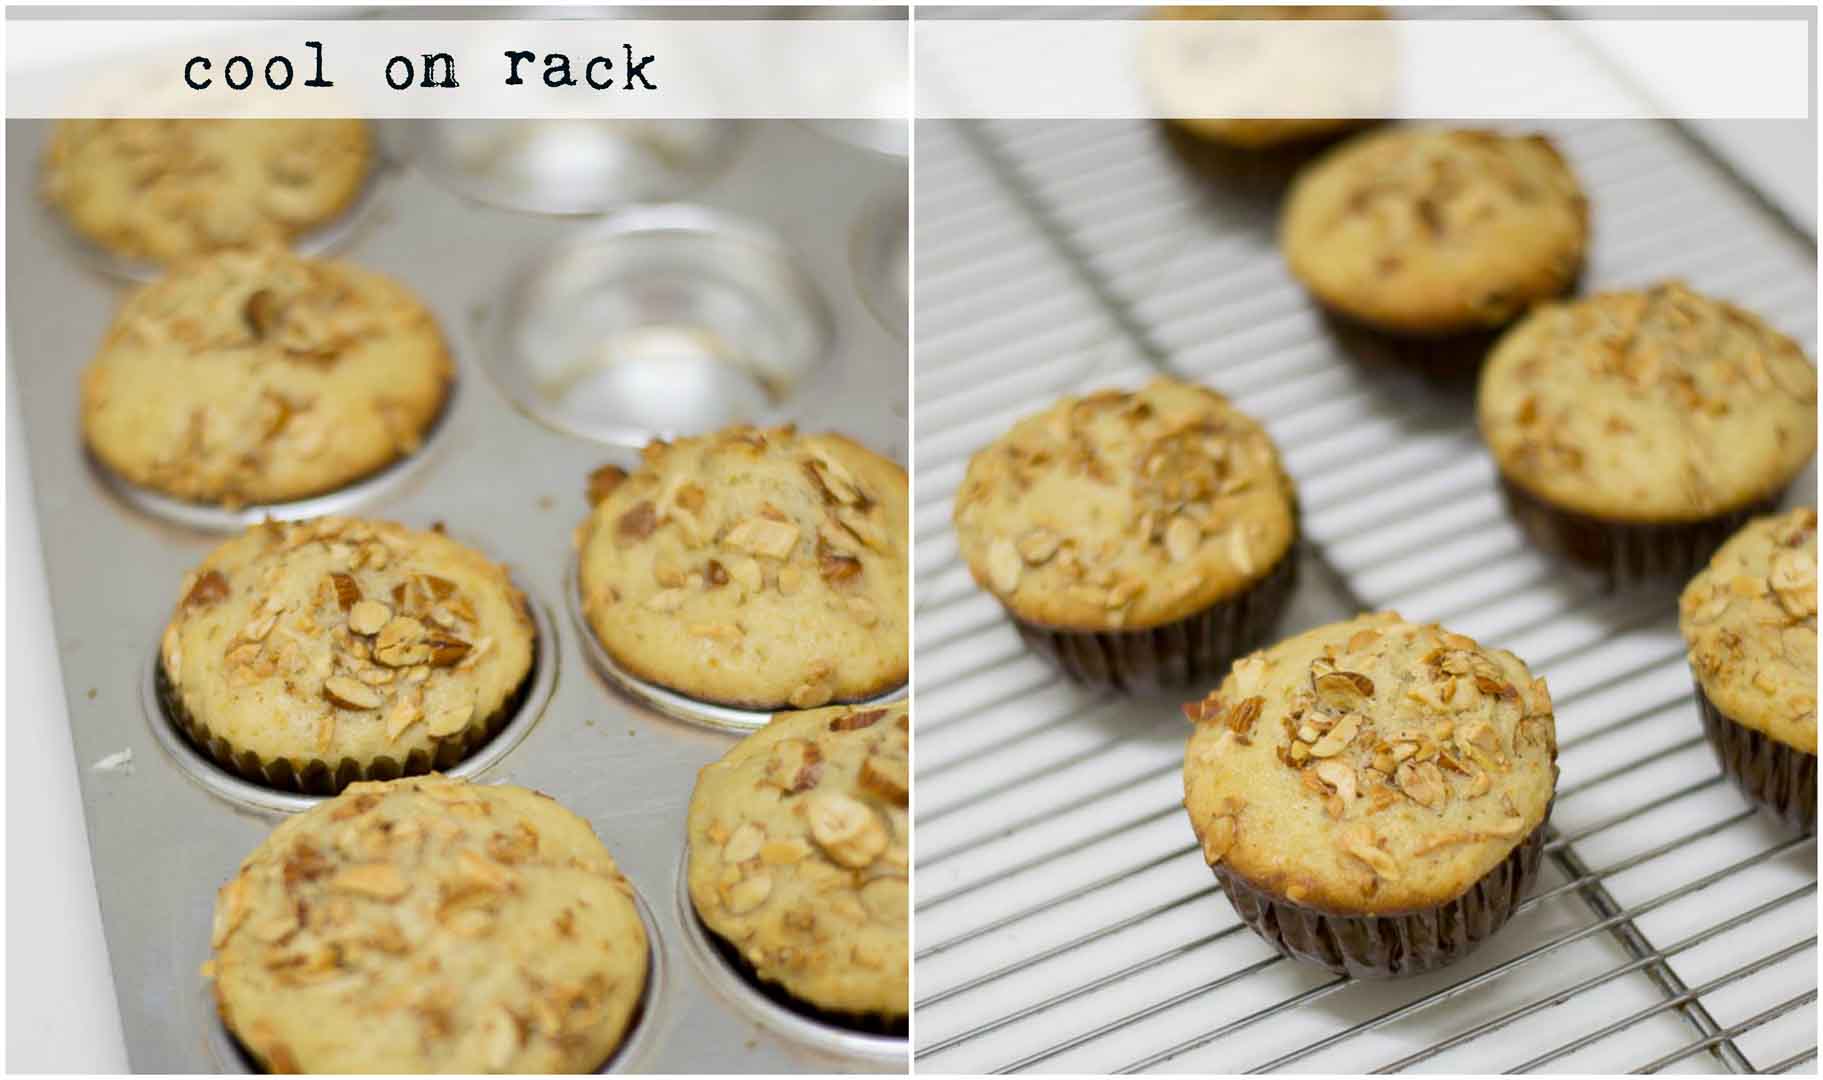
Remove the muffin from the tin and let it cool on wire rack for an hour.
Store the muffin in an airtight container for up-to four days.

TIP TO TEST FRESHNESS OF BAKING POWDER If you feel that your baking powder is old, always add a little baking powder to water. If it foams, it means that the baking powder is active. If it does not foam, it means the baking powder is dead. Discard and use a new pack of baking powder.
Roasting the nuts
- 1 teaspoon ghee
- 1/2 cup nuts of your choice
Wet Ingredients
- 1/2 cup sugar
- 1/4 cup vegetable oil / sunflower oil
- 1/4 teaspoon pure vanilla extract (use only a drop if using artificial vanilla)
- 1/4 teaspoon salt
- 1 egg
- 1/2 cup milk (preferably full fat)
Dry Ingredients
- 1 cup Maida (All purpose flour)
- 1 teaspoon baking powder
- Preheat the oven to 200 degrees Celsius.
- Roast the nuts in ghee. Set aside.
- Mix all the wet ingredients together.
- Sieve the dry ingredients and add to the wet ingredients.
- Add half of the nuts and mix well.
- Pour the batter in prepared muffin tin.
- Sprinkle the remaining nuts on top.
- Bake for 12-15 minutes.
- Vanilla Nut Muffins are ready.
- Author: Kannamma - Suguna Vinodh
- Prep Time: 15 mins
- Cook Time: 15 mins
- Category: Baking
- Cuisine: American