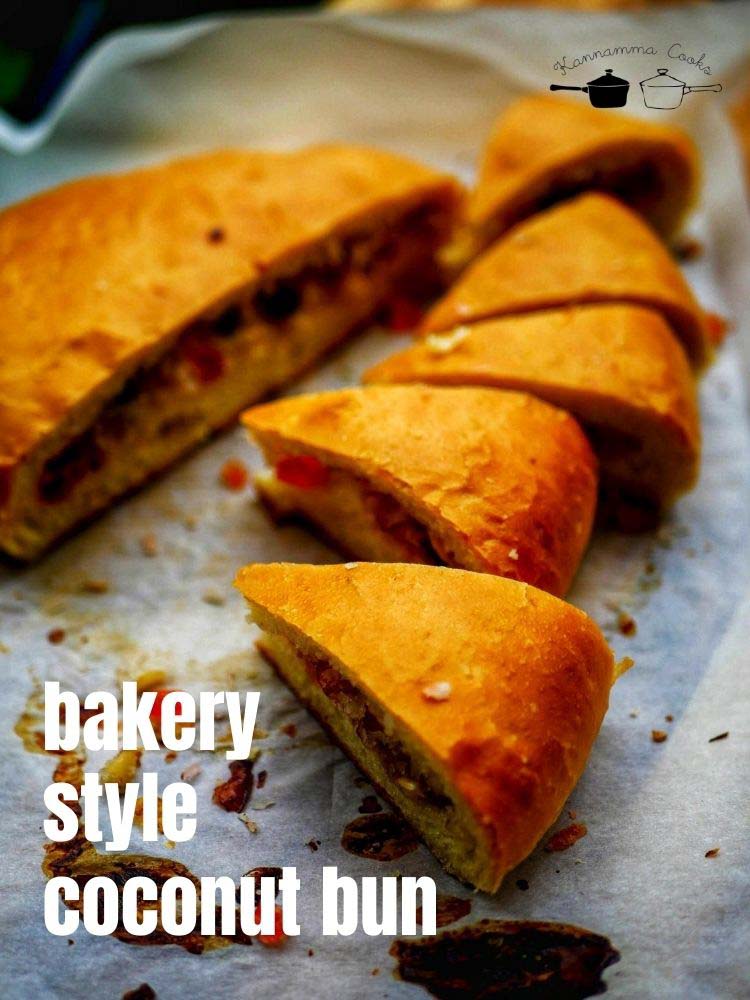
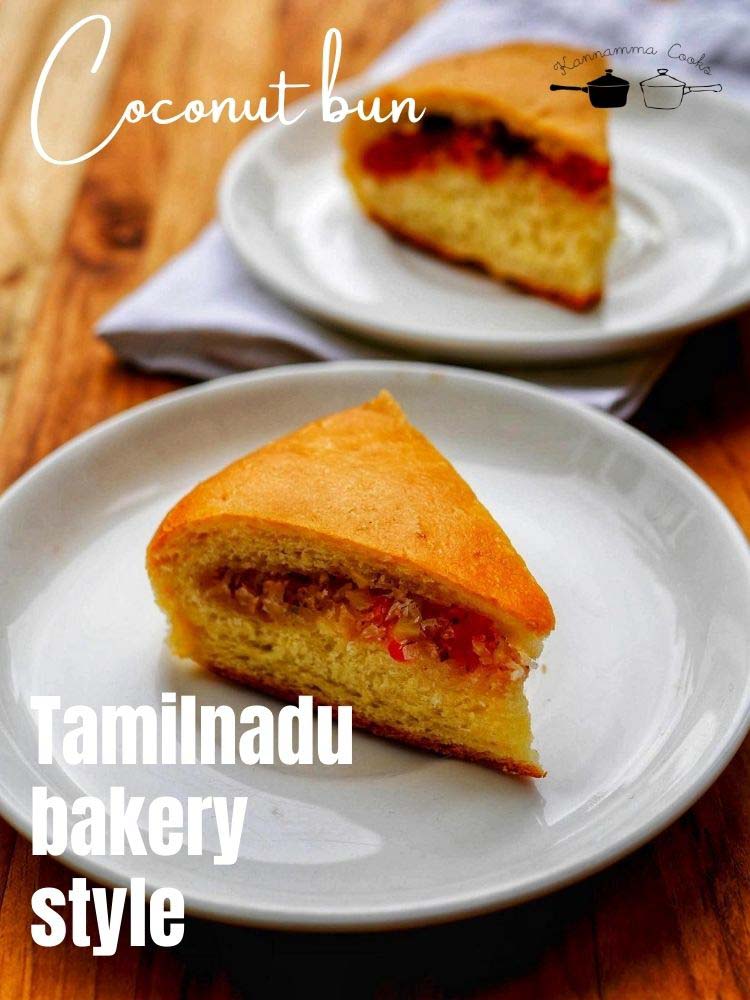
Thengai Bun Recipe, Tamilnadu Bakery style coconut bun made with dough from scratch and coconut filling, baked in the oven. Indian coconut buns. Also called as dilkush / dilpasand.
Click the link below to find the recipes on the site. Baking Recipes
Here are some of the equipment, utensils and gadgets that will be useful for making this recipe. Click the link to buy them online. Unbleached Flour Active dry yeast Parchment Paper Baking Sheet Pan Pastry Brush Prep Bowls
This is my husband Vinodh’s all time favorite bakery special that he never forgets to pack on our every single trip to Coimbatore. Coimbatore thengai bun is always special as it is loaded with coconut and dry fruits aka tutti frutti. He has been having major missings of the same since it’s been more than 6 months since we have traveled. Made these today and he is such a happy man. In Bengaluru we get this in the bakeries and it’s called Dilkush and Dilpasand. Dilkush – very similar to the buns we get in Tamilnadu while Dilpasand is made with a sort of puff pastry. So I baked these today using my regular bun dough with a little bit of added butter for extra flavor and it has come out fantastic. Here is how to do it.
Here is the video of how to make Thengai Bun , Coconut Bun Bakery Style Recipe

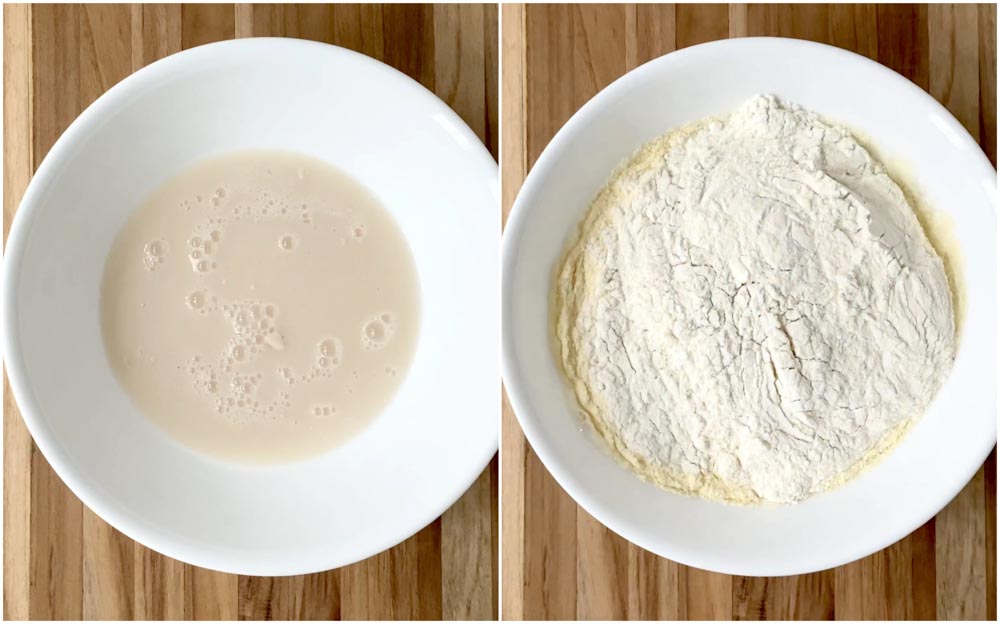
Once the yeast has foamed up, add in the milk, milk powder, flour and the salt.

Form a dough and knead the dough by hand for a good three to four minutes. The dough will be very soft and will stick to the hands. Dust the dough with little flour while kneading. But do not add too much flour while kneading as the dough will become dry and the buns will become very hard. Resist your temptation to add flour while kneading. Do not add more two to three tablespoons of flour while kneading. The dough will come together and start to stick less after kneading.
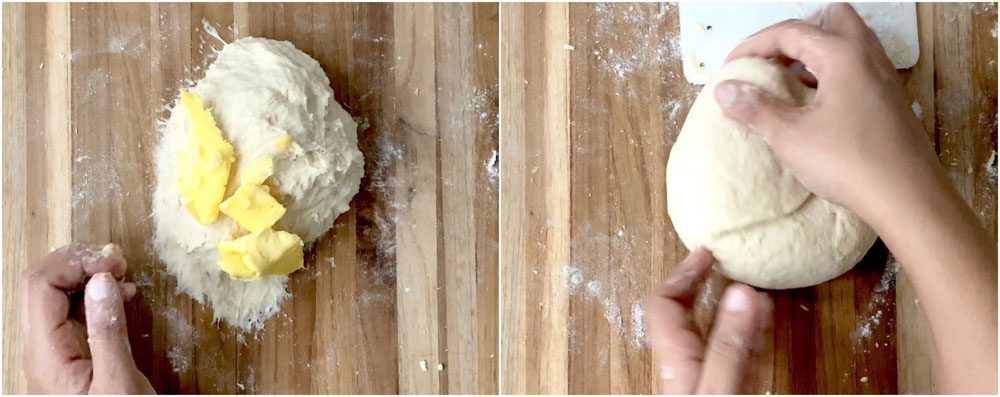
Add in the butter and keep kneading for another three to four minutes. I used slightly cold butter (forgot to take it out). Dont be like me. Use room temperature butter so its easy to knead.
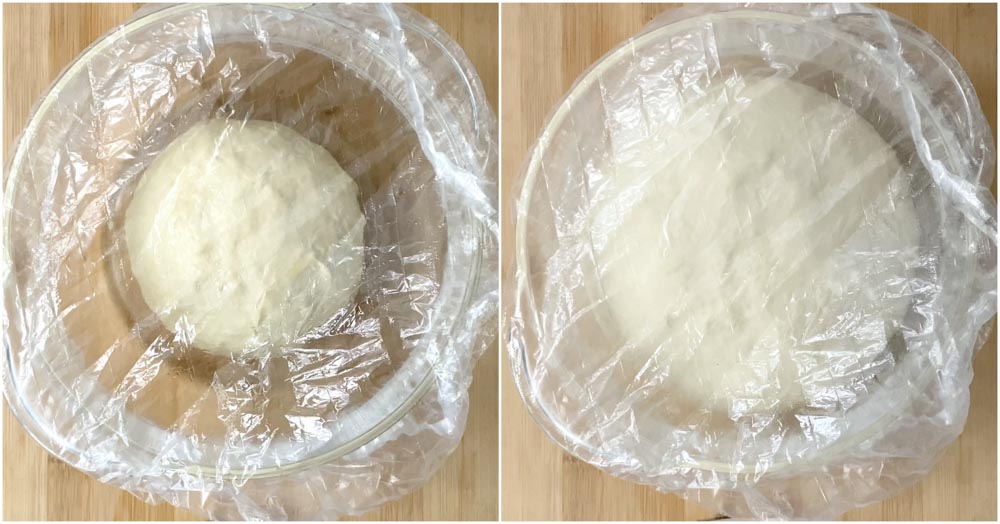
Once the dough is smooth, transfer to an oiled bowl and cover with a plastic wrap or a shower cap. I find the shower cap to be a fantastic piece of little “thingy” that’s perfect for proofing the dough. I hoard all the shower caps from hotel rooms on our vacation. Guilty as charged 🙂
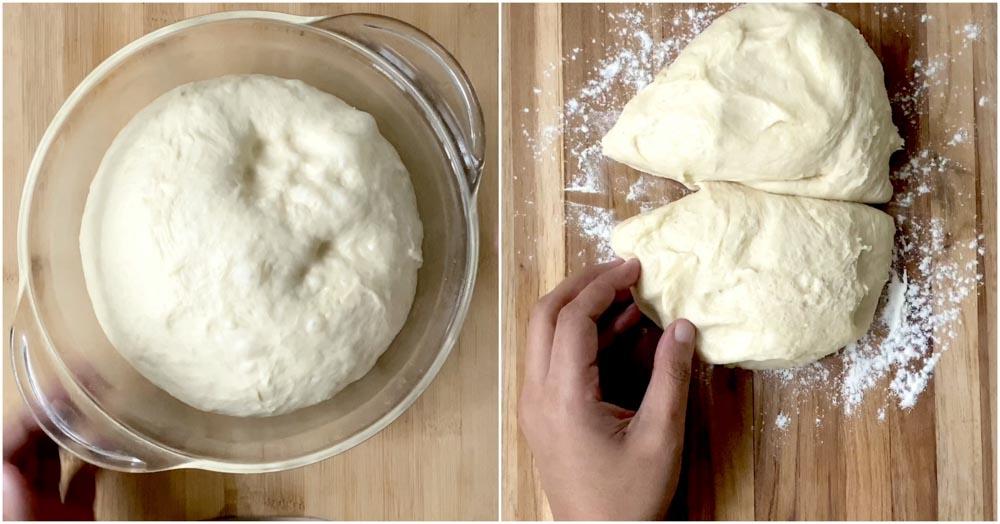
Let the dough rise until doubled. It will take anywhere between 45 minutes to an hour depending on how humid the place you live is. Once the dough is doubled, remove the dough from the bowl and place it on a flour dusted work bench. Gently deflate it and cut the dough into two pieces.
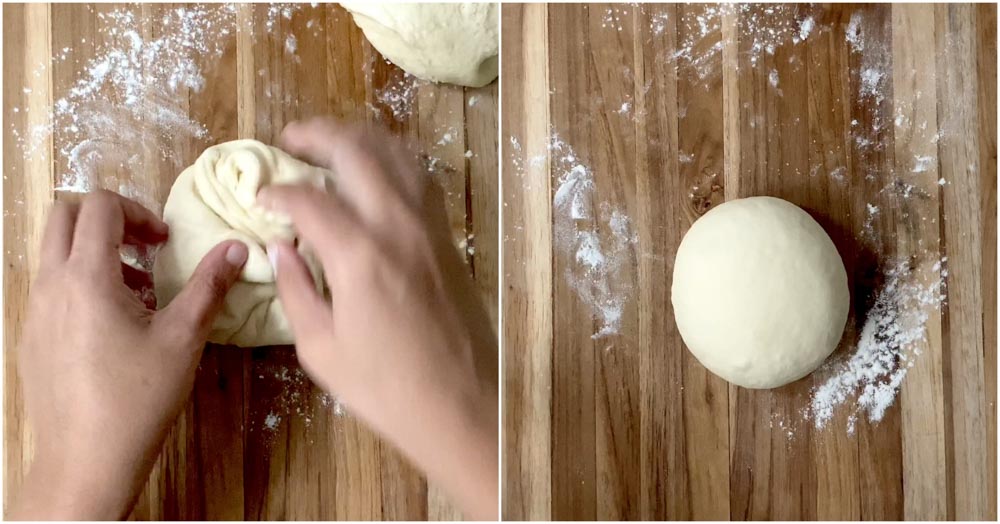
Form each dough into a tight ball. Refer to the video as to how each ball is formed. Its important that there are no cracks while forming the dough else the final bun will show these cracks. Let the balls rest for five minutes. Cover with a cloth to prevent the balls from drying.
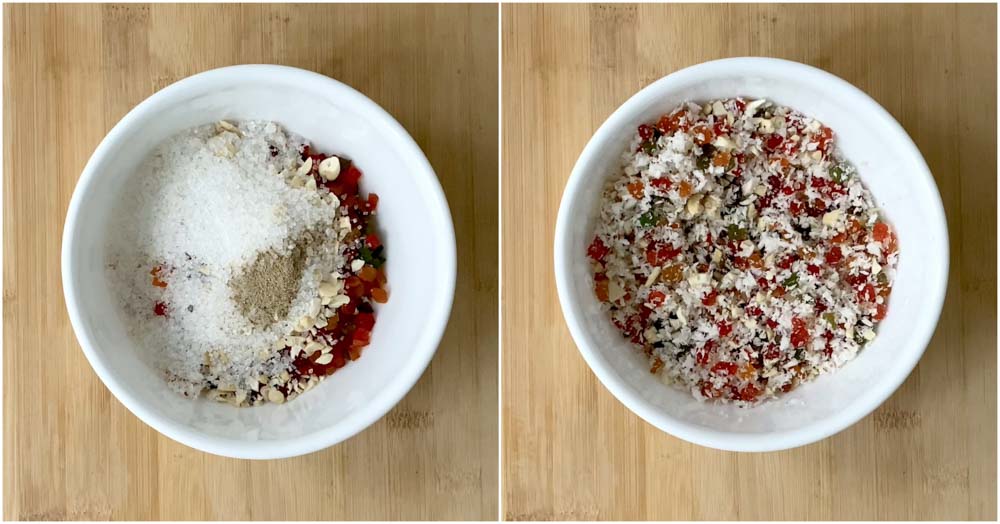
In the mean time, make the filling for the thengai bun / coconut bun. Take a bowl and add in all the ingredients listed under filling. Mix well with a spoon to combine. Fresh shredded coconut is preferred for this recipe. Note: Do not make the filling ahead of time as the sugar will melt and become liquid / messy. Make it when the balls are resting.
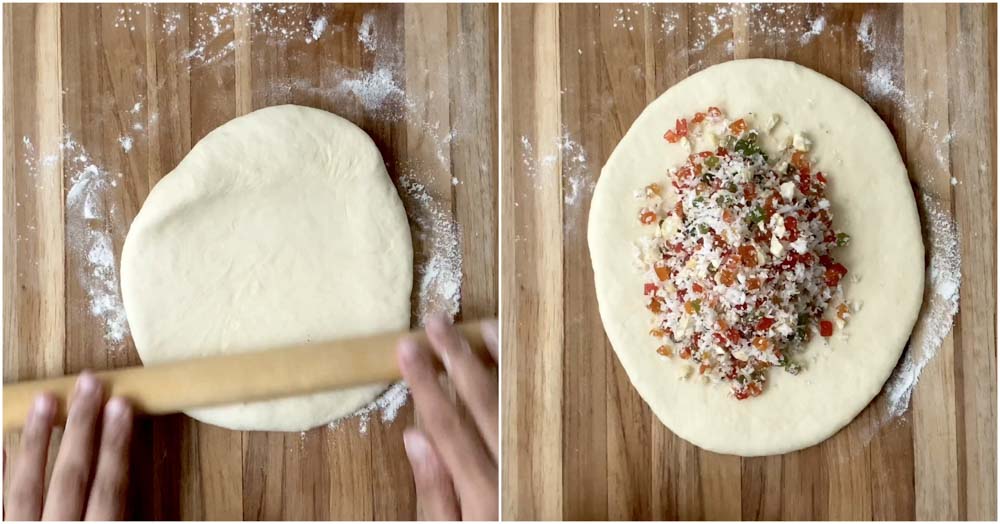
Roll the dough into an 8 to 9 inch circle. Place half of the filling and cover it completely. Crimp the edges so it does not open up while baking.

Shape the ball again with your palm and gently roll to a 7 or 8 inch round. Be gentle and dont press too hard or the stuffing will pop out. (refer the video above for shaping).
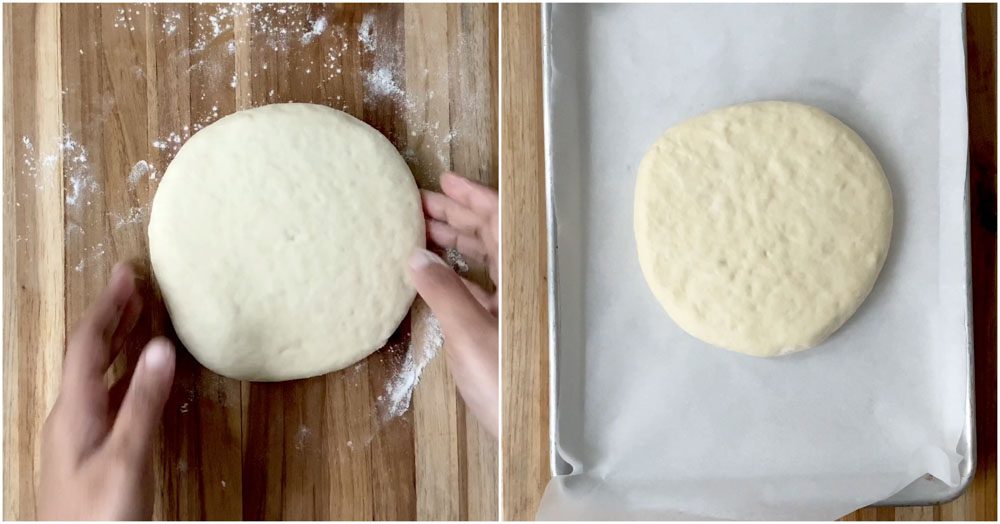
Place the flattened dough on a parchment lined sheet pan. Cover with a cloth and let it rest for 15 minutes. In the mean time preheat the oven to 200 degree Celsius / 400 degree Fahrenheit.
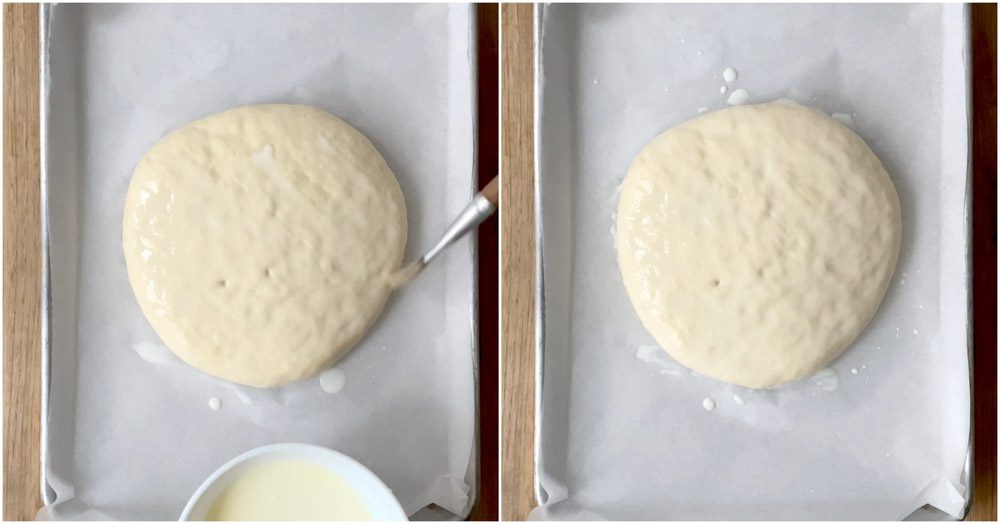
Brush the buns evenly with milk.
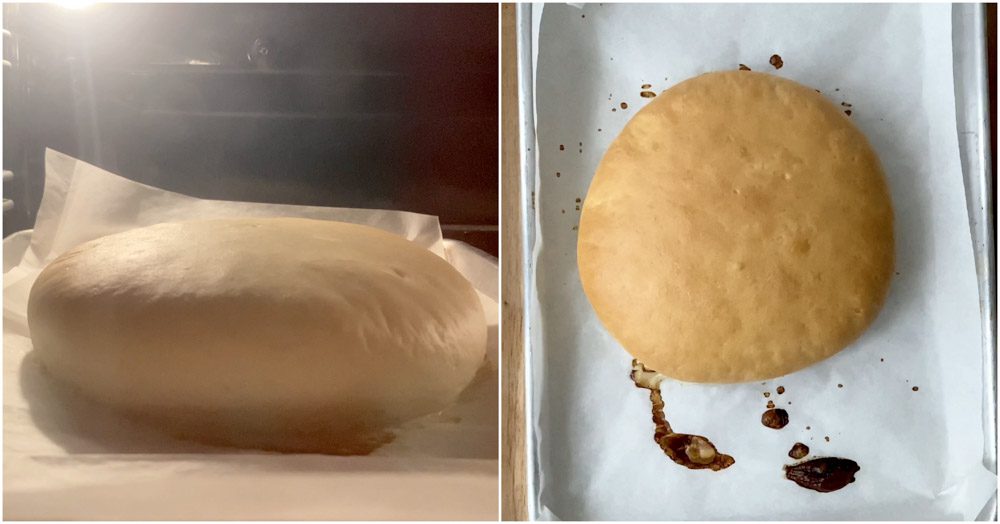
Bake the buns for 20-25 minutes. The buns should be golden brown on top. Note: If your oven is small and cannot bake two buns at a time, rest the other prepared bun in the fridge while one is baking. Once one has finished baking, you can bake another.
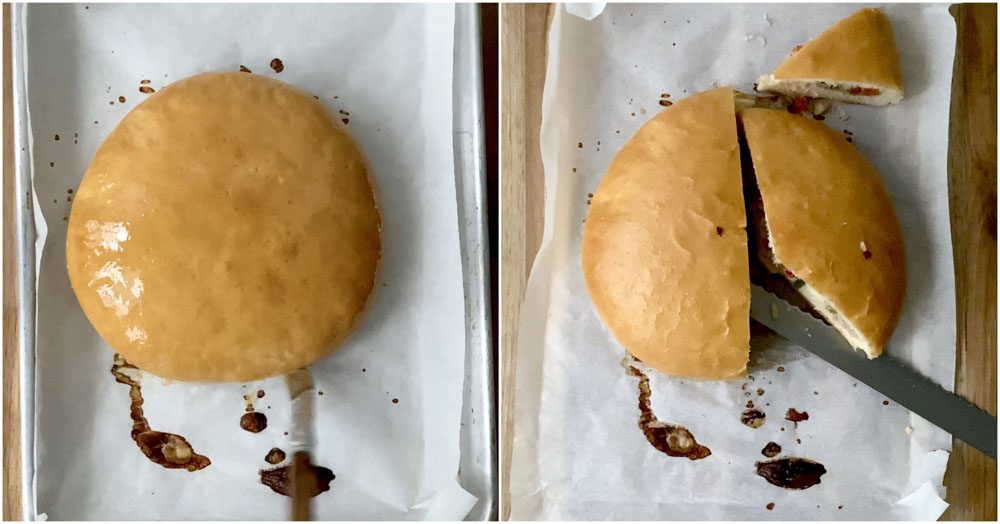
Remove the buns and brush the buns with ghee / melted butter while its still hot.
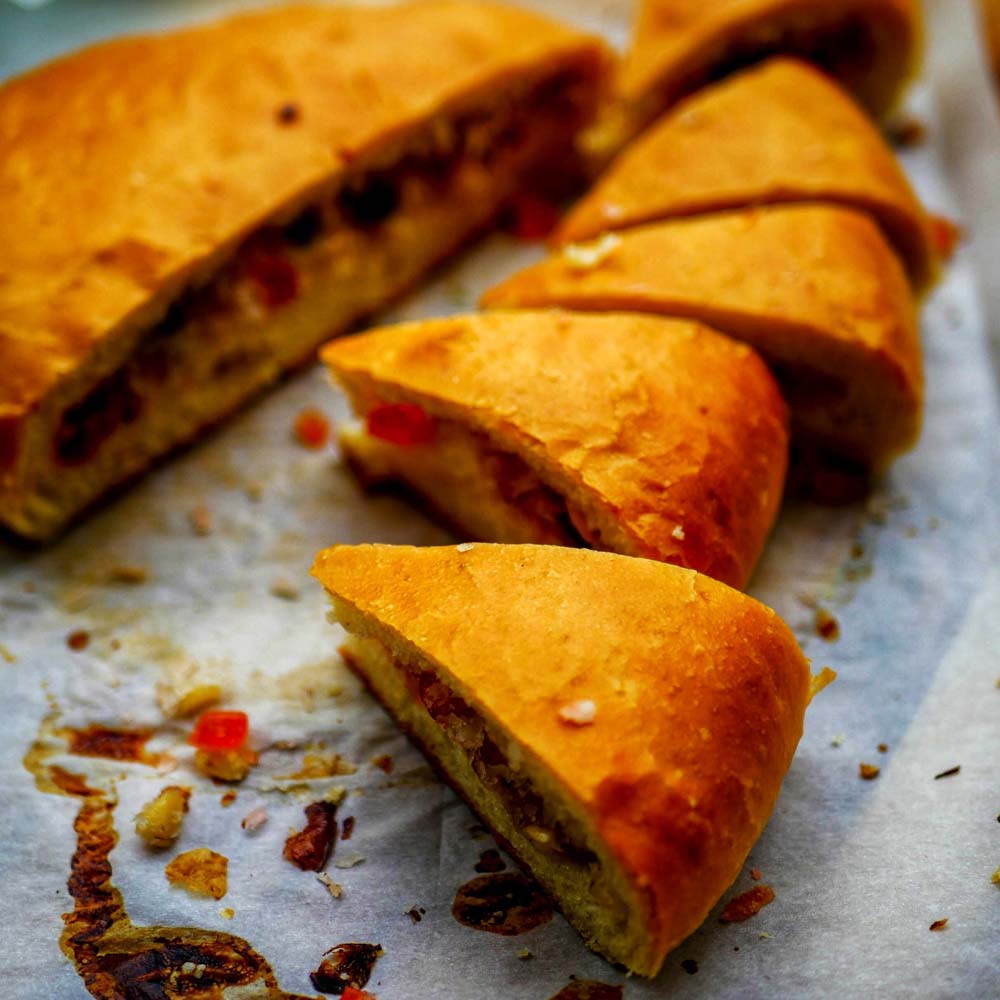
Fantastic homemade Thengai Bun | Bakery Style coconut Bun is ready. Its a fantastic after school snack for kids or makes for a picnic pick me up. It tastes good warm or cold.
Ingredients for thengai bun / coconut bunFor making the thengai bun dough
1/2 cup luke warm water 2 teaspoon sugar 1.5 teaspoon active dry yeast 1/4 cup whole cow milk 20 grams plain milk powder 210 grams maida / all purpose flour 1/2 teaspoon salt 30 grams butter at room temperature
For making the thengai bun filling
75 grams fresh shredded coconut 100 grams tutti frutti 50 grams plain granulated sugar 30 grams cashews, chopped 1/4 teaspoon cardamom powder pinch of salt
Other ingredients for making thengai bun
Milk for brushing the dough Melted butter / Ghee for brushing the finished buns
Take a bowl and add in the warm water, sugar and the yeast. Mix well with a whisk and set aside for five minutes. The yeast will get activated and will foam up. Once the yeast has foamed up, add in the milk, milk powder, flour and the salt.
Form a dough and knead the dough by hand for a good three to four minutes. The dough will be very soft and will stick to the hands. Dust the dough with little flour while kneading. But do not add too much flour while kneading as the dough will become dry and the buns will become very hard. Resist your temptation to add flour while kneading. Do not add more two to three tablespoons of flour while kneading. The dough will come together and start to stick less after kneading.
Add in the butter and keep kneading for another three to four minutes. Once the dough is smooth, transfer to an oiled bowl and cover with a plastic wrap or a shower cap.
Let the dough rise until doubled. It will take anywhere between 45 minutes to an hour depending on how humid the place you live is. Once the dough is doubled, remove the dough from the bowl and place it on a flour dusted work bench. Gently deflate it and cut the dough into two pieces.
Form each dough into a tight ball. Refer to the video as to how each ball is formed. Its important that there are no cracks while forming the dough else the final bun will show these cracks. Let the balls rest for five minutes. Cover with a cloth to prevent the balls from drying.
In the mean time, make the filling for the thengai bun / coconut bun. Take a bowl and add in all the ingredients listed under filling. Mix well with a spoon to combine. Fresh shredded coconut is preferred for this recipe. Note: Do not make the filling ahead of time as the sugar will melt and become liquid / messy. Make it when the balls are resting.
Roll the dough into an 8 to 9 inch circle. Place half of the filling and cover it completely. Crimp the edges so it does not open up while baking. Shape the ball again with your palm and gently roll to a 7 or 8 inch round. Be gentle and dont press too hard or the stuffing will pop out. (refer the video above for shaping).
Place the flattened dough on a parchment lined sheet pan. Cover with a cloth and let it rest for 15 minutes. In the mean time preheat the oven to 200 degree Celsius / 400 degree Fahrenheit. Brush the buns evenly with milk. Bake the buns for 20-25 minutes. The buns should be golden brown on top. Remove the buns and brush the buns with ghee / melted butter while its still hot.
Fantastic homemade Thengai Bun | Bakery Style coconut Bun is ready. Its a fantastic after school snack for kids or makes for a picnic pick me up. It tastes good warm or cold.
- Author: Suguna Vinodh
- Prep Time: 90m
- Cook Time: 20m
Find it online : https://www.kannammacooks.com/thengai-bun-recipe/
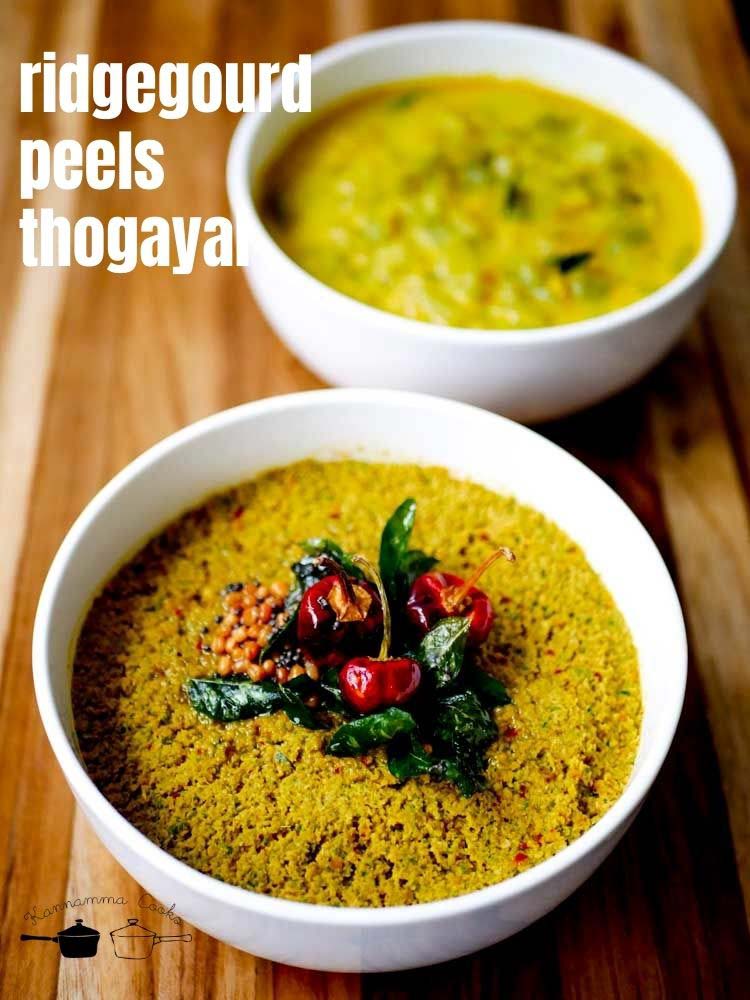
Recipe for Peerkangai Thogayal made with the peels of ridge gourd. This is a very delicious thogayal recipe that goes very well with rice for lunch. Recipe with step by step pictures and video.
Peerkangai Thol Thogayal, Ridge-gourd peel chutney – This is a lip-smacking thogayal recipe made with the peels of ridge-gourd. The roasted peels take a slightly charred / smoky flavor that pairs so well with coconut and is an excellent side dish to serve along with rice. Here is how to do it.
Here are other recipes from the site made using Ridge Gourd
I usually make curry / stir-fry with the flesh of the ridge gourd and a chutney / thogayal with the peels / skin. Never discard the peels of the ridge-gourd. They are so flavourful. If you are not going to use the peels right away, you can store it in the refrigerator for up to 3-4 days and use it whenever required. Here is a video of how to make a Peerkangai paal kuzhambu (milk curry) and a thogayal made with the peels. I love to serve the thogayal with rice. An important thing while making Tamil style thogayal is to use Indian sesame oil (gingely oil). The flavour of sesame oil is so good in Tamil style recipes. A note for readers out of India – The sesame oil used in Chinese cooking is not the same kind of sesame oil used in Indian cooking. Generally, Chinese sesame oil is toasted and is very strong and pungent. Indian sesame oil has a slightly sweet flavour and a very unique aroma. Its much lighter and is very good for cooking. These oils are not interchangeable. Use only Indian style sesame oil for south Indian recipes wherever mentioned.
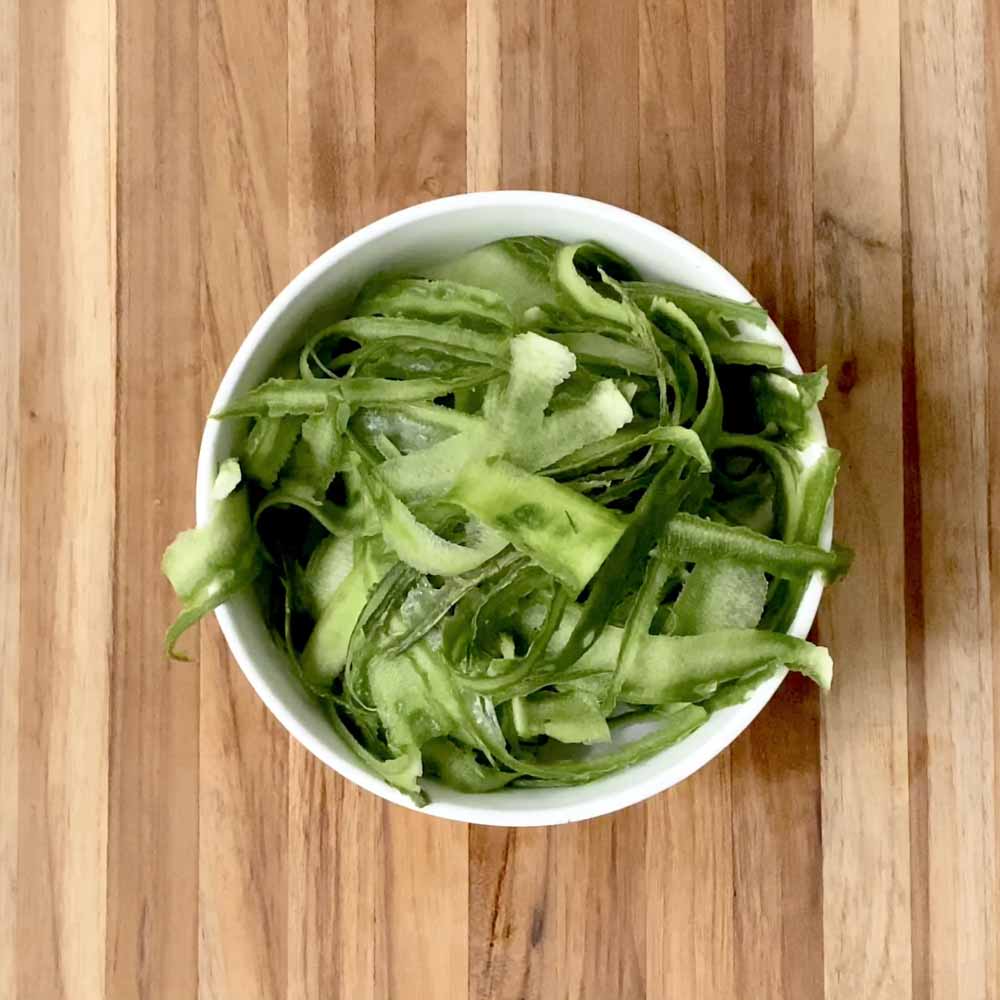
Here is how to make Peerkangai Thol Thogayal, Ridge-gourd peel chutney I have used the peels of about two big ridge gourd (about 500 grams). The peels are roughly about two cups. Set aside. Use the flesh to make curries, stir-fry, sambar etc…

Heat a teaspoon Indian sesame oil (gingely oil) in a pan until hot. Add in the chana dal and roast on a low flame for a couple of minutes. Low flame is key or else the lentils will burn fast. When the lentils are slightly starting to change colour, add in the tamarind, dried red chillies, garlic and curry leaves. Continue to roast on a low flame for about a minute till the lentils are golden. Remove from heat and set this mixture aside on a plate to cool.
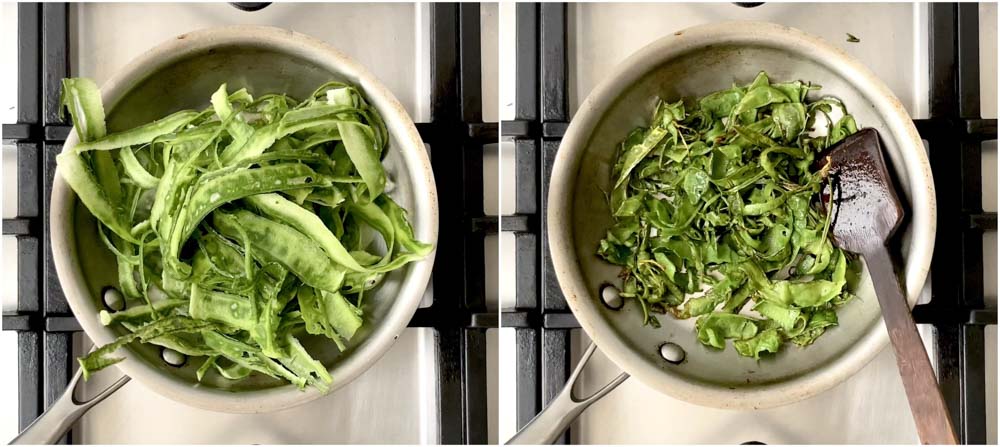
In the same pan, add in a tablespoon of Indian sesame oil (gingely oil) and add in the ridge gourd peels. Roast for a good 7-8 minutes on medium flame. The peels should wilt and shrink. After about 4-5 minutes, it will slowly start to char and brown on the edges. Continue roasting the peels for a couple of minutes and remove from heat.
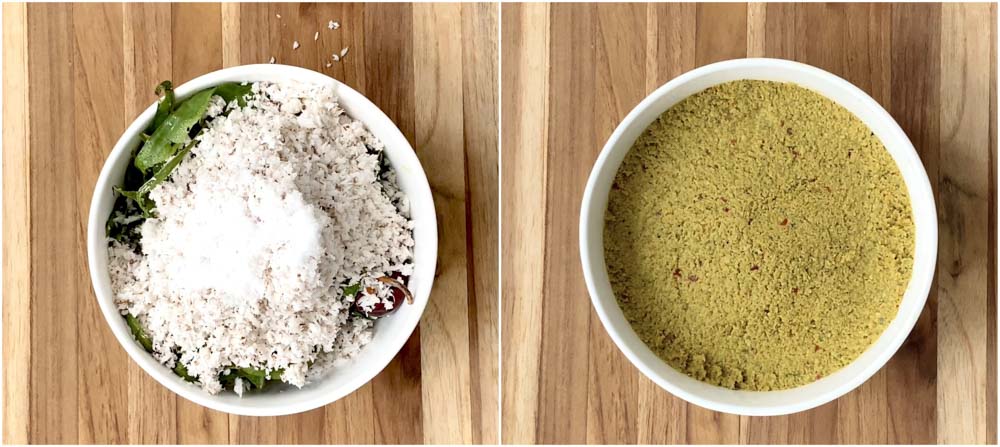
The roasted lentils are ready. The roasted ridge gourd peels / skins are also ready. To this mixture add in the coconut and the salt. If you like, add a small piece of jaggery (about 1/2 a teaspoon). Grind to a thick paste adding few tablespoons of water while grinding. Do not add a lot of water. Also grind to a very slightly coarse texture. It gives a nice taste while eating with rice. Some people like it to be really smooth. There is no right or wrong. Do it the way your family likes it.
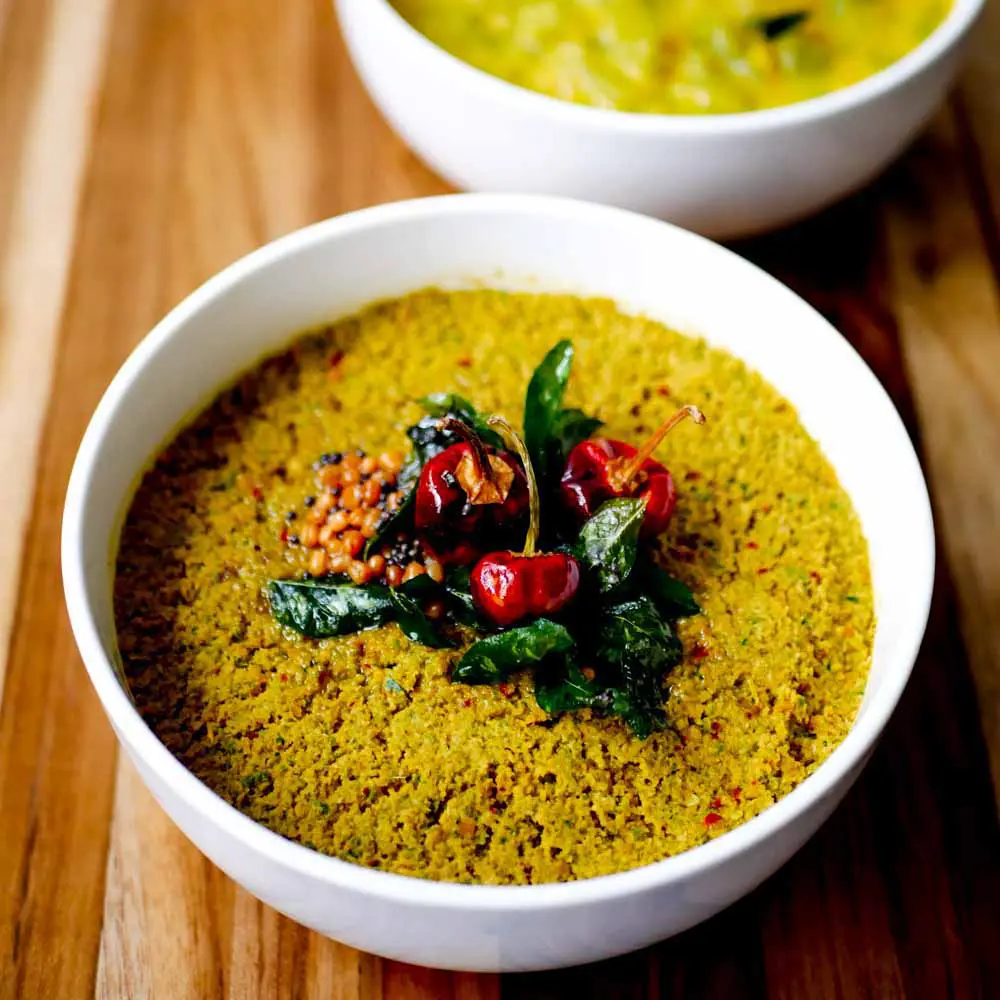
Tempering for the Peerkangai Thol Thogayal, Ridge-gourd peel chutney Heat a teaspoon of Indian sesame oil in a small kadai / pan. Add in the mustard seeds and the urad dal. Let the mustard seeds crackle. Add in the curry leaves, dried red chillies and asafoetida. Briefly saute for a few seconds. Add it to the thogayal. Tip: If you are going to serve the Peerkangai Thol Thogayal right away, then mix in the tempering. Else, do not mix the tempering after adding it to the top of the thogayal. Mix and serve when on the table. The thogayal tastes very fresh and the mustard seeds and the urad dal stays very crisp.
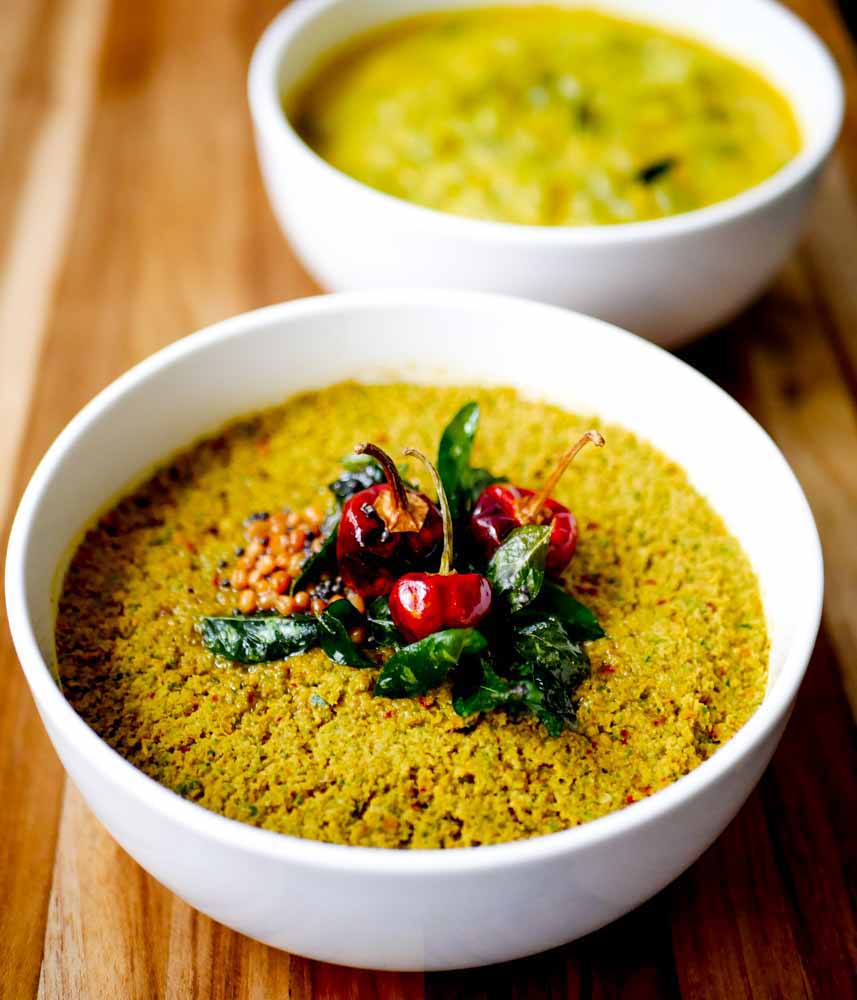
Fantastic Peerkangai Thol Thogayal, Ridge-gourd peel chutney is ready. Serve with rice. This thogayal can be stored in the refrigerator for up to two days. Enjoy!
Ingredients for the peerkangai thol thogayal
- 1 teaspoon Indian sesame oil
- 1/4 cup chana dal
- 1 small marble size tamarind
- 6 dried red chillies
- 6 cloves garlic
- 2 sprigs curry leaves
- 1 tablespoon Indian sesame oil
- 2 cups Ridgegourd peels
- 1/2 cup fresh shredded coconut
- 3/4 teaspoon salt
Tempering peerkangai thol thogayal
- 1 teaspoon Indian sesame oil
- 1/4 teaspoon mustard seeds
- 1/4 teaspoon urad dal
- 1 sprig curry leaves
- 3 dried red chillies
- a pinch of asafoetida
Making the peerkangai thol thogayal
- I have used the peels of about two big ridge gourd (about 500 grams). The peels are roughly about two cups. Set aside. Use the flesh to make curries, stir-fry, sambar etc…
- Heat a teaspoon Indian sesame oil (gingely oil) in a pan until hot. Add in the chana dal and roast on a low flame for a couple of minutes. Low flame is key or else the lentils will burn fast. When the lentils are slightly starting to change colour, add in the tamarind, dried red chillies, garlic and curry leaves. Continue to roast on a low flame for about a minute till the lentils are golden. Remove from heat and set this mixture aside on a plate to cool.
- In the same pan, add in a tablespoon of Indian sesame oil (gingely oil) and add in the ridge gourd peels. Roast for a good 7-8 minutes on medium flame. The peels should wilt and shrink. After about 4-5 minutes, it will slowly start to char and brown on the edges. Continue roasting the peels for a couple of minutes and remove from heat.
- The roasted lentils are ready. The roasted ridge gourd peels / skins are also ready. To this mixture add in the coconut and the salt. If you like, add a small piece of jaggery (about 1/2 a teaspoon). Grind to a thick paste adding few tablespoons of water while grinding. Do not add a lot of water. Also grind to a very slightly coarse texture. It gives a nice taste while eating with rice. Some people like it to be really smooth. There is no right or wrong. Do it the way your family likes it.
Tempering for the Peerkangai Thol Thogayal, Ridge-gourd peel chutney
Heat a teaspoon of Indian sesame oil in a small kadai / pan. Add in the mustard seeds and the urad dal. Let the mustard seeds crackle. Add in the curry leaves, dried red chillies and asafoetida. Briefly saute for a few seconds. Add it to the thogayal.
Fantastic Peerkangai Thol Thogayal, Ridge-gourd peel chutney is ready. Serve with rice. This thogayal can be stored in the refrigerator for up to two days.
Author: Suguna Vinodh
Prep Time: 5m
Cook Time: 15m
