
This is hands down the best rava kesari and not only that. Its the easiest and fool proof recipe. There is one thing that gets people away from trying kesari. They end up with sticky goo like kesari or end up with lumpy kesari. But this is a fool proof recipe and the kesari just glides in your mouth. It only takes 10 minutes of cooking time and 20 minutes of resting time. So you need to be attentive in the kitchen for just 10 minutes. Here is how to do it.

Take a pressure cooker (two or three liter capacity cooker) and add in the water, sugar, cardamom powder, turmeric and a pinch of salt. Turmeric is for colour. You can add saffron or a food colour too. But I personally like the yellow hue that turmeric imparts. Start the heat and let it simmer.

When the water-sugar mixture is boiling, set a pan on stove in medium heat. We will roast the rava. Add in the ghee, cashew-nuts and the rava.

Start roasting the rava in ghee. The rava will initially bubble up on the sides of the pan during roasting. It will slowly settle down and a nutty smell will fill your kitchen. Keep sauteing all the time so the rava doesnt burn. The rava should start taking the color of a very mild amber.

We will need to be working simultaneously so when the sugar mixture boils, the rava is also cooked. If the sugar mixture starts boiling before the rava is roasted, do not worry. Just put the sugar mixture on a low simmer.

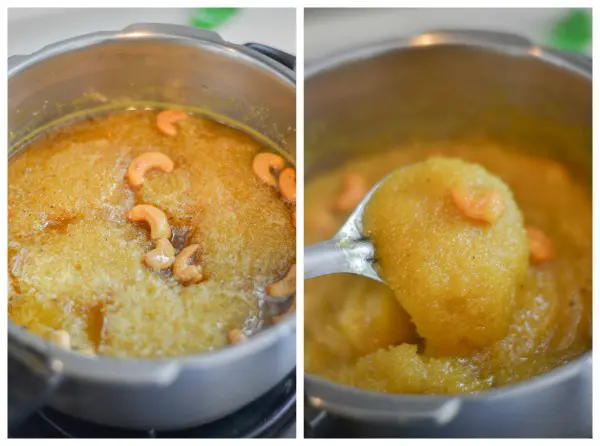
The rava is fully roasted when the cashew nuts have turned slightly golden and the rava has slightly changed colour. Also look for the nutty aroma. Thats a sure sign that the rava is roasted. When the sugar mixture comes to a full boil, we are ready to add in the rava. Gently, carefully, slowly add in the roasted hot rava into the sugar water mixture. It will bubble up briefly. That’s OK. Switch off the heat / stove.

Immediately after adding rava, mix well once and cover the cooker with the lid and add in the weight. Remember that the stove is off . Do not open the cooker for the next 20 minutes.

Open the cooker after 20 minutes and mix the kesari well. The rava would have absorbed all the moisture and would have swollen up. It will be glistening and totally lump free.
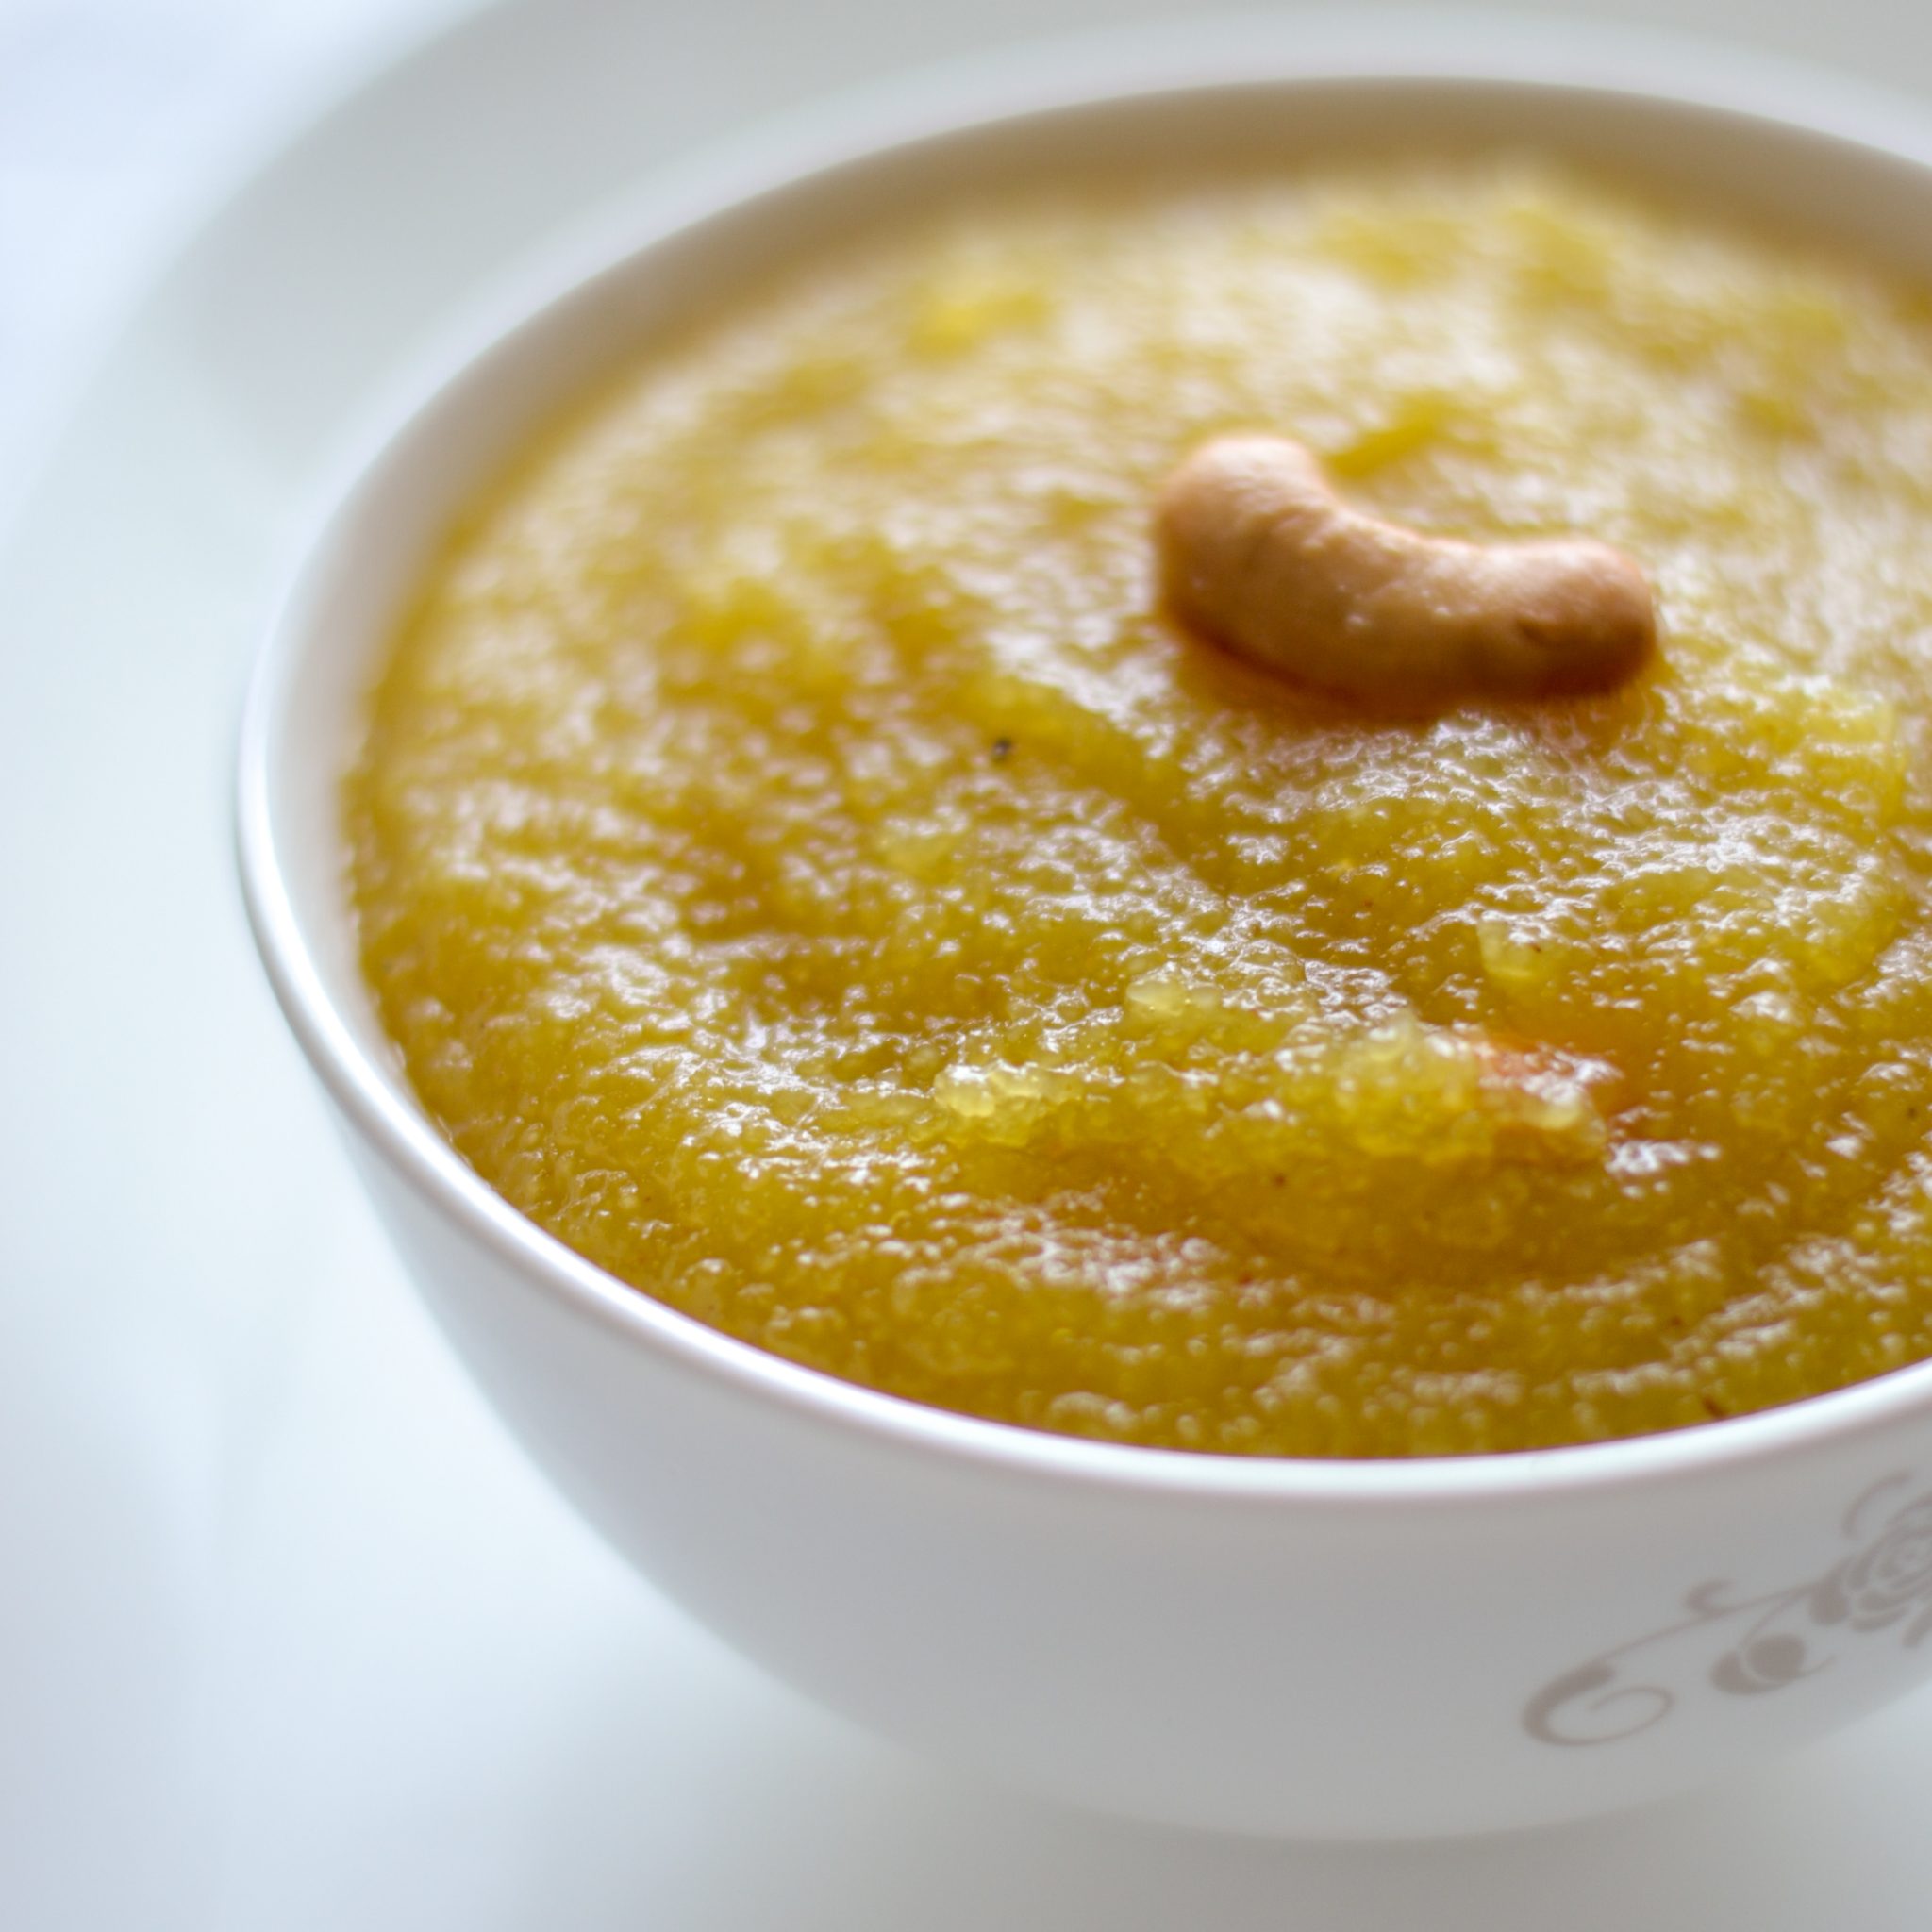
You just made yourself a glide in your mouth wonderful kesari. Look at the texture of that beautiful kesari. Its sublime. Serve the kesari warm. You can store the kesari in the fridge for upto a week.

For the sugar syrup
- 1 cup sugar
- 1 1/2 cup water
- a pinch of cardamom powder
- a pinch of turmeric powder
- a pinch of salt
For roasting the rava
- 1/4 cup ghee
- 1/2 cup rava / sooji
- 15 - 20 cashew-nuts
- Take a pressure cooker and add in the water, sugar, cardamom powder, turmeric and a pinch of salt. Start the heat and let it simmer.
- When the water-sugar mixture is boiling, set a pan on stove in medium heat. Add in the ghee, cashew-nuts and the rava. Keep sauteing all the time so the rava doesnt burn. The rava should start taking the color of a very mild amber. The rava is fully roasted when the cashew nuts have turned slightly golden and the rava has slightly changed colour. Also look for the nutty aroma.
- When the sugar mixture comes to a full boil, add in the roasted hot rava into the sugar water mixture. It will bubble up briefly. That’s OK. Switch off the heat / stove.
- Immediately after adding rava, mix well once and cover the cooker with the lid and add in the weight. Remember that the stove is off. Do not open the cooker for the next 20 minutes.
- Open the cooker after 20 minutes and mix the kesari well. The rava would have absorbed all the moisture and would have swollen up.
- Serve the kesari warm.
- Author: Kannamma - Suguna Vinodh
- Prep Time: 2 mins
- Cook Time: 10 mins
- Category: Dessert
- Cuisine: Tamilnadu
Find it online : https://www.kannammacooks.com/kesari-recipe-rava-kesari-recipe-sweet-kesari/
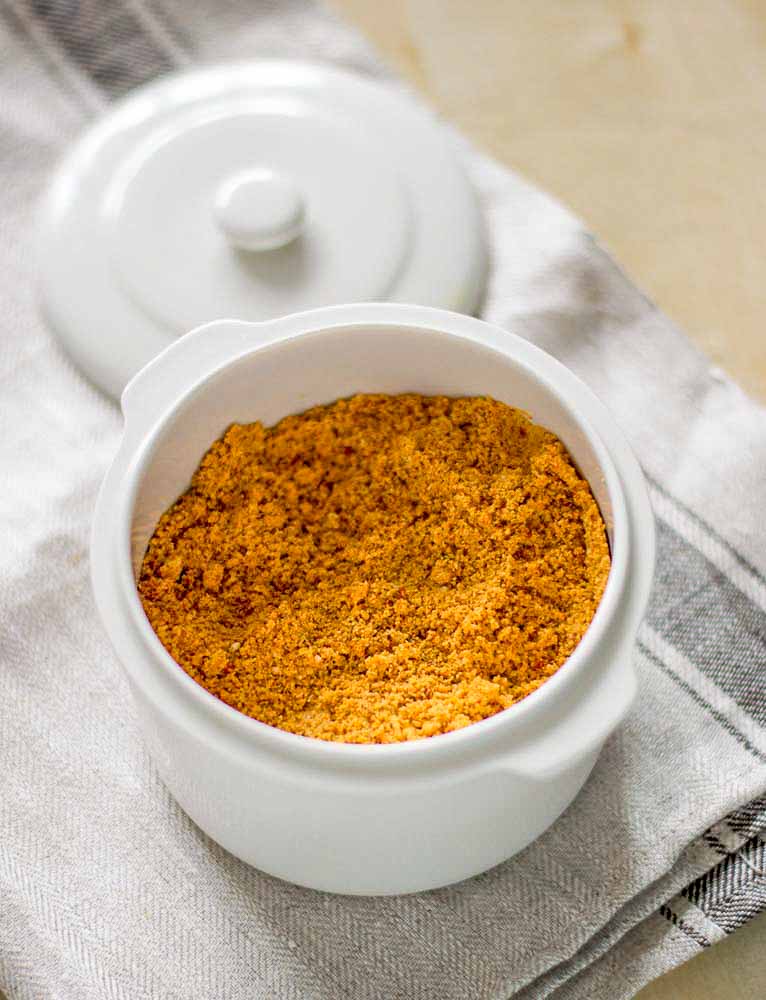
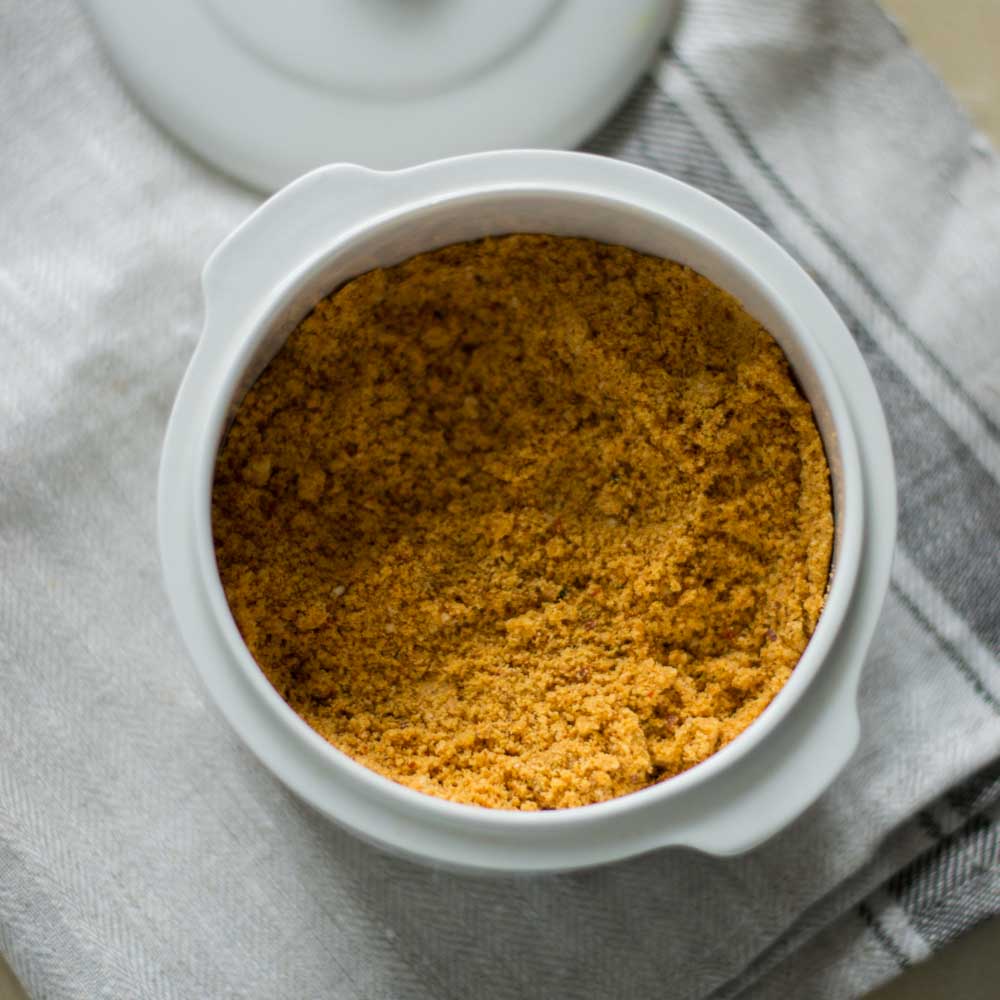
Idli milagai podi means comfort food in Tamilnadu. During school days, 50% of all the school lunch boxes were packed with sesame oil coated idlis drenched in different kinds of idli podi. It is the best lunch box friendly food our moms knew those days. Slightly crunchy and spicy, idli is the perfect vehicle for podi. My brother was a big time picky eater when he was young. He would never have chutney, sambar or anything wet on the side with idli or dosa. The only thing you can give him was idli podi and it holds true to this day. So our house had gallons of idli podi at all times of the year. This is a very easy recipe to do. Hope you like it. There are countless types of idli milagai podi one can make and this is the most popular one that’s made with roasted lentils.
Here is the video of making idli podi / Idli milagai podi Recipe.
Here is how to make Idli milagai podi Recipe
The key to a good idli milagai podi is the crunch when you bite. You can achieve that texture only by slow roasting making sure that the lentils turn golden. Low heat is key. Here is how to do it.
Heat a pan and add in a teaspoon of vegetable oil and add quarter cup of chana dal (kadalai paruppu). Roast the chana dal in low flame until golden brown. Keep sauteing to avoid burning. Have patience and roast slow until the aroma comes and the dal turns color. Remove from the pan once the dal is golden. Set aside on a plate to cool.

In the same pan add in a teaspoon of vegetable oil and add half cup of whole white urad dal. Use unpolished urad dal. Roast the lentil until it smells nutty and the dal turns color. It should be really golden in colour. Always roast on low flame. That is the key. Remove from the pan once the dal is golden. Set aside on a plate to cool.

Place the pan back again on the stove and add in a teaspoon of vegetable oil and half cup of white sesame seeds. Fry on low flame till golden. Keep sauteing and spread the seeds on the pan evenly so the seeds doesn’t burn. Sesame seeds burn fast. So roast on low flame until it starts to pop. Remove the seeds from the pan and set aside on a plate to cool.

Dry roast red chillies on the same pan until you can smell them. Remove the chillies from the pan and set aside on a plate to cool.
Add in the cooled and roasted lentils, sesame seeds and red chillies to the mixie. Add in the salt, asafoetida (perungayam/hing) and jaggery.

Grind the ingredients to the consistency you like. You can grind it fine, slightly coarse or to a coarse powder. I like the slight crunch of the podi that comes from the lentils. So I ground slightly to a coarse powder. Just ever so slightly coarse. A note on grinding: If you want a fine idli podi / powder – grind all the ingredients except sesame seeds to a fine powder. Add the sesame seeds on top of the ground powder and pulse several times. Grinding the sesame seeds for a long time will make the oils ooze out. So a word of caution on that.

You can store this idli milagai podi / idli molaga podi at room temperature for upto 15-20 days. If you are going to need it for a longer time, then store the podi in zip tote bags in the freezer. It stays fresh for upto 4-5 months in the freezer.
Mix the chutney powder either with sesame oil (nallennai) or ghee. Serve with idli, dosa, paniyaram varieties.
- 3 teaspoon vegetable oil or peanut oil
- 1/4 cup split chana dal
- 1/2 cup whole white urad dal
- 1/2 cup white sesame seeds
- 10 dried red chillies
- 1 teaspoon salt
- 2 teaspoon jaggery
- 1/4 teaspoon asafoetida (hing)
- Heat a pan and add in a teaspoon of vegetable oil and add quarter cup of chana dal (kadalai paruppu). Roast the chana dal in low flame until golden brown. Set aside on a plate to cool.
- In the same pan add in a teaspoon of vegetable oil and add half cup of whole white urad dal. Roast the lentil until it smells nutty and the dal turns color. Remove from the pan once the dal is golden. Set aside on a plate to cool.
- Add in a teaspoon of vegetable oil and half cup of white sesame seeds. Fry on low flame till golden. Set aside on a plate to cool.
- Dry roast red chillies on the same pan until you can smell them. Remove the chillies from the pan and set aside on a plate to cool.
- Add in the cooled and roasted lentils, sesame seeds and red chillies to the mixie. Add in the salt, asafoetida (perungayam/hing) and jaggery.
- Grind the ingredients to the consistency you like. You can grind it fine, slightly coarse or to a coarse powder.
- Enjoy with idlis!
Notes
Mix the chutney powder either with sesame oil (nallennai) or ghee. Serve with idli or dosa.
- Author: Kannamma - Suguna Vinodh
- Prep Time: 5 mins
- Cook Time: 20 mins
- Category: Chutney Powders
- Cuisine: Tamilnadu

