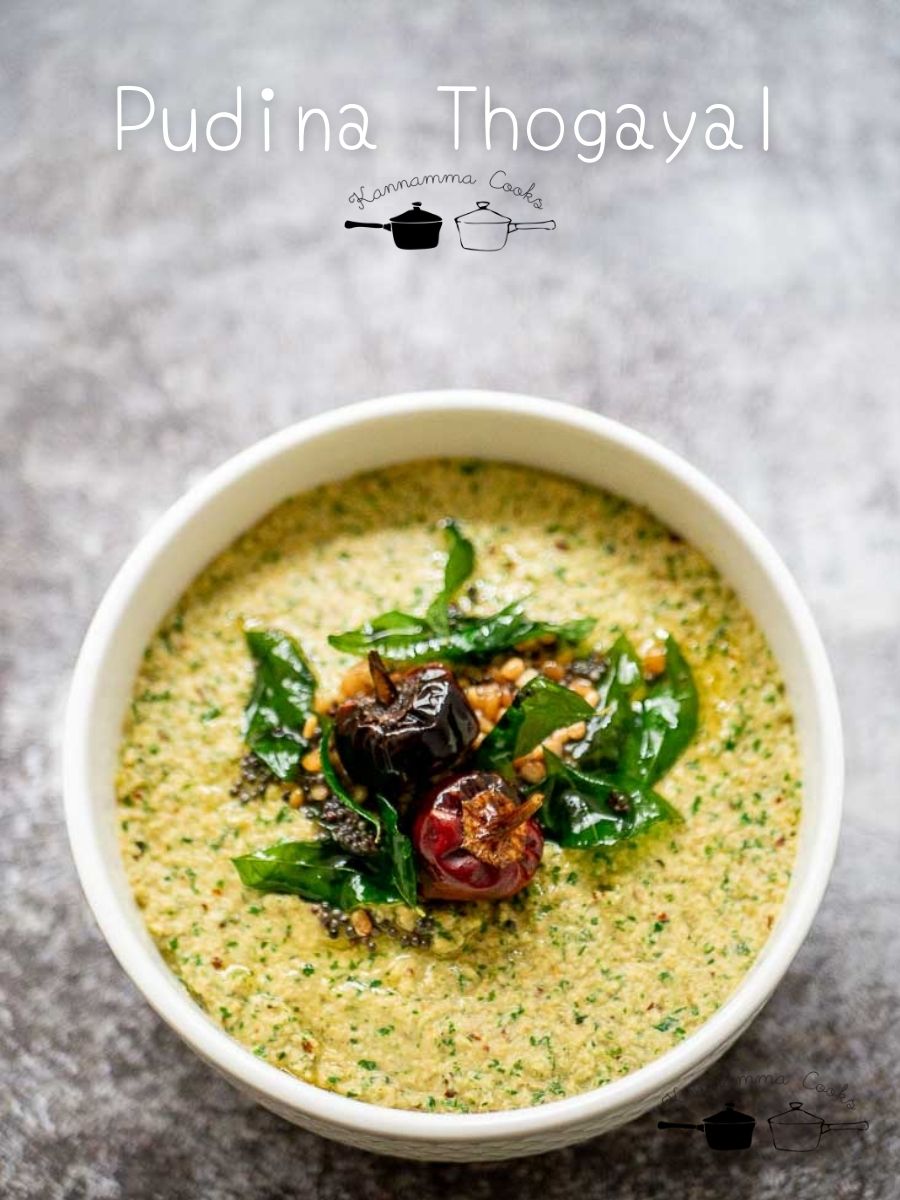
Recipe for Tamilnadu style Pudina Thogayal / Mint chutney for rice made with the addition of coconut and lentils. Pudina Thogayal recipe with step by step pictures and video.
This recipe for Pudina thogayal is a simple side dish that can be served along with rice for lunch. This pudina thogayal recipe can be made in minutes and it tastes very delicious with rice. Do try this Pudina Thogayal recipe at home.
Click the link below to find more varieties of pudina thogayal / chutneys and dishes made using pudina leaves / mint leaves as the main ingredient. Recipes on Kannamma Cooks using Pudina / Mint leaves recipes
Here are some of the equipment, utensils and gadgets that will be useful for making this pudina thogayal recipe. Click on the link to buy them online. Panasonic Mixie Teak-wood Chopping Board Glass Mixing Bowls (500 ml) Measuring Spoons Saute / Stainless Fry Pan Spatula Kadai for Tempering spices Carbon Steel Knife
Here is the video of how to do Pudina Thogayal / Mint Chutney for rice made with mint leaves, lentils and with coconut.
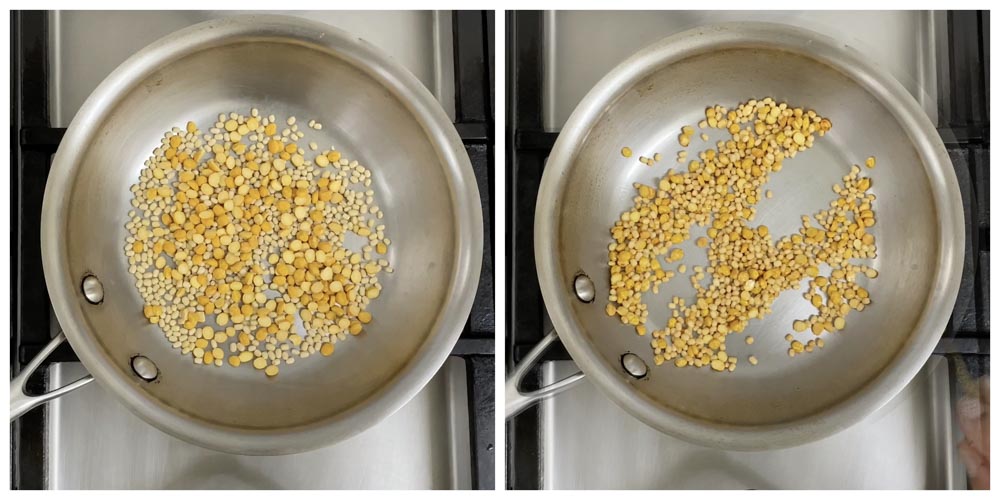
Here is a pictorial of how to do Pudina Thogayal / Mint Chutney for rice made with mint leaves, lentils and with coconut. Heat little oil in a pan and add in the urad dal and chana dal. Use unpolished lentils for this pudina thogayal recipe. Try to use unpolished dal as they are more healthy and minimally processed. Roast the lentils on a low flame till they are nice and golden. Low flame is key. If you cook on a high flame, the lentils might burn and the flavour of the pudina thogayal will not be very palatable.
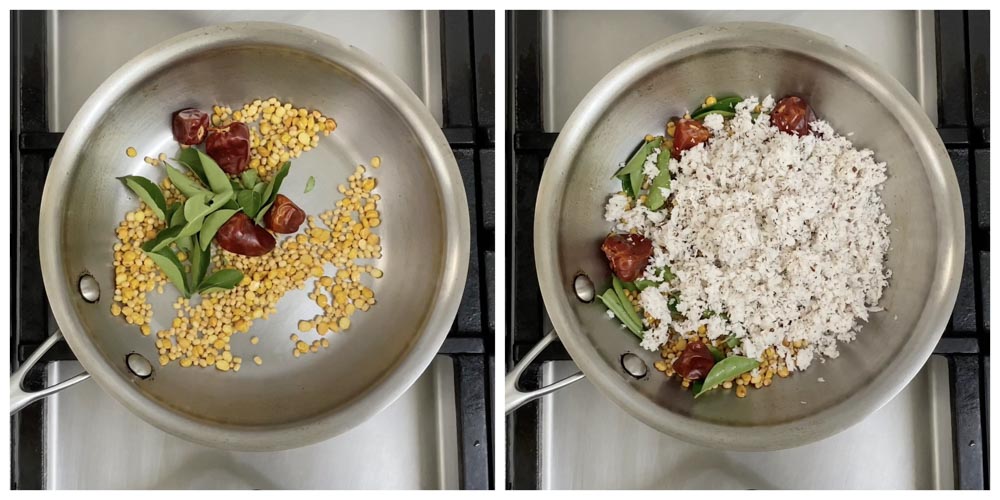
Once the lentils are half done, add in the dried red chillies and the curry leaves. I have used Guntur chillies or the long dried red chillies for the recipe today. The Tamilnadu chillies / Gundu chillies also works well in this pudina thogayal recipe. Adjust the quantity of the chillies according to your taste. If you want a spicy pudina thogayal, add more chillies and vice versa. Saute for a few seconds. Add in the tamarind and the fresh shredded coconut. If you want to make the thogayal without coconut, just omit the coconut. The fresh coconut adds a nice richness and body to the pudina thogayal.
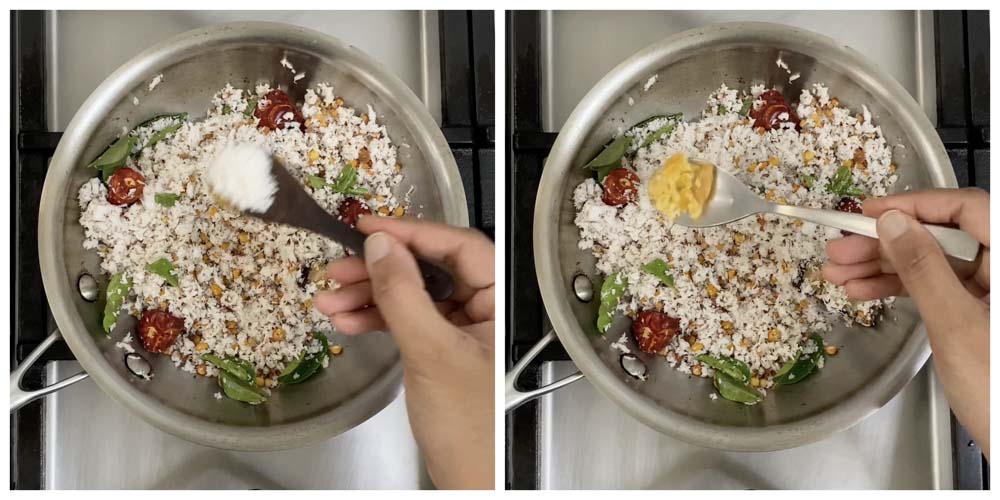
Add in the salt and Jaggery. The little jaggery is optional in this pudina thogayal. If you do not want to add jaggery, just omit it while making the pudina thogayal. Jaggery nicely rounds the flavour of the pudina thogayal. I love to add jaggery to my thogayal.
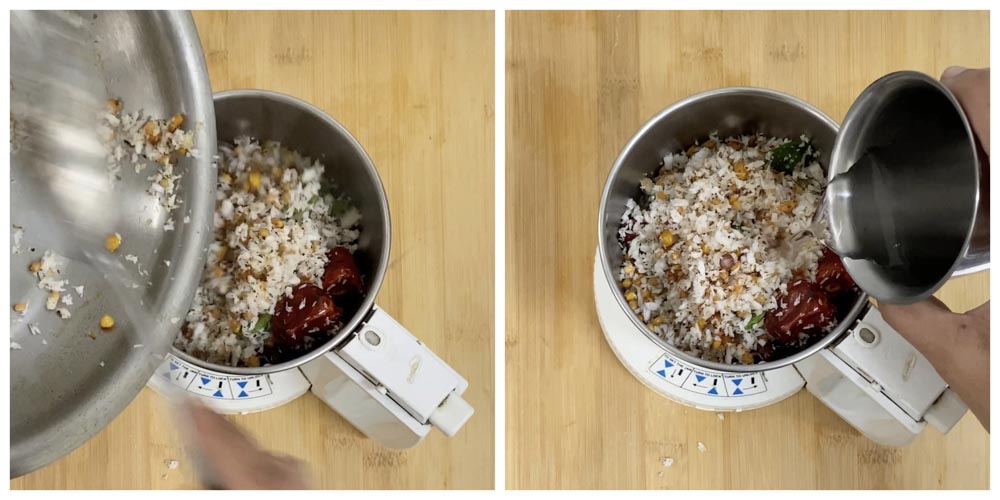
Remove the sauteed ingredients and set aside on a plate / mixie to cool. Add half a cup of water to the mixie and set aside to cool.
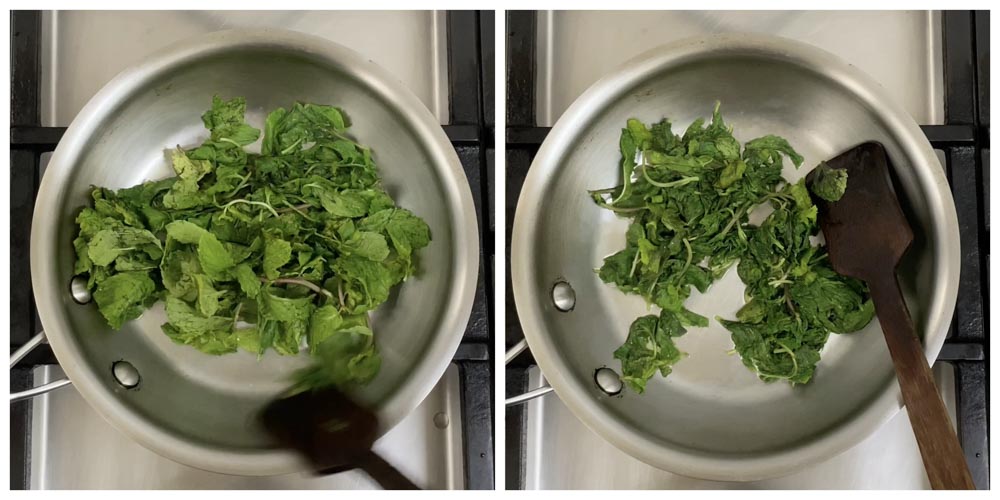
In the same pan, add in the cleaned and washed pudina leaves / mint leaves. Add only the leaves. The stems are very fibrous. Discard the stems. Saute for a few seconds until the mint leaves are wilted. Do not cook the mint leaves for long. The pudina thogayal will become bitter if the mint leaves are cooked for long. Remove the mint leaves and set aside to cool.
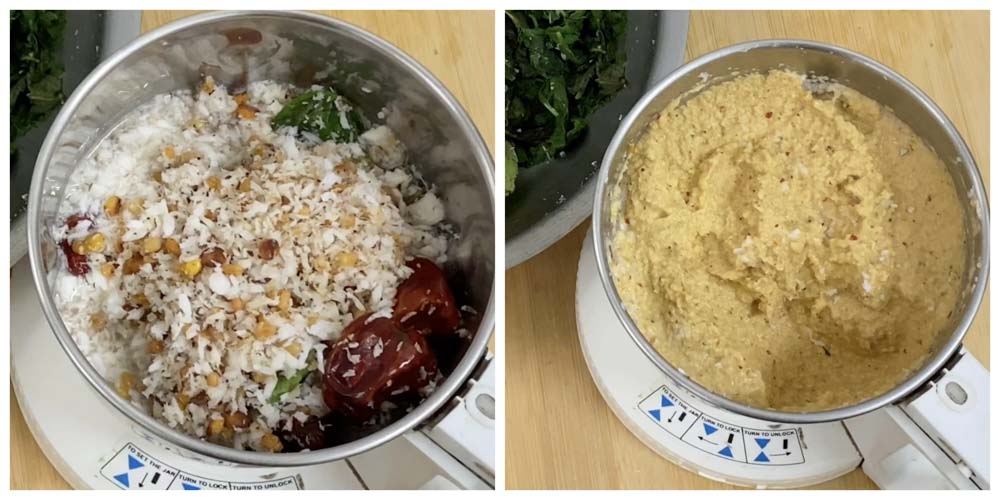
Now we will grind the sauteed ingredients to make pudina thogayal. Take a small mixie and add in the lentil mixture. Add in a little water and grind to a smooth paste. First we will grind the lentils and then we will grind the mint leaves. By doing so, the pudina thogayal will be a nice green colour with the green specks that are so good to look at and also the awesome taste.
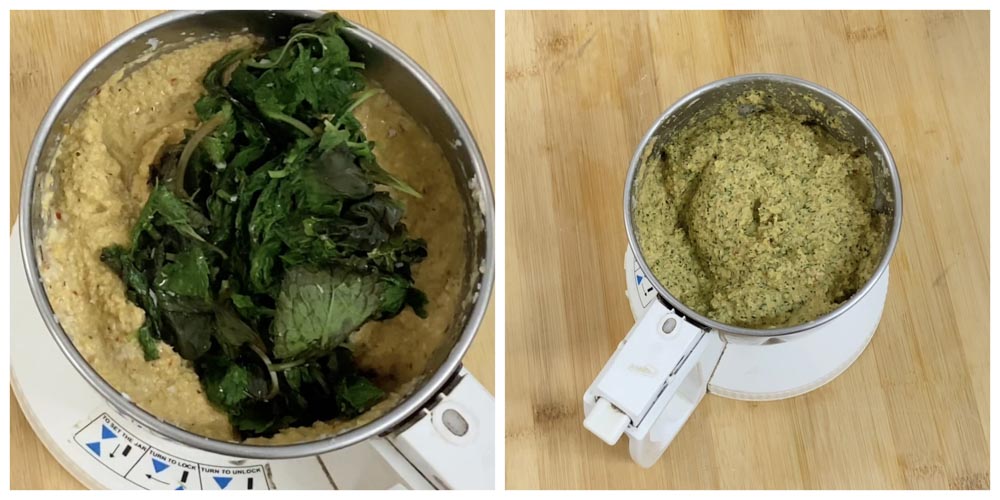
Now add in the mint leaves and grind the pudina thogayal briefly. Use the pulse mode / setting in the mixie and grind the pudina thogayal for a few seconds only. The green specks should still be visible.
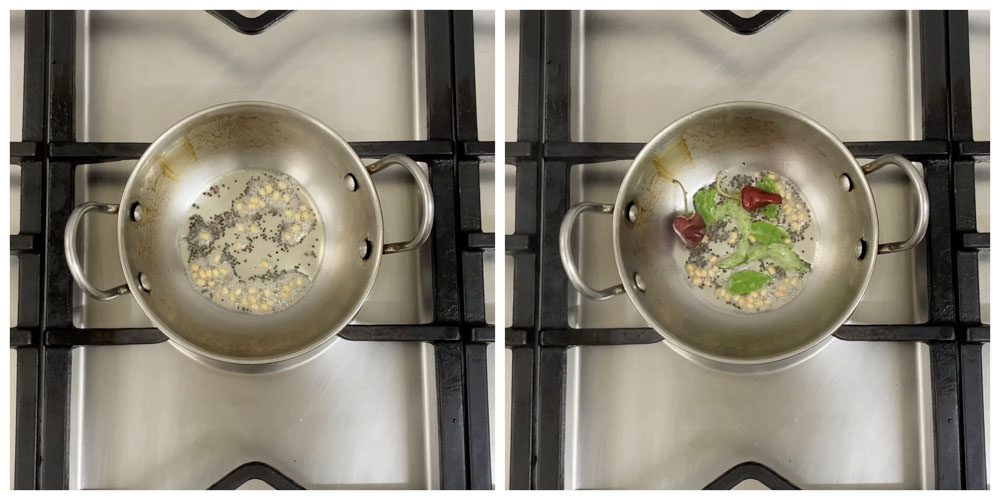
Tempering for the pudina thogayal Heat Indian sesame oil in a pan and add in the mustard seeds and urad dal. Let the mustard seeds crackle. Add in the curry leaves and dried red chillies. Saute for a few seconds.
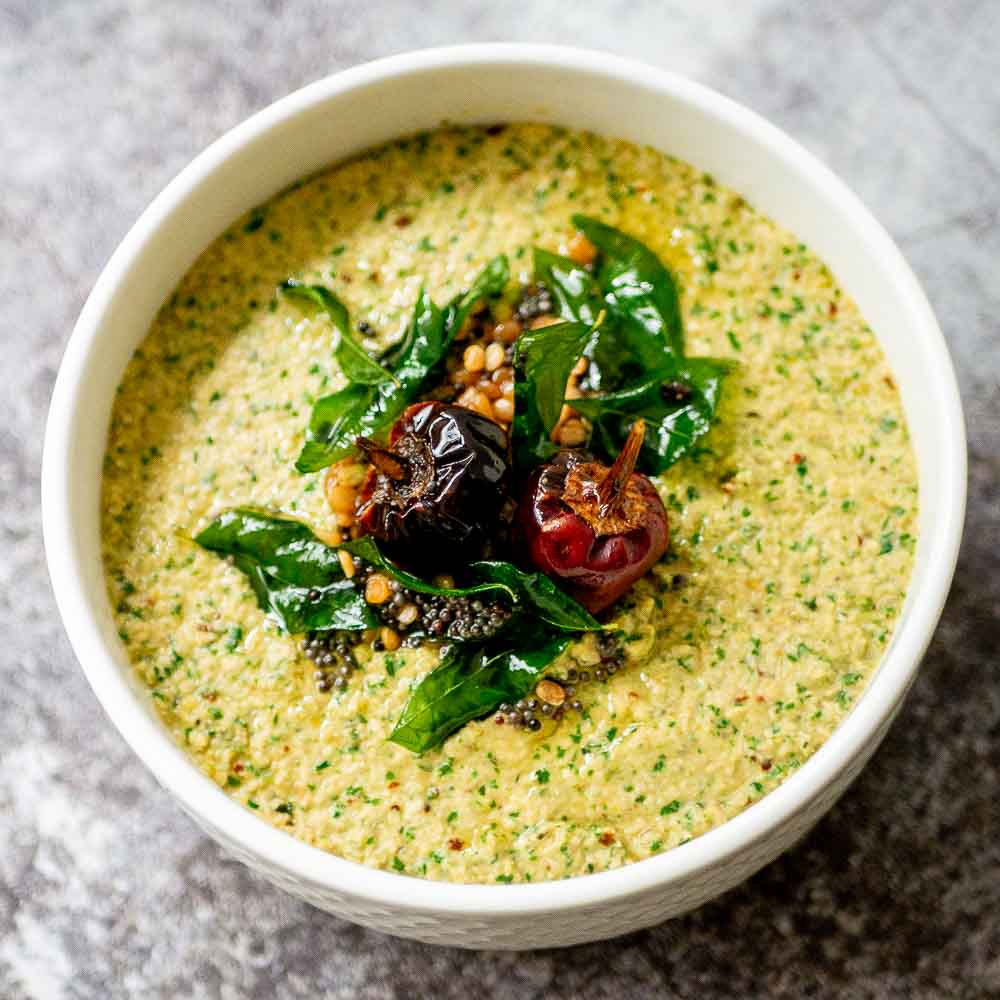
Add the tempering to the pudina thogayal. Serve the pudina thogayal / mint chutney with rice. This pudina thogayal tastes delicious served with rice and little ghee or Indian sesame oil.
Ingredients for making Pudina Thogayal
- 1 teaspoon Indian sesame oil
- 2 tablespoon white unpolished urad dal
- 2 tablespoon chana dal
- 4 dried red chillies
- 1 sprig curry leaves
- 1/2 inch piece tamarind
- 1/2 cup fresh coconut
- 3/4 teaspoon salt
- 1/2 teaspoon jaggery
- 1/2 cup water
- 2 cups mint leaves
Tempering for the Pudina Thogayal
- 1 teaspoon Indian sesame oil
- 1/4 teaspoon mustard seeds
- 1/4 teaspoon urad dal
- 1 sprig curry leaves
- 2 dried red chillies
Here is how to make Pudina Thogayal
Heat little oil in a pan and add in the urad dal and chana dal. Use unpolished lentils for this pudina thogayal recipe. Try to use unpolished dal as they are more healthy and minimally processed. Roast the lentils on a low flame till they are nice and golden. Low flame is key. If you cook on a high flame, the lentils might burn and the flavour of the pudina thogayal will not be very palatable.
Once the lentils are half done, add in the dried red chillies and the curry leaves. I have used Guntur chillies or the long dried red chillies for the recipe today. The Tamilnadu chillies / Gundu chillies also works well in this pudina thogayal recipe. Adjust the quantity of the chillies according to your taste. If you want a spicy pudina thogayal, add more chillies and vice versa. Saute for a few seconds. Add in the tamarind and the fresh shredded coconut. If you want to make the thogayal without coconut, just omit the coconut. The fresh coconut adds a nice richness and body to the pudina thogayal.
Add in the salt and Jaggery. The little jaggery is optional in this pudina thogayal. If you do not want to add jaggery, just omit it while making the pudina thogayal. Jaggery nicely rounds the flavour of the pudina thogayal. I love to add jaggery to my thogayal.
Remove the sauteed ingredients and set aside on a plate / mixie to cool. Add half a cup of water to the mixie and set aside to cool.
In the same pan, add in the cleaned and washed pudina leaves / mint leaves. Add only the leaves. The stems are very fibrous. Discard the stems. Saute for a few seconds until the mint leaves are wilted. Do not cook the mint leaves for long. The pudina thogayal will become bitter if the mint leaves are cooked for long. Remove the mint leaves and set aside to cool.
Now we will grind the sauteed ingredients to make pudina thogayal. Take a small mixie and add in the lentil mixture. Add in a little water and grind to a smooth paste. First we will grind the lentils and then we will grind the mint leaves. By doing so, the pudina thogayal will be a nice green colour with the green specks that are so good to look at and also the awesome taste. Now add in the mint leaves and grind the pudina thogayal briefly. Use the pulse mode / setting in the mixie and grind the pudina thogayal for a few seconds only. The green specks should still be visible.
Tempering for the pudina thogayal Heat Indian sesame oil in a pan and add in the mustard seeds and urad dal. Let the mustard seeds crackle. Add in the curry leaves and dried red chillies. Saute for a few seconds. Add the tempering to the pudina thogayal. Serve the pudina thogayal / mint chutney with rice. This pudina thogayal tastes delicious served with rice and little ghee or Indian sesame oil.
Author: Suguna Vinodh
This Pudina Thogayal recipe post from the archives has been updated and republished – June 2020.
Ingredients for making Pudina Thogayal
- 1 teaspoon Indian sesame oil
- 2 tablespoon white unpolished urad dal
- 2 tablespoon chana dal
- 4 dried red chillies
- 1 sprig curry leaves
- 1/2 inch piece tamarind
- 1/2 cup fresh coconut
- 3/4 teaspoon salt
- 1/2 teaspoon jaggery
- 1/2 cup water
- 2 cups mint leaves
Tempering for the Pudina Thogayal
- 1 teaspoon Indian sesame oil
- 1/4 teaspoon mustard seeds
- 1/4 teaspoon urad dal
- 1 sprig curry leaves
- 2 dried red chillies
Here is how to make Pudina Thogayal
Heat little oil in a pan and add in the urad dal and chana dal. Use unpolished lentils for this pudina thogayal recipe. Try to use unpolished dal as they are more healthy and minimally processed. Roast the lentils on a low flame till they are nice and golden. Low flame is key. If you cook on a high flame, the lentils might burn and the flavour of the pudina thogayal will not be very palatable.
Once the lentils are half done, add in the dried red chillies and the curry leaves. I have used Guntur chillies or the long dried red chillies for the recipe today. The Tamilnadu chillies / Gundu chillies also works well in this pudina thogayal recipe. Adjust the quantity of the chillies according to your taste. If you want a spicy pudina thogayal, add more chillies and vice versa. Saute for a few seconds. Add in the tamarind and the fresh shredded coconut. If you want to make the thogayal without coconut, just omit the coconut. The fresh coconut adds a nice richness and body to the pudina thogayal.
Add in the salt and Jaggery. The little jaggery is optional in this pudina thogayal. If you do not want to add jaggery, just omit it while making the pudina thogayal. Jaggery nicely rounds the flavour of the pudina thogayal. I love to add jaggery to my thogayal.
Remove the sauteed ingredients and set aside on a plate / mixie to cool. Add half a cup of water to the mixie and set aside to cool.
In the same pan, add in the cleaned and washed pudina leaves / mint leaves. Add only the leaves. The stems are very fibrous. Discard the stems. Saute for a few seconds until the mint leaves are wilted. Do not cook the mint leaves for long. The pudina thogayal will become bitter if the mint leaves are cooked for long. Remove the mint leaves and set aside to cool.
Now we will grind the sauteed ingredients to make pudina thogayal. Take a small mixie and add in the lentil mixture. Add in a little water and grind to a smooth paste. First we will grind the lentils and then we will grind the mint leaves. By doing so, the pudina thogayal will be a nice green colour with the green specks that are so good to look at and also the awesome taste. Now add in the mint leaves and grind the pudina thogayal briefly. Use the pulse mode / setting in the mixie and grind the pudina thogayal for a few seconds only. The green specks should still be visible.
Tempering for the pudina thogayal Heat Indian sesame oil in a pan and add in the mustard seeds and urad dal. Let the mustard seeds crackle. Add in the curry leaves and dried red chillies. Saute for a few seconds. Add the tempering to the pudina thogayal. Serve the pudina thogayal / mint chutney with rice. This pudina thogayal tastes delicious served with rice and little ghee or Indian sesame oil.
Author: Suguna Vinodh
Find it online : https://www.kannammacooks.com/pudina-chutney/
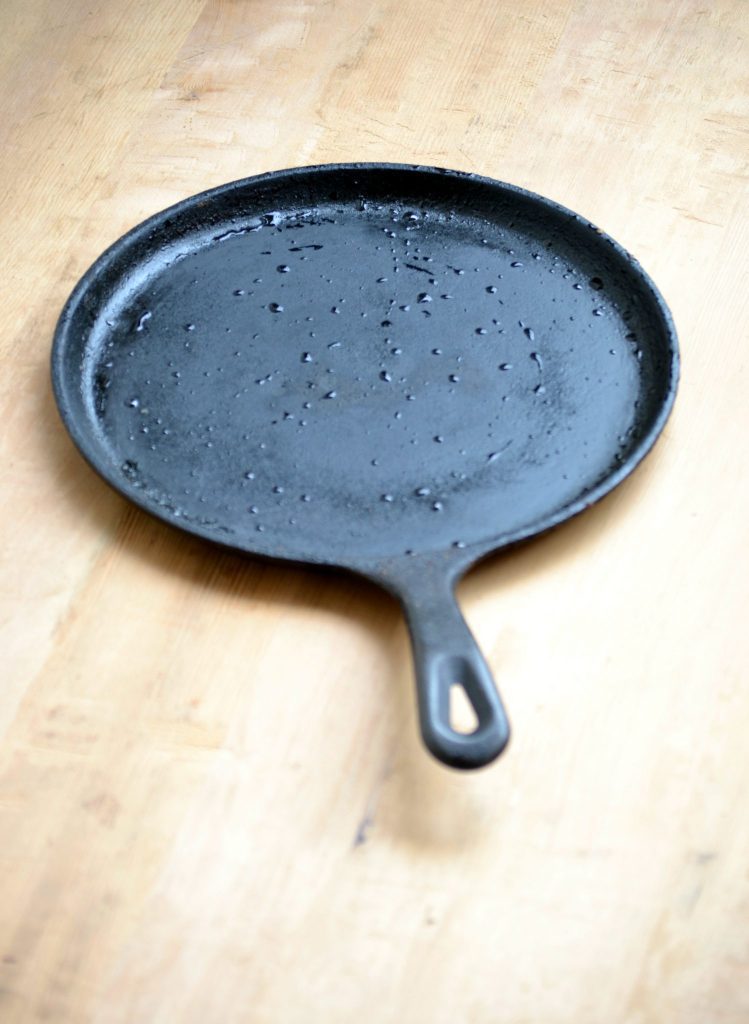
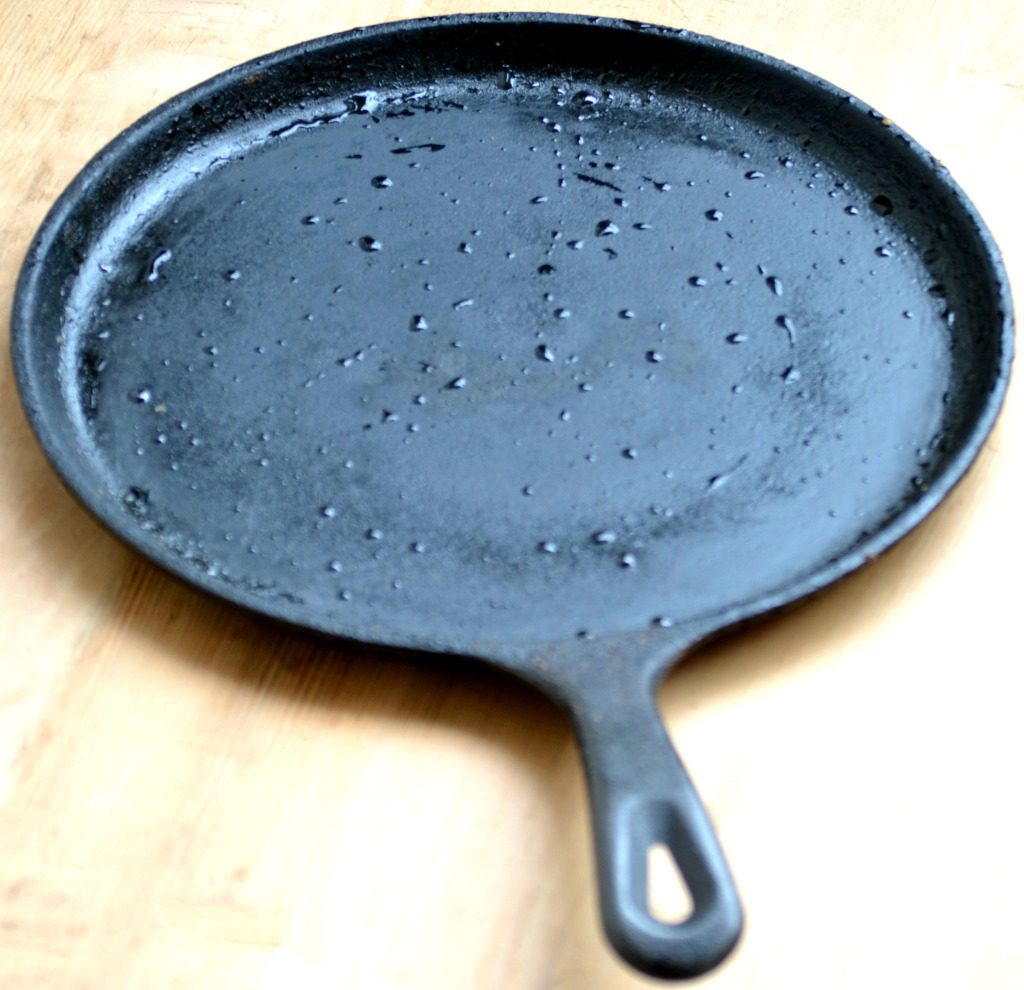
My ultimate comfort food has to be dosa. To me, nothing like a dosa from an iron pan. But many times iron pans just doesn’t work. Every household will have that worn out rusty dosa pans that they don’t use anymore. Its time to dust them as we are going to learn how to season them. Properly seasoned iron pan lasts a lifetime. Its durable. The older the pan gets with usage, better the pan gets. The surface of the pan becomes as good as no stick Teflon pans sans the toxins. Now lets get into business. Shall we?
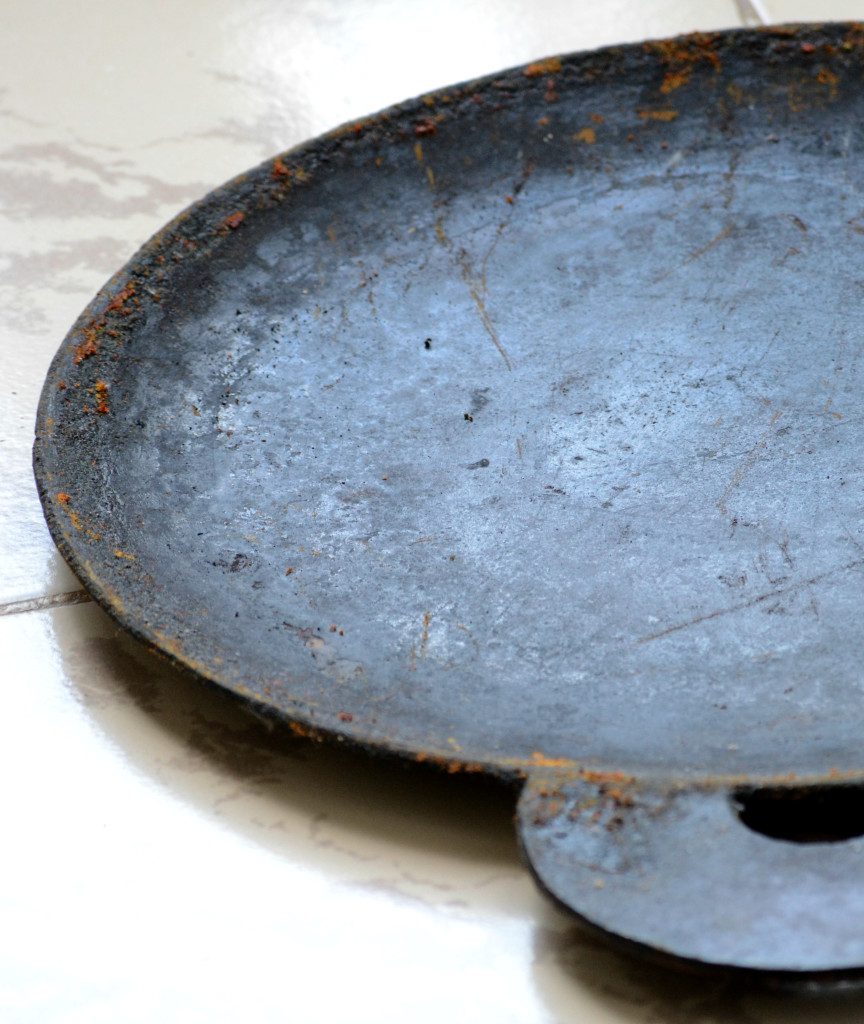
COLD WATER SOAK First step in seasoning a pan is a good cold water soak. All dosa pans need this as there can be a lot of accumulated dried gunk. When you look closely at a used dosa pan, you can notice a lot of scales around the rim. The goal of soaking is to try and soften the gunk.

Fill a wide bucket with cold water. Soak the iron pan in it. Make sure that its fully immersed. Leave it there for a good two hours. Some of the gunk would have softened by this time. You know now is the perfect time for? oh yes…Scrubbing…Soaking makes removing the dried up gunk easier.

SCRUBBING You will need a metal dish scrubber, dish soap and the soaked pan. Start scrubbing….Try to get rid of as much gunk as possible. Some of the scales might not go. Its ok. Its not going to do any harm. Wash and dry thoroughly. Give it two hours to dry. That is it. Stage two over.
HOT OIL SOAK This stage is where the magic happens. Lets talk about oil. When oil is heated to high temperatures on a metal surface, it polymerizes. when you heat oil on a metal surface for a long time, it breaks down. It becomes like goo. Most of the times the rim of the dosa pan will be scaly. It is because the rim never comes in contact with food (dosa batter in this case) and over the long run, the oil on the rim polymerizes, then dries into large flakes. Now, back in business. Apply oil generously to your pan and heat it on medium for a good ten minutes. It will smoke. So crank up that chimney. After 10 minutes switch off and rest the pan for one hour. Clean the oil which has now become goo with a paper napkin. Lets repeat again! Apply oil generously to your pan and heat it on medium for a good ten minutes. After 10 minutes, switch off and rest the pan for one hour. Clean the oil which has now become goo with a paper napkin. Lets repeat for one last time! Apply oil generously to your pan and heat it on medium for a good ten minutes. After 10 minutes switch off and rest the pan for one hour. Clean the oil which has now become goo with a paper napkin. Wash the pan with warm water. DO NOT USE SOAP. Your pan is seasoned and ready to rock.

Here are the rules after seasoning: Use only a sharp steel spatula to turn your dosa. No you wont harm the seasoned pan. Wooden spatulas do not work. I have my trusty fish turner which is my default dosa spatula. You need not wash your pan with soap after use everyday. Just a rinse with water and you are good to go. The seasoning forms on the pan everyday when you use it. Its called the “patina” – the natural oil coating that forms on the pan that provides the non stick qualities. So do not use soap to wash the pan once its seasoned. Soap will take the patina away. Just wash in warm water and slightly scrub if necessary.
Some people have had problems with the new cast iron pan. Here are some tips.
When you receive a new pan, Heat 2 tablespoon of coconut oil or gingely oil for 5 minutes on the pan. Remove from heat and let it cool. Wipe with a tissue and set aside. That is all you need to do.
Religiously, after each use, wash in water if necessary . Else, wipe off with a dry cloth and apply a teaspoon of cooking oil to the surface. Once in a while, apply cooking oil to the back of the pan too to avoid rusting.
Never heat the pan to smoking hot at any circumstances. # If the dosa is sticking in the initial days , mix one egg to 3 cups of dosa batter and make dosas. Do this for a week. The dosa pan will get super seasoned. # Cut an onion into half, and apply onto the hot pan with some oil before every dosa. # Do not wash after every use. Just a wipe with a wet tissue is enough. As we are heating the griddle every time, it gets sterilized. No need to wash each time. # Always apply oil after each use. Don’t forget. # Have a separate pan for dosa and chapati. # If for some reason your pan is ruined ( you made rotis and dosas are starting to stick), do the seasoning again. Heat 2 tablespoon of coconut oil or gingely oil for 5 minutes on the pan. Remove from heat and let it cool. Wipe with a tissue and set aside. That is all you need to do. # If you are watching your oil consumption and do not want to use oil for your dosas, here is what you can do. Take a tissue and wet it in some oil. After each dosa, slightly rub the tissue on the pan to cover it with a thin coat of oil so the dosas wont stick.
UPDATE: Recently I came across this dosa pan manufactured in Coimbatore by my school buddy Santosh. Its made in India and excellent alternative to Lodge pan. Proudly made in Coimbatore. It is 12 inches and really good for the home kitchen. Its friendly on the pocket too!
THE BEST GRIDDLE FOR DOSA
When it comes to cast iron skillets, it has to be Lodge. But it is expensive in India. I love love LODGE cast iron pans for many reasons. Lodge has been there for “100 years and still cooking . . .” . Its extremely durable and gets better with age. Lodge cast iron is easy to season and stays seasoned for a long long time if used regularly. The quality of dosas from an iron pan cannot be beat. I have the Lodge L9OG3 Pre-Seasoned Cast-Iron Round Griddle, 10.5-inch and couldn’t be more happier. I have had it for more than 5+ years now and its still running strong thousands of dosas later. HERE IS WHERE YOU CAN BUY THIS PAN Winner winner dosa dinner!