
I have a confession to make. I don’t eat yogurt. I can never touch that stuff. Its a childhood aversion that continues to this day. So no curd rice and no pickle for me. I am happy I told it to you. But, but do not judge me ok. I know you wont. Thank you! This Green Peppercorn Pickle made with young peppercorn is marinated in a brine. Its sour, hot and delicious. I love to chop them and use it in omelettes and sandwiches. Its perfect with curd rice too. This is Vinodh’s sister Padma Akka’s favorite pickle. This is her recipe. This recipe is very popular in the Palakkad region near Coimbatore. This is a very simple recipe with just 3 ingredients. Green peppercorns, lemon juice and salt. That is it. You mix everything and wait for it to mature. Waiting is the hardest part and as with any pickle, it gets better as they age.

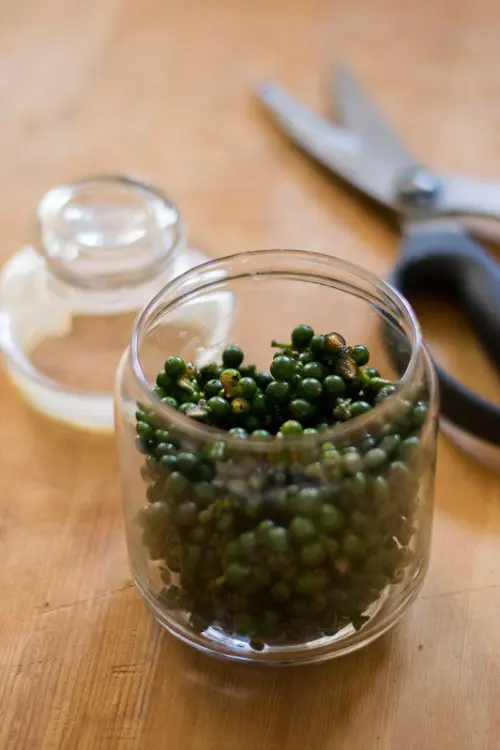
Here is to how to do an awesome green peppercorn pickle. Use only a glass or a ceramic jar for making this recipe. Metals and plastic containers tend to react to the pickle and hence using them is not recommended.
Wash and dry the green peppercorn.
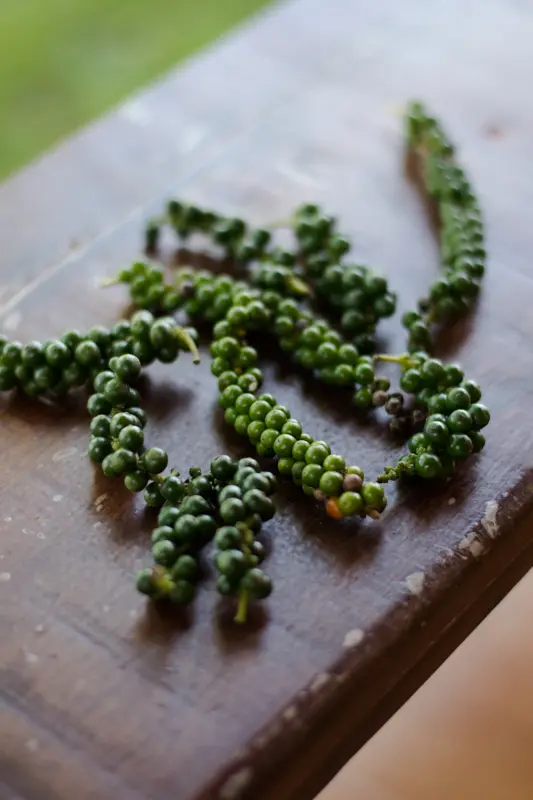
Cut the pepper into small strips. Cut them along with the stem. Do not remove the stem. Cut them about 1 to 1.5 inch in size. I used about 150 grams of green peppercorn today.
Add in the juice of 10 Indian Lemons. The juice should cover all the peppercorn in the bottle.

Add in 1/4 cup of salt.

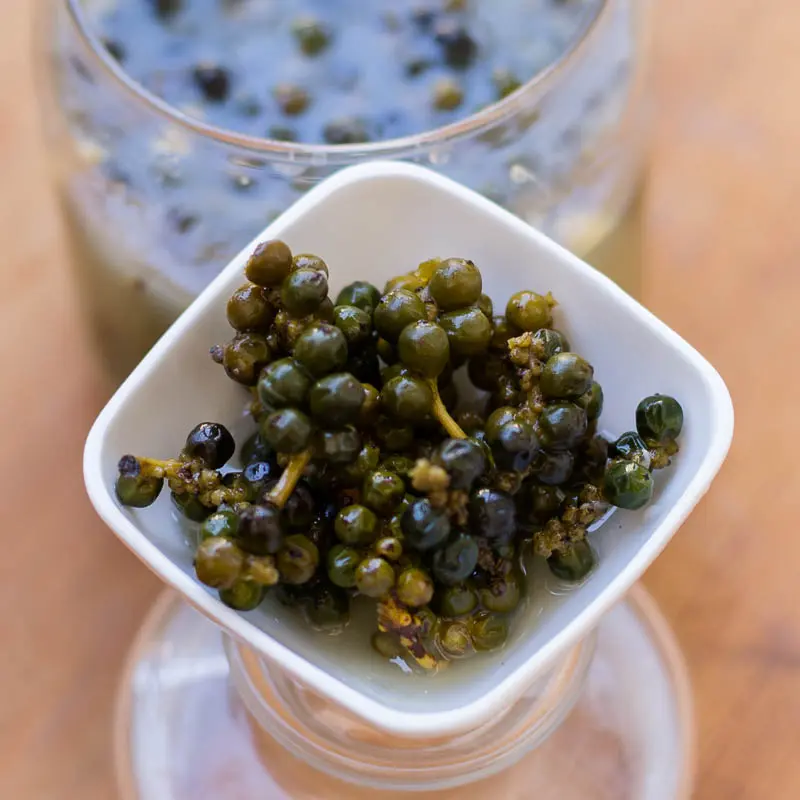
Cover the bottle with a lid and shake well. Set aside. Shake the bottle once everyday for the next 10 days. You can start consuming the pickle after that. Its yum!

Use it as an accompaniment for curd rice. Chop them coarsely and add it to your salads, omelettes, sandwiches etc…

- 150 grams green peppercorn with stem
- 10 Indian Lemons
- 1/4 cup Salt
- Wash and dry the green peppercorn.
- Cut the pepper into small strips.Cut them about 1 to 1.5 inch in size.
- Add in the juice of 10 Indian Lemons. The juice should cover all the peppercorn in the bottle.
- Add in 1/4 cup of salt.
- Cover the bottle with a lid and shake well. Set aside. Shake the bottle once everyday for the next 10 days. You can start consuming the pickle after that. Its yum!
- Author: Kannamma - Suguna Vinodh
- Prep Time: 240 hours
- Category: Pickles
- Cuisine: Tamilnadu - Kongunad
Find it online : https://www.kannammacooks.com/green-peppercorn-pickle-kurumilagu-oorugai-recipe/

My aunt Sarasu Athama told this story behind today’s chola paniyaram recipe. Long long time ago……. Whenever there was sorghum paniyarams for breakfast, my uncle Kandasamy Abba would always complain to my aunt Sarasu athama that his wife Perur athama was making bad sorghum paniyarams. He used to say that even her paniyarams were equally bad. He said that he liked his sisters paniyarams much better and both of them could never make food like her sister. Both my aunts denied the case vehemently (what else did you expect) saying that his sister used a lot of oil and that was the reason her paniyarams tasted better. This drama continued for a long time. Kandasamy Abba’s sisters name is also Sarasu. So my Sarasu athama had gone for breakfast to the other Sarasu athama’s house one day and guess what? She was making Chola Paniyaram for breakfast. Sarasu athama found out the secret of good chola paniyarams from her that day. She now laughs at the whole thing saying how furious they would get if someone compared their food with another. Particulary that too with the food of MIL or SIL. Coming back to the secret. The secret was that the fermented batter was not to be mixed after fermentation. The batter will be well aerated and bubbly once fermented. So taking the aerated batter without mixing much and ladling into the pan was the key to fluffy and airy sorghum paniyarams. Such a simple but great technique. Ever since, all athamas are making super duper paniyarams. Here is a wonderful recipe for my aunt’s sorghum paniyaram. I wont eat something just because its healthy. I need flavour. Here is a list of millet recipes to check out .
English – Sorghum , Hindi – Jowar, Tamil – Cholam, Telugu – Jonna, Kannada – Jola, Malayalam- Cholum
Wash the Cholam/Sorghum in running water 2-3 times to get rid of the dirt and any husk. Now soak it in lots of water for 8-10 hours. Soak the urad dal and fenugreek seeds in water separately. You can also do 50:50 sorghum and rice for a softer paniyaram.

After the soaking, we need to grind them. Drain the water from urad dal and fenugreek seeds. Grind it to a very fine paste. Add up to half a cup of water while grinding. Set aside.

Now lets grind the Cholam/Sorghum. Drain the water from the Sorghum and add it to the mixie/blender. To this, add shallots (small onions), dried red chillies, cumin seeds, Salt and curry leaves. Add about 1 to 1.5 cups of water and grind to a paste. Do not grind it to a smooth paste. The texture should be that of coarse sooji rava / semolina. Once ground, remove the mixture and set aside.

Mix the Sorghum mixture and urad dal mixture well to combine.
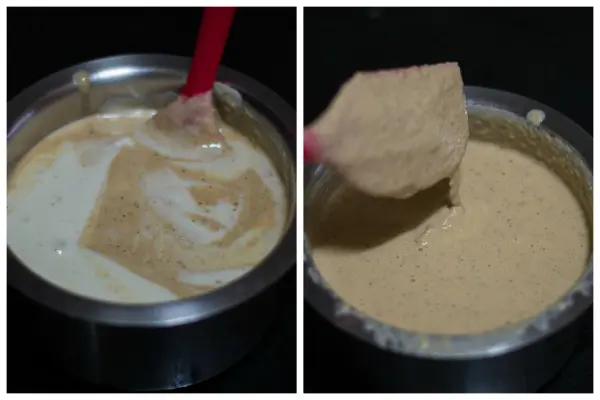
Now cover the batter with a lid and allow it to ferment in a warm place. This sorghum batter usually ferments slowly than idli/dosa batter. Usually in summer, it will take about 8-10 hours to ferment. Its winter here in Bangalore and it took almost 24 hours for my batter to ferment. So do not hurry. Wait for the batter to ferment completely. After fermentation, the batter would have risen a little (it will rise more if you live in a hot place) and will be very bubbly. Do not mix the batter. That’s the key as lots of bubbles would have formed and that aerated batter is what makes the paniyaram fluffy. So keep that spatula away.

After fermentation, the batter is ready for making paniyaram. If you will not use the batter immediately, store in the refrigerator for up to a day. Its time to make paniyaram. Heat a paniyaram pan until hot. Add in 1/4 teaspoon of oil (be generous with the oil) to each of the mold and set the pan on low flame. Sorghum takes time to cook. High heat will burn the paniyarams. So low heat is also key to get crispy paniyarams. Ladle the paniyaram batter to the pan. Drop the batter gently to fill the mold. Cook for a minute. Then turn and cook on the other side. Turn again if necessary to make sure the paniyaram is evenly cooked on both sides and its nicely golden in colour. The outer skin will crisp up nicely.

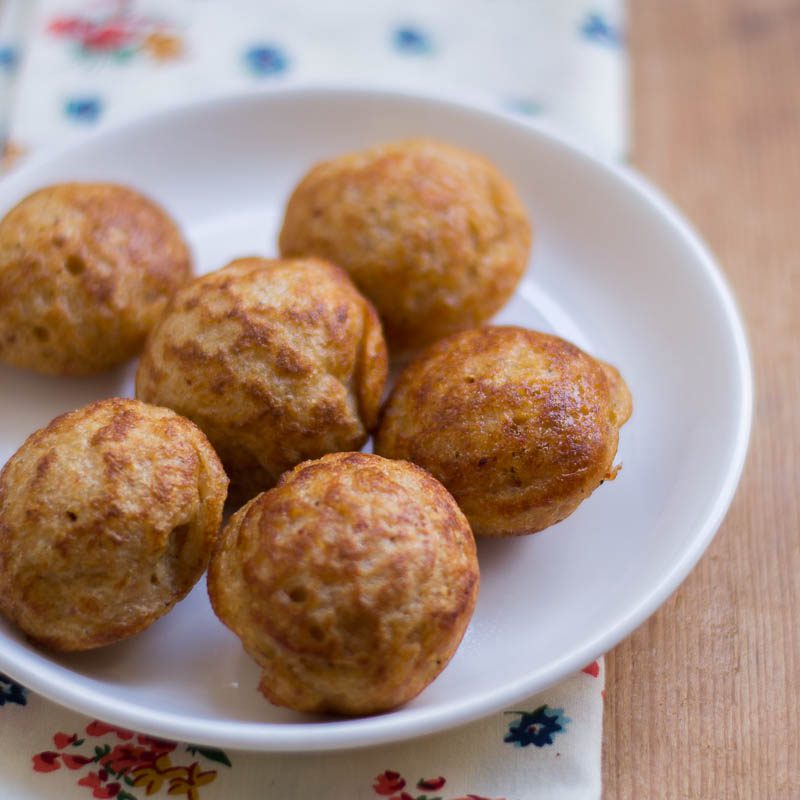
The paniyaram is ready if it has become crispy and golden on both sides.
- 1 Cup Cholam / Sorghum
- 1 cup idli rice (optional) – makes crispy paniyarams
- 1/2 Cup Whole Urad Dal
- 1/4 teaspoon fenugreek seeds
- 10 shallots / small onions
- 3 Dry Red Chillies
- 1 teaspoon Salt
- 1 teaspoon Cumin Seeds
- 1 sprig Curry Leaves
- Wash the Cholam/Sorghum in running water 2-3 times. Soak it in lots of water for 8-10 hours. soak the rice along if using. Soak the urad dal and fenugreek seeds in water separately.
- Drain the water from urad dal and fenugreek seeds. Grind it to a very fine paste. Add upto half a cup of water while grinding. Set aside.
- Drain the water from the Sorghum and add it to the mixie/blender. To this, add shallots, dried red chillies, cumin seeds, Salt and curry leaves. Add about 1 to 1.5 cups of water and grind to a paste. Do not grind it to a smooth paste. The texture should be that of sooji rava / semolina. Once ground, remove the mixture and set aside.
- Mix the Sorghum mixture and urad dal mixture and mix well to combine.
- Now cover the mixture with a lid and allow it to ferment in a warm place.
- After fermentation, the batter would have risen a little (it will rise more if you live in a hot place) and will be very bubbly. Do not mix the batter.
- Heat a paniyaram pan until hot. Add in 1/4 teaspoon of oil to each of the mold and set the pan on low flame. Ladle the paniyaram batter to the pan. Cook for a minute. Then turn and cook on the other side.
- The paniyaram is ready if it has become crispy and golden on both sides.
- Author: Kannamma - Suguna Vinodh
- Prep Time: 24 hours
- Cook Time: 20 mins
- Category: Breakfast
- Cuisine: Coimbatore, Tamilnadu, South Indian

