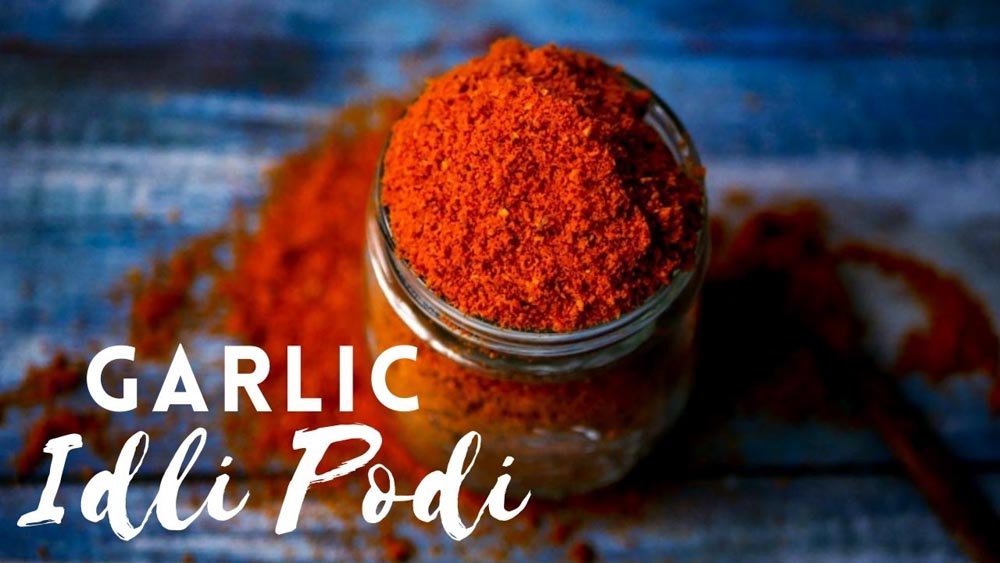
Recipe for Garlic Idli Podi / Garlic Chutney Powder. A spicy and tangy idli podi that is so addictive that one always goes for more. Recipe with step by step pictures and video.
We are fans of idli podi at home and here are other idli podi recipes from the site. Chutney Powder / Idli Powder Recipes
This garlic chutney podi is my son’s absolute favorite. He is obsessed so much with this podi. He has idli and dosai only with podi, rejecting the chutney and the sides these days. This is such a delicious chutney with a dash of spicy, tangy and faintly sweet on every single bite. This idli podi takes about half an hour to make and I promise that your patience will be rewarded. There are about 11 ingredients (The dream 11 of idli podi world) in this recipe and each of the ingredient is roasted and ground to perfection.
Here are few pointers you might want to read. 1.Dry roast all the ingredients on a low flame. Slow roasting the ingredients brings out the best texture and flavour. 2.Grind the lentils first, then mix in the roasted seeds and garlic and grind again. If everything is ground together, the seeds tend to leave out oil and the mixture does not grind well. Since the garlic is ground at last along with the seeds and the lentil powder, there will be no moisture left. The lentil powder absorbs the excess moisture and the garlic gets ground fine. Do not overload the mixie while grinding. Always grind in batches and an Indian heavy duty mixie is preferred for making this recipe. Here are the Indian mixie that I recommend Panasonic Mixie Bosch Mixie
Here is the video of how to make Garlic Idli Podi / Garlic Chutney Powder.
Here is how to do Garlic Idli Podi / Garlic Chutney Powder.
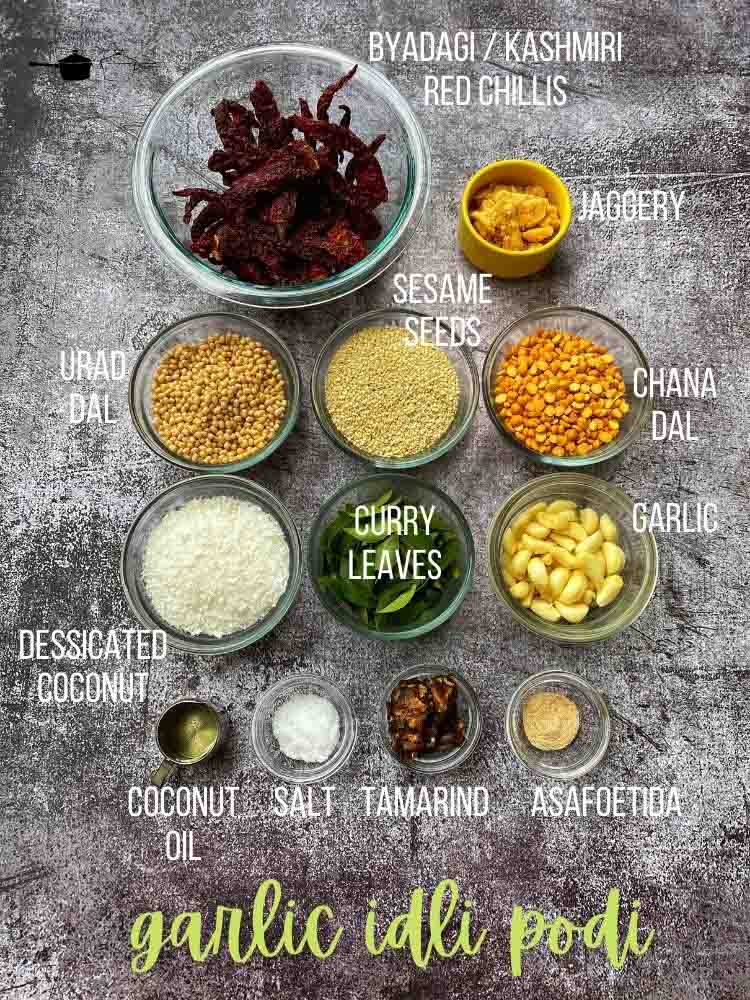
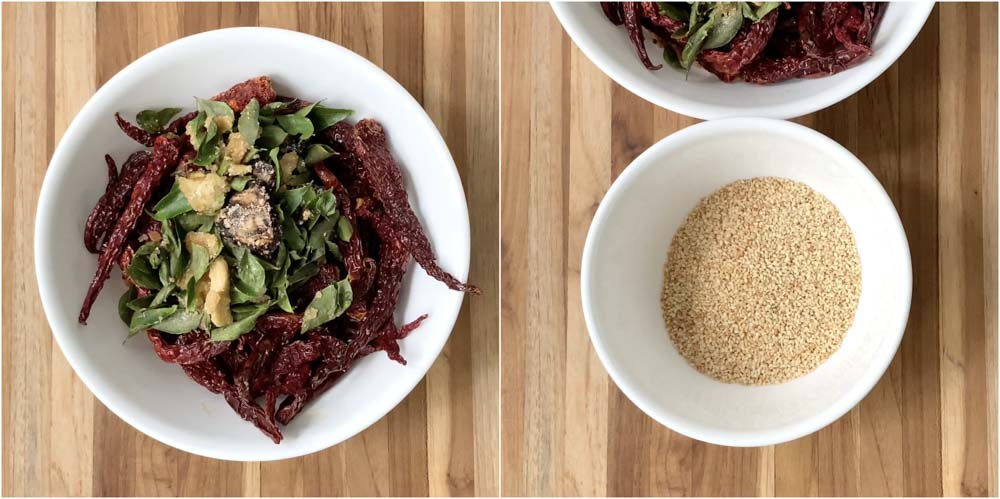
Here is what you will need
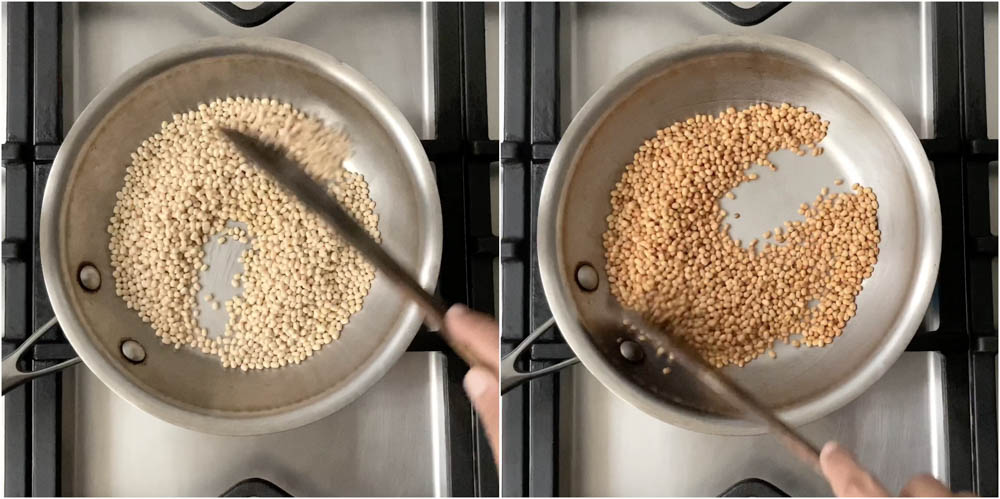
We will be dry roasting all the lentils separately so the lentils get evenly roasted. Add in 1/4 teaspoon of coconut oil and whole unpolished white urad dal. Use unpolished urad dal for best results. I like this particular brand of urad dal . Sauté on a low flame till the urad dal is golden. Set aside on a plate to cool.
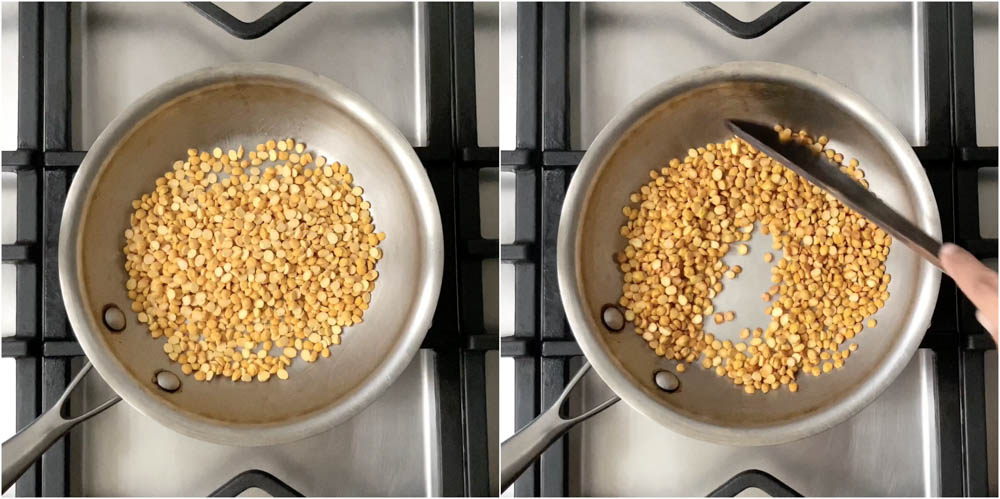
In the same pan, heat 1/4 teaspoon of coconut oil in a pan and add in the chana dal. Roast the chana dal on a low flame till the lentils are golden. Keep sautéing to avoid burning. Have patience and roast slow until the aroma comes and the dal turns color. Remove from the pan once the dal is golden. Set aside on a plate to cool.
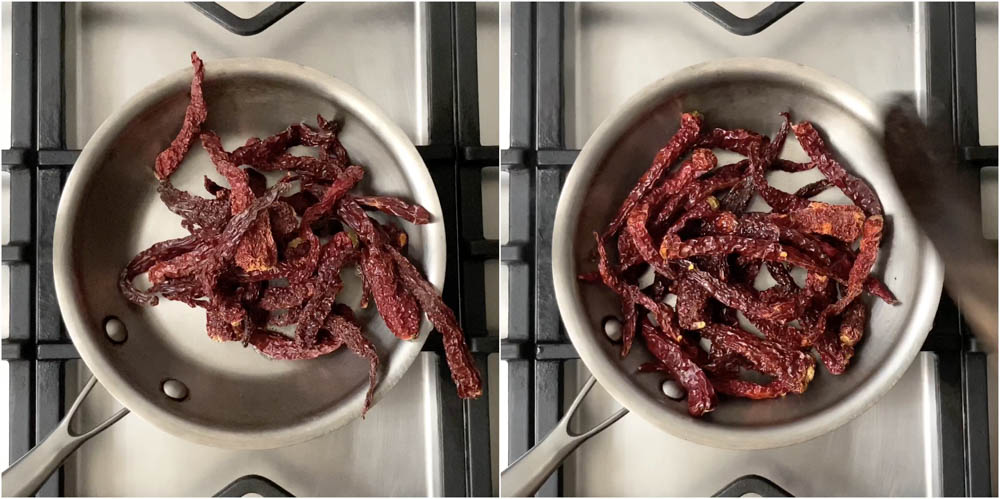
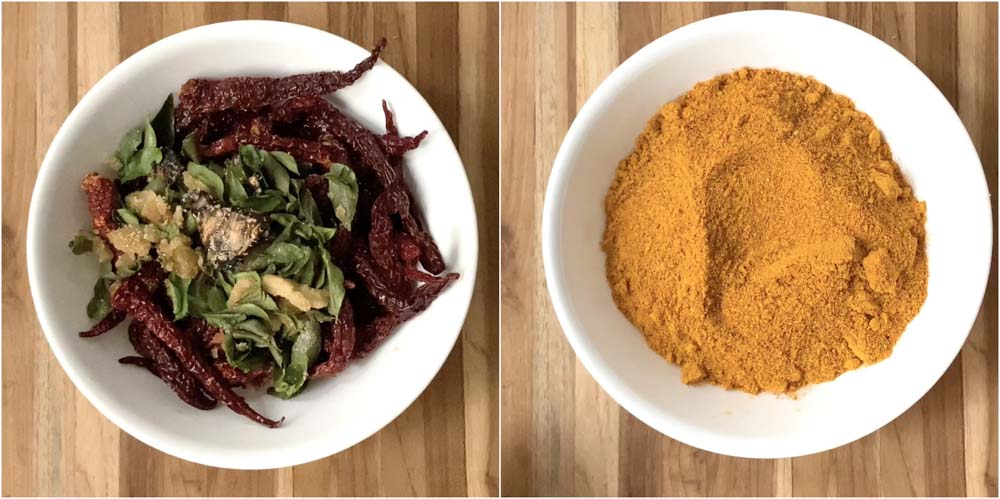
In the same pan, add in a teaspoon of coconut oil. Add in the Byadagi chillies / Kashmiri red chillies. I like to add the Byadagi chillies as it gives the idli podi a robust color and aroma. Sauté for a few seconds. The chillies will fluff up. Remove the chillies and set aside on a plate to cool. Do not fry the chillies for long.
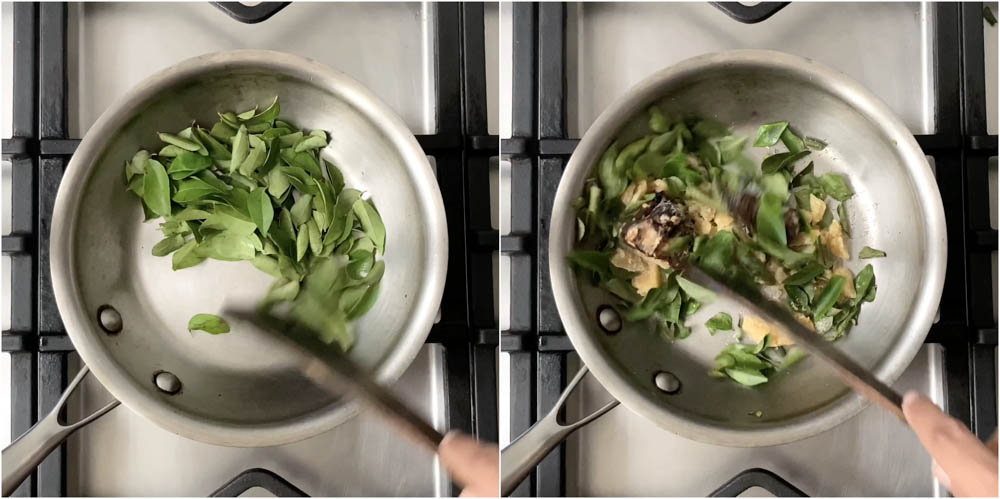
In the same pan add in the curry leaves. Sauté till the curry leaves turn crisp and dry. Add in the asafoetida, tamarind and the salt. Fry for a few seconds. Finally add in the jaggery on top of the hot mixture. Remove the mixture from heat and set aside on a plate to cool.
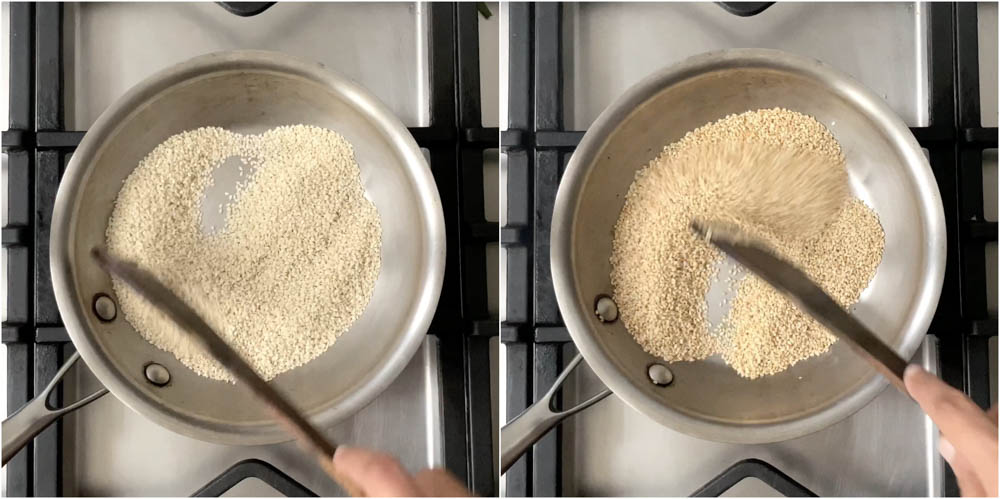
In the same pan, add in the white sesame seeds. Dry roast the seeds till it slightly changes color and starts to pop. Set aside on * separate * plate to cool.
From now on, we will add the roasted ingredients to a separate bowl as we will be grinding separately.
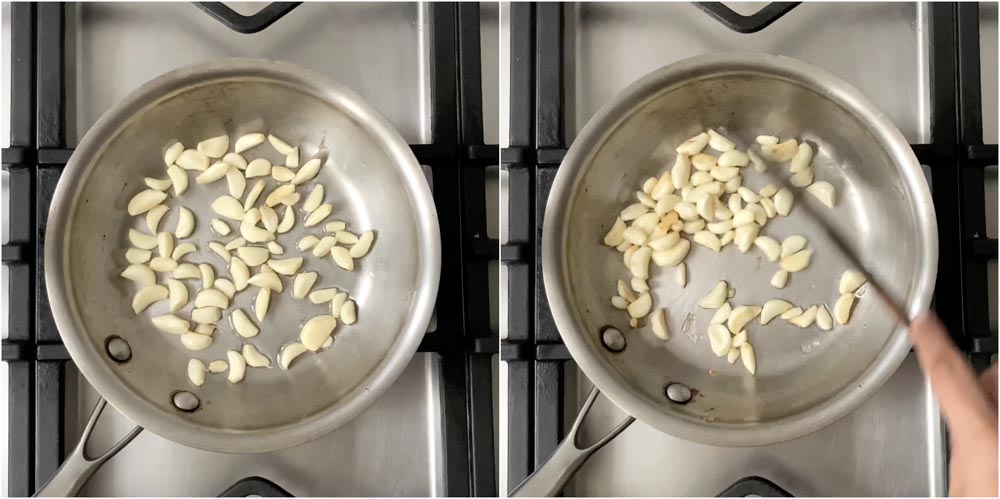
In the same pan, add in a teaspoon of coconut oil and add in 50 grams of peeled garlic. Saute on a low flame till the garlic is charred on the edges. Set aside.
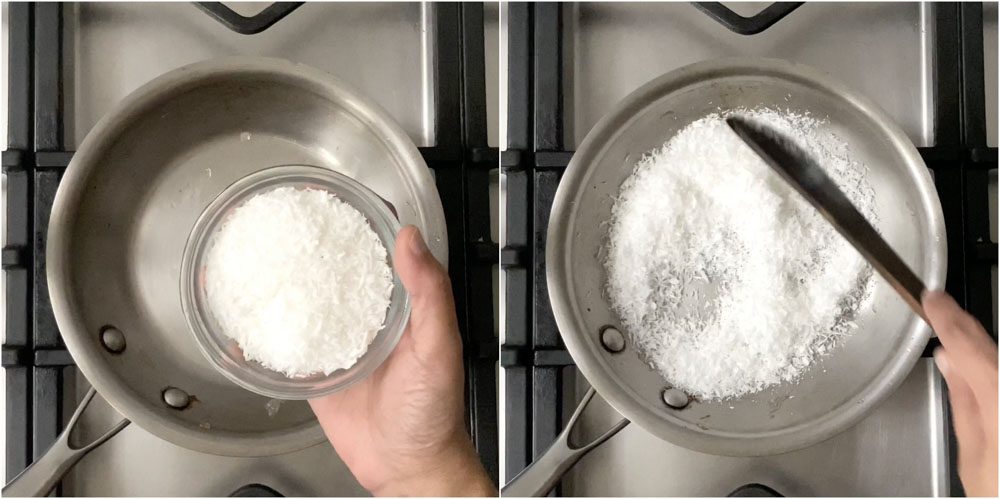
In the same pan, dry roast the desiccated coconut. Sauté for a few seconds. Coconut tends to fry very fast. Since the pan is hot, it should take only few seconds for the coconut to roast. All eyes on the pan. Remove the fried coconut and set aside on a plate to cool.
Now, lets grind. WORD OF CAUTION: Do not grind everything together. Ingredients like coconut and sesame will give away oil if ground for long. Garlic needs to be added after the lentils are ground.
Take a mixie jar and add in the dal-chilli mixture. Grind to a fine powder. The important thing is to grind the mixture in batches. Grinding in batches does not heat up the mixie due to overloading and the mixture gets ground to a fine texture too.
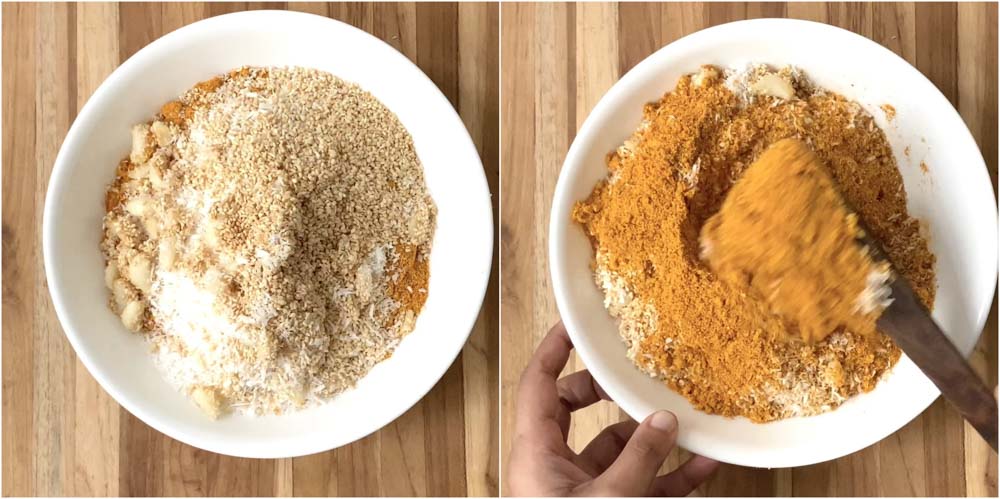
To the powder, add in the sesame, coconut and garlic. Mix well to combine. Grind again in batches to desired consistency. Again, do not overload the mixie.
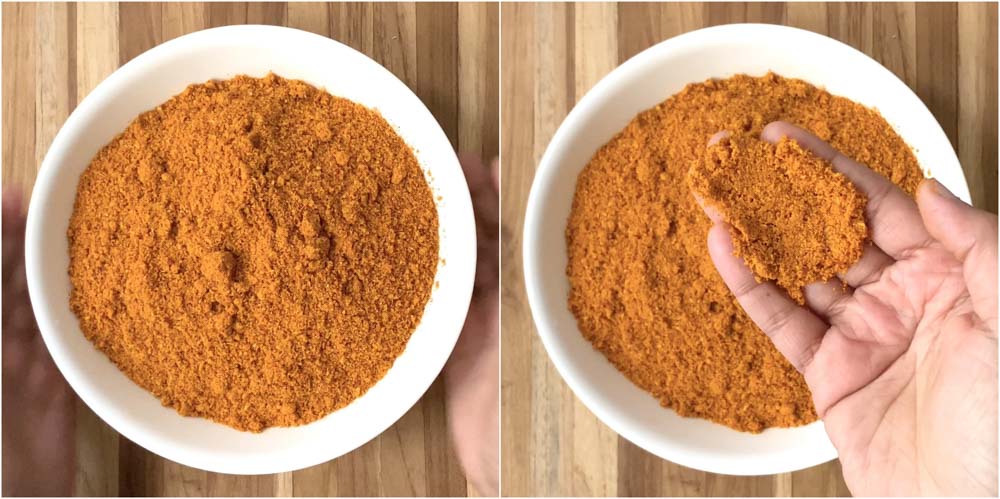
Empty the contents of the mixie to a big bowl and let it completely cool. Store the idli podi in an air tight container and use within a month. For longer storage, store in the freezer. The podi stays fresh for months in the freezer.

This idli podi is super addictive and delicious. Definitely do try at home.
1 tablespoon coconut oil (divided) 1/2 cup chana dal 1/2 cup unpolished white whole urad dal 1/2 cup white sesame seeds 1/2 cup dessicated coconut 1/2 cup curry leaves 1/2 teaspoon asafoetida 15 - 25 Byadagi Chillies / Kashmiri Red Chillies (Use more or less according to your taste) 50 grams peeled garlic cloves (w eight after peeling) 40 grams jaggery 25 grams tamarind 1 teaspoon salt
Add in 1/4 teaspoon of coconut oil and whole unpolished white urad dal. Use unpolished urad dal for best results. Set aside on a plate to cool. In the same pan, heat 1/4 teaspoon of coconut oil in a pan and add in the chana dal. Roast the chana dal on a low flame till the lentils are golden. Keep sautéing to avoid burning. Remove from the pan once the dal is golden. Set aside on a plate to cool.
In the same pan, add in a teaspoon of coconut oil. Add in the Byadagi chillies / Kashmiri red chillies. I like to add the Byadagi chillies as it gives the idli podi a robust color and aroma. Sauté for a few seconds. The chillies will fluff up. Remove the chillies and set aside on a plate to cool. Do not fry the chillies for long.
In the same pan add in the curry leaves. Sauté till the curry leaves turn crisp and dry. Add in the asafoetida, tamarind and the salt. Fry for a few seconds. Finally add in the jaggery on top of the hot mixture. Remove the mixture from heat and set aside on a plate to cool.
In the same pan, add in the white sesame seeds. Dry roast the seeds till it slightly changes color and starts to pop. Set aside on separate plate to cool.
In the same pan, add in a teaspoon of coconut oil and add in 50 grams of peeled garlic. Saute on a low flame till the garlic is charred on the edges. Set aside.
In the same pan, dry roast the desiccated coconut. Sauté for a few seconds. Coconut tends to fry very fast. Since the pan is hot, it should take only few seconds for the coconut to roast. All eyes on the pan. Remove the fried coconut and set aside on a plate to cool.
Take a mixie jar and add in the dal-chilli mixture. Grind to a fine powder. The important thing is to grind the mixture in batches. Grinding in batches does not heat up the mixie due to overloading and the mixture gets ground to a fine texture too.
Empty the mixie jar to a bowl. To the powder, add in the sesame, coconut and garlic. Mix well to combine. Grind again in batches to desired consistency. Again, do not overload the mixie.
Empty the contents of the mixie to a big bowl and let it completely cool. Store the idli podi in an air tight container and use within a month. For longer storage, store in the freezer. The podi stays fresh for months in the freezer.
- Author: Suguna Vinodh
- Prep Time: 10m
- Cook Time: 20m
Find it online : https://www.kannammacooks.com/garlic-chutney-powder/
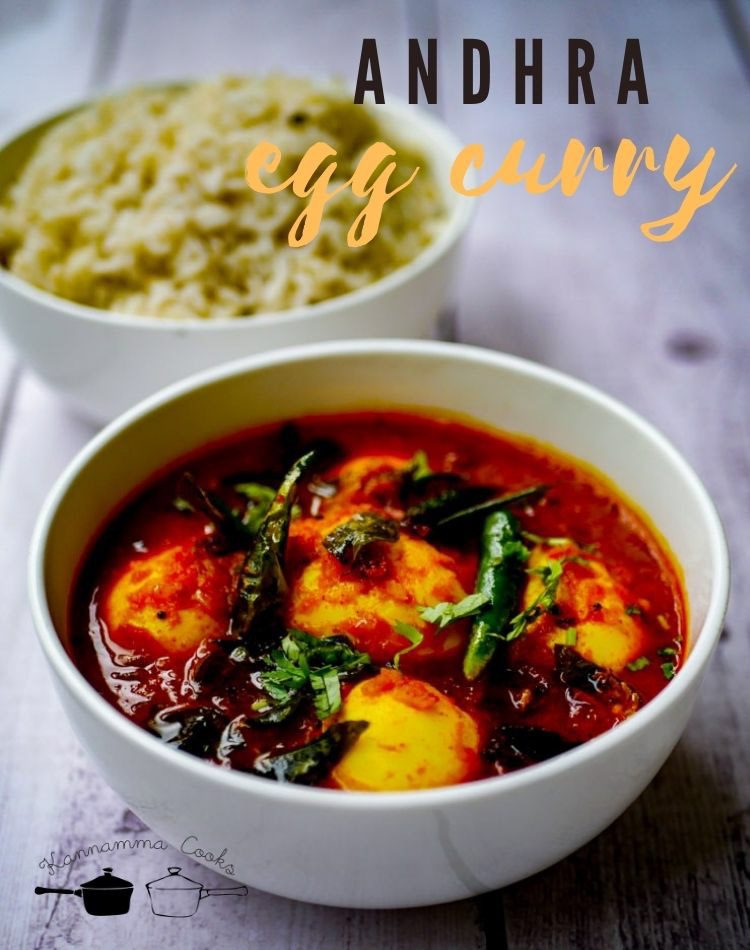
Recipe for Spicy Andhra egg curry made with boiled eggs. Tomato and tamarind based egg curry recipe. Easy and simple egg curry for rice. Recipe with step by step pictures and video.
Here are other egg recipes from the site Egg Recipes
Here is the video of how to make Andhra Egg Curry – Kodi Guddu Pulusu Recipe
Here is how to make Andhra Egg Curry – Kodi Guddu Pulusu Recipe

Frying the Eggs First step in making the Andhra Egg Curry – Kodi Guddu Pulusu is to fry the eggs. Take a fork and poke some holes on the boiled eggs. The holes will allow the masala to penetrate into the eggs. Set aside. To know how to boil perfect eggs, check the link here.
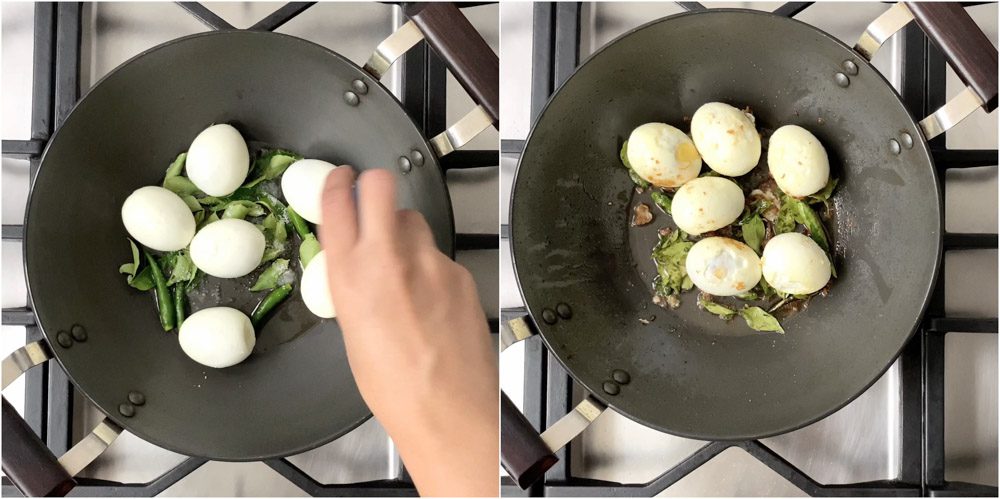
Heat oil in a pan and add in the curry leaves and the green chillies. Add in the eggs and the salt. After adding the eggs, do not move the eggs or disturb the eggs for a minute. The outer layer will tear. Allow the outer layer of the eggs to brown and crisp up. Move the eggs after a minute and let it slightly crisp up on all sides.
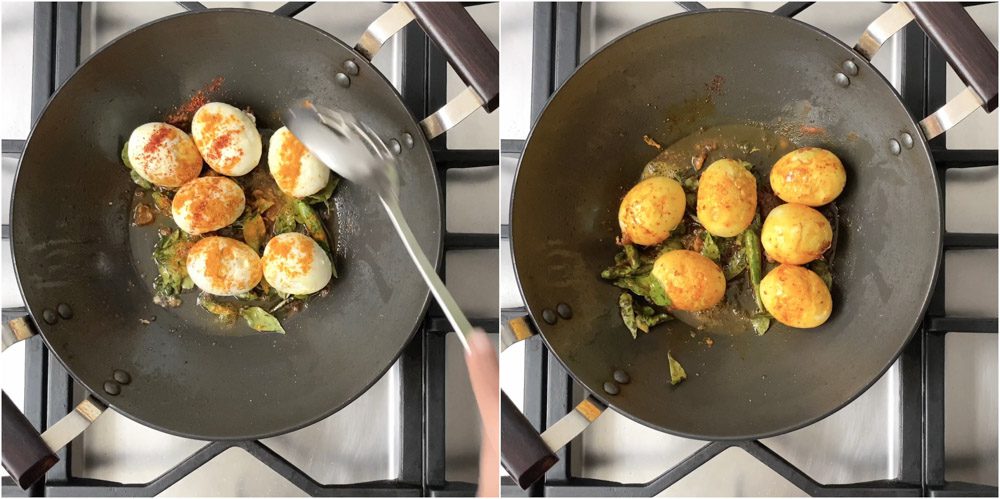
Add in the turmeric powder and red chilli powder. Fry for a minute. Remove the eggs onto a plate and set aside. The crisped up curry leaves and the fried green chillies can be used as a garnish in the end when plating the recipe. The crisped up curry leaves are very tasty.
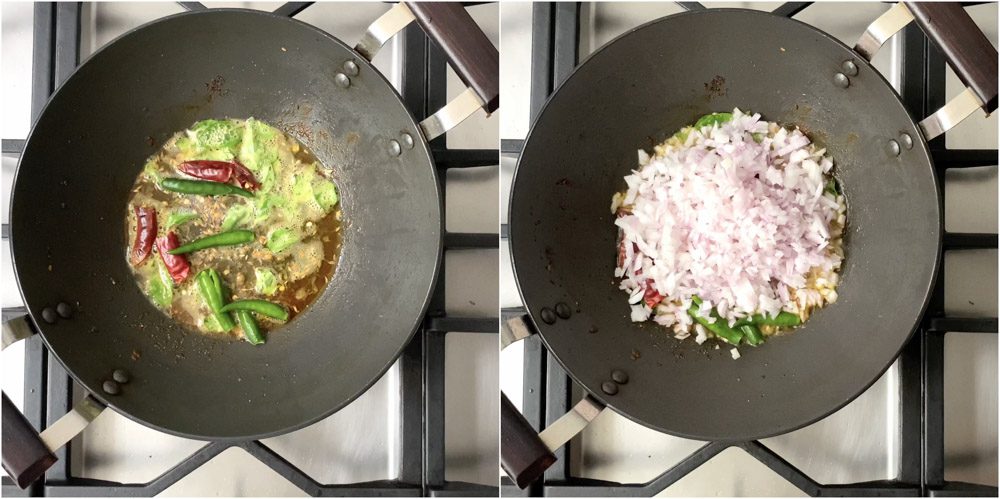
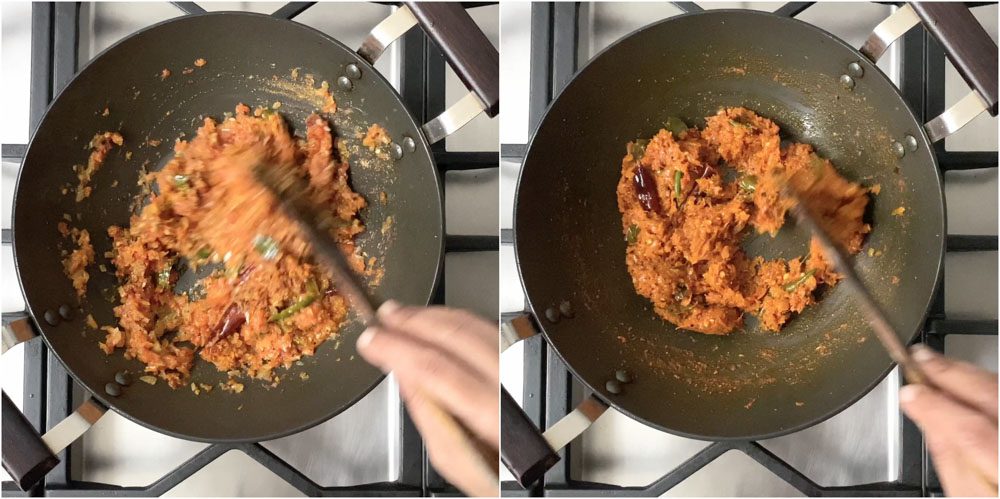
Making the Andhra Egg Curry – Kodi Guddu Pulusu Recipe In the same pan, add in some more oil. Add in the fenugreek seeds. Do not add a lot of fenugreek seeds as the curry will become bitter. Add in the mustard seeds, cumin seeds, curry leaves, red chillies and the green chillies. Add in the finely chopped onions.
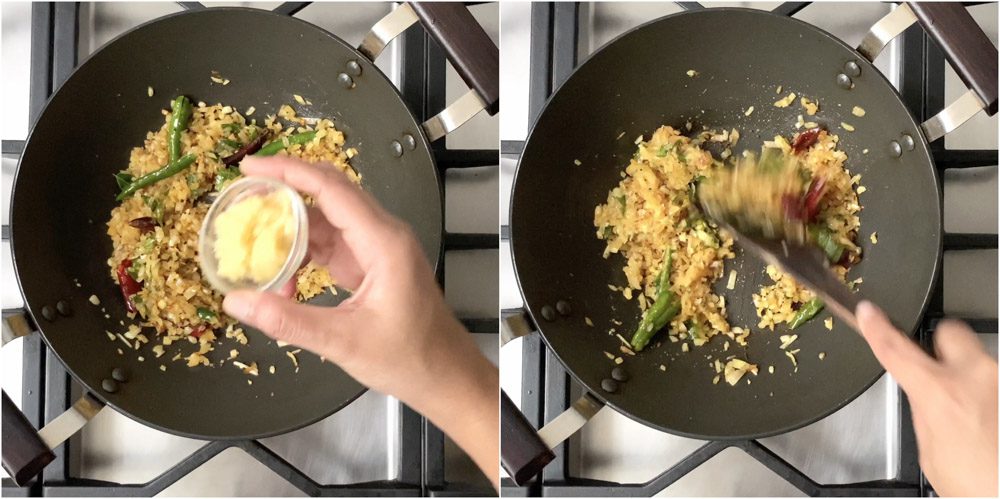
Sauté the onions till the onions are soft. It will take about 5-7 minutes on a medium flame. Add in the ginger garlic paste and sauté for a few minutes.
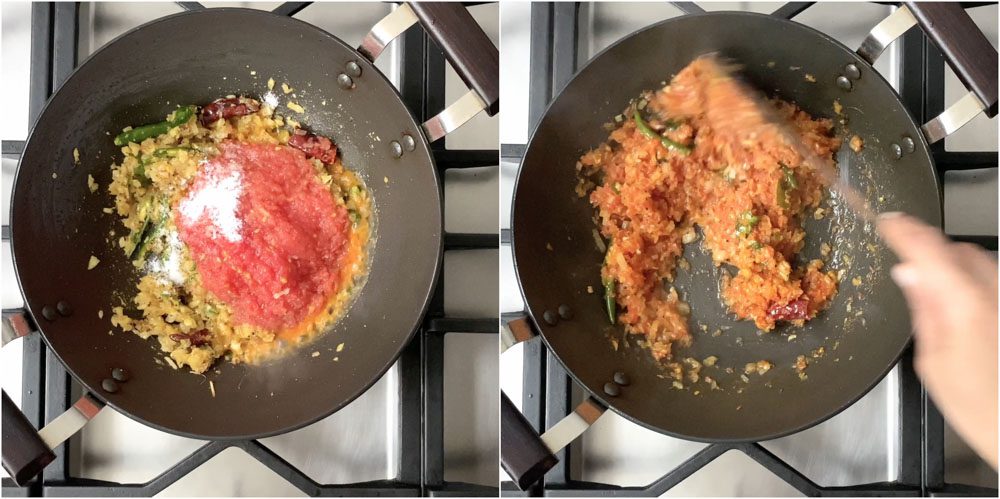
Add in the grated tomatoes and the salt. I use a box grater to grate my tomatoes. If hard pressed for time, just pulse the tomatoes in a mixie for several times to get a coarse puree and use it in the recipe. Mix well to combine.
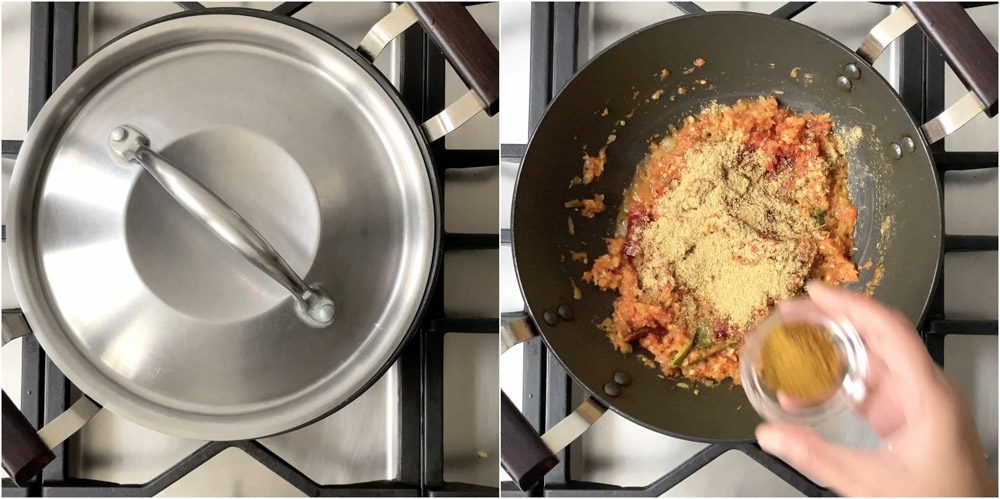
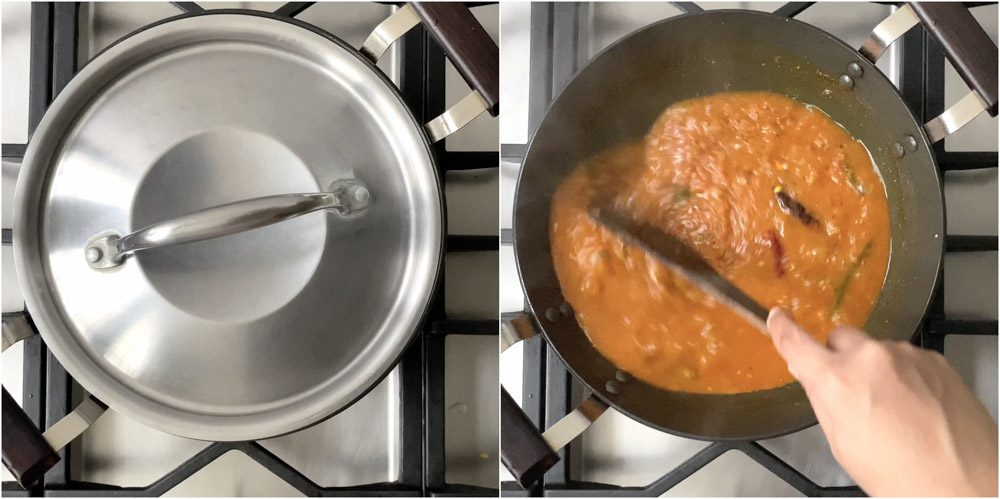
Cover the pan with a lid and let the curry simmer on a low flame for about 10 minutes. Add in the spice powders and saute till the oils separate from the mixture.
Keep sautéing to avoid scorching at the bottom of the pan.

In the mean time, soak tamarind in hot water for 15 minutes. Squeeze the tamarind to extract the pulp. Discard the seeds and the pith.
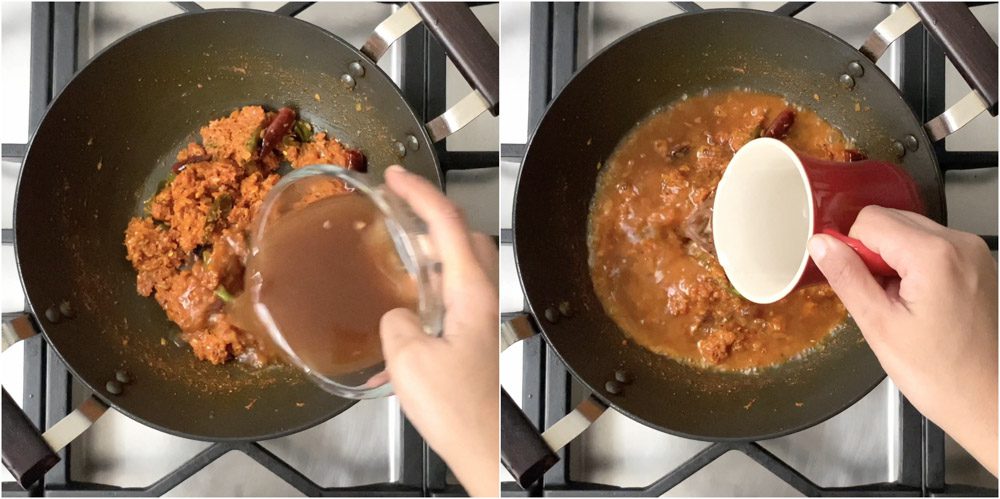
Add in the tamarind pulp and water.
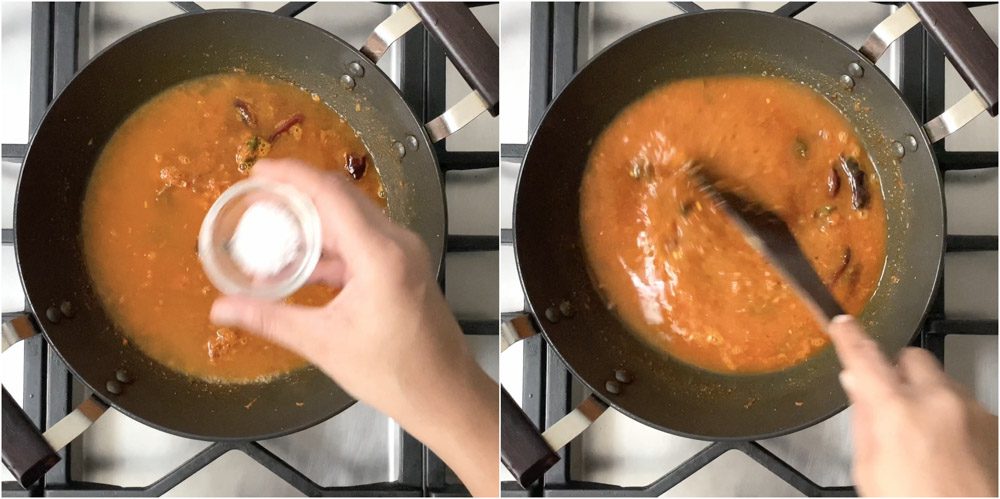
Add in the sugar and mix well to combine. The little bit of sugar will help balance the flavors of the curry.
Simmer the curry for a few minutes to cook the tamarind.
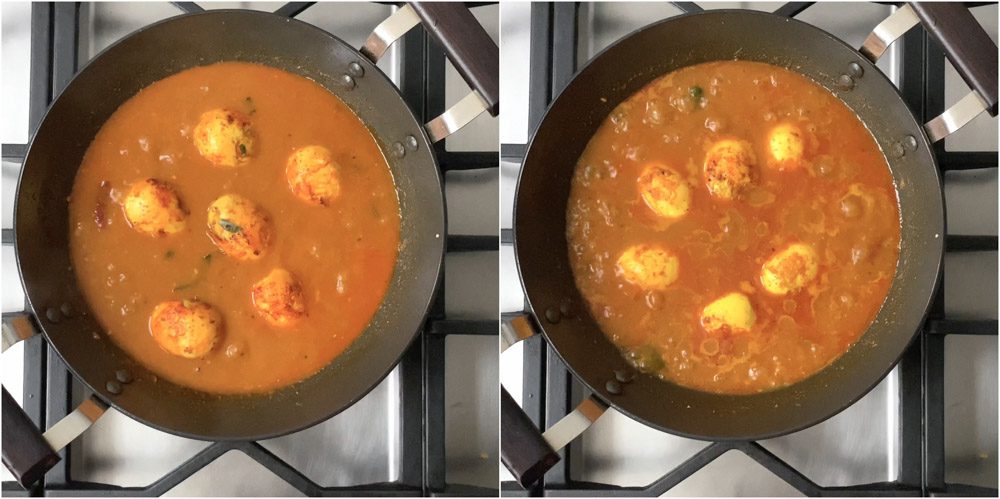
Add in the boiled eggs and cook for couple of minutes more to warm up the eggs. Do not cook for long after adding the eggs.
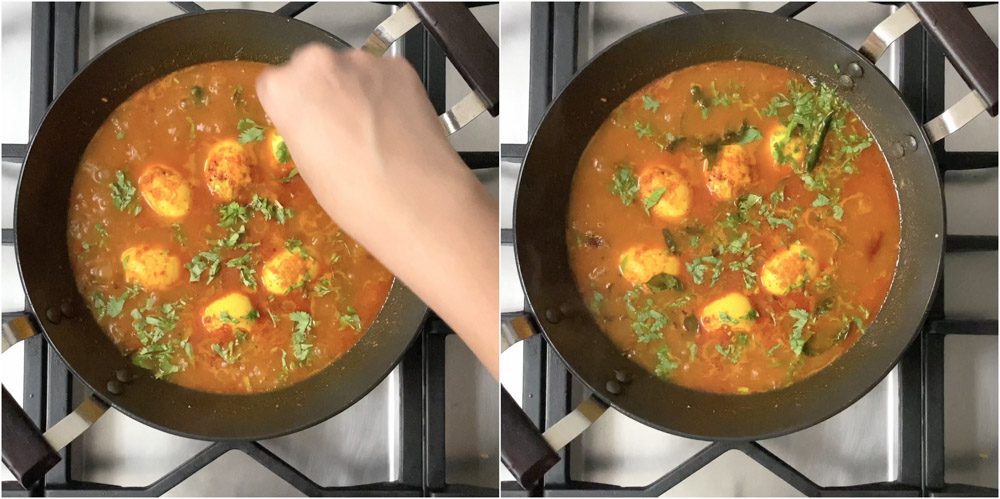
Finally finish the curry with a generous sprinkling of coriander leaves and the crisped up curry leaves and green chillies (that came while frying the eggs).
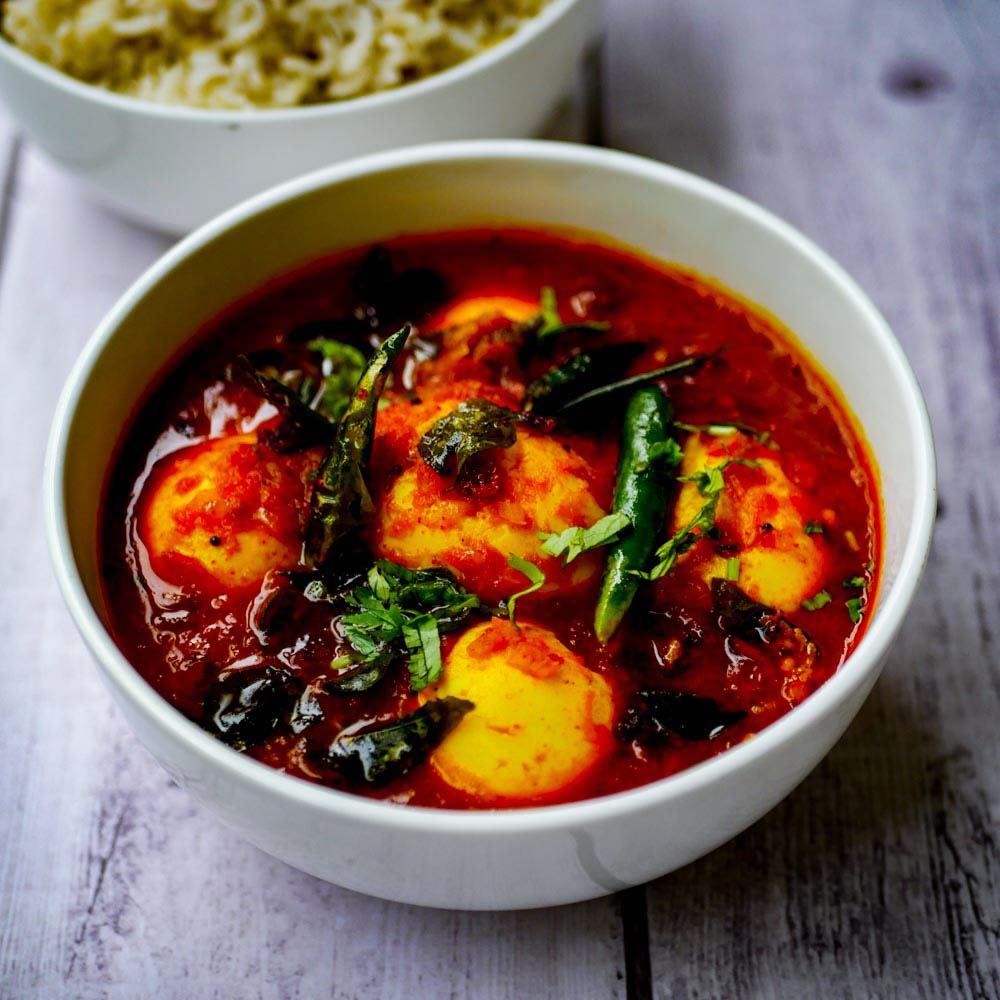
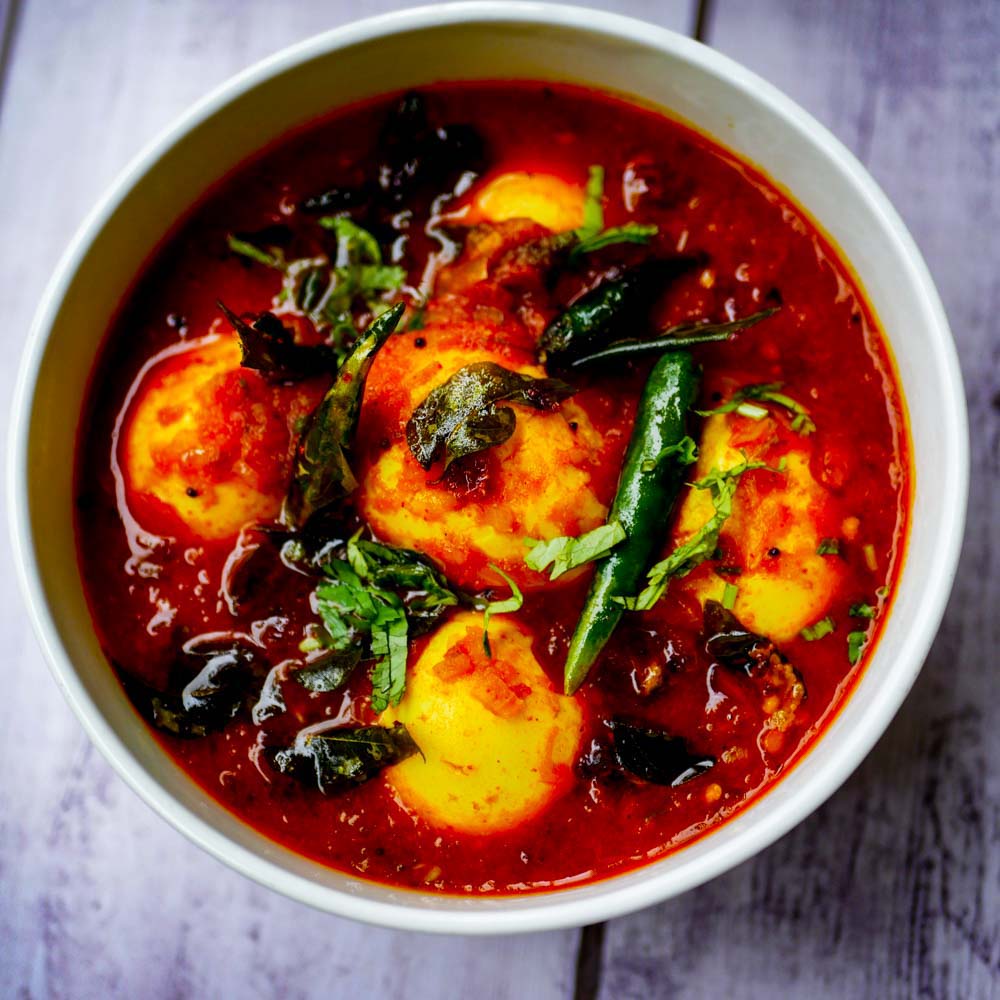
Serve Andhra Egg Curry hot with rice and a little drizzle of ghee on top of the rice.
For frying the eggs for Andhra Egg Curry
1 tablespoon groundnut oil 1 sprig curry leaves 4 green chillies 6 boiled eggs 1/4 teaspoon salt 1/4 teaspoon red chilli powder 1/4 teaspoon turmeric powder
For making the Andhra Egg Curry
2 tablespoon groundnut oil 1/4 teaspoon fenugreek seeds 1/2 teaspoon mustard seeds 1/2 teaspoon cumin seeds 2 sprig curry leaves 2 dried red chillies 4 green chillies, slit 2 cups finely chopped onions 2 teaspoon ginger garlic paste 1.5 cups grated tomatoes 1 teaspoon salt 1/2 teaspoon turmeric powder 1 teaspoon red chilli powder 2 teaspoon coriander powder 1/2 teaspoon garam masala 1 gooseberry size tamarind 2 cups water 1/4 teaspoon sugar 2 tablespoon coriander leaves, chopped
Frying the Eggs for Andhra Egg Curry
First step in making the Andhra Egg Curry – Kodi Guddu Pulusu is to fry the eggs. Take a fork and poke some holes on the boiled eggs. The holes will allow the masala to penetrate into the eggs. Set aside.
Heat oil in a pan and add in the curry leaves and the green chillies. Add in the eggs and the salt. After adding the eggs, do not move the eggs or disturb the eggs for a minute. The outer layer will tear. Allow the outer layer of the eggs to brown and crisp up. Move the eggs after a minute and let it slightly crisp up on all sides. Add in the turmeric powder and red chilli powder. Fry for a minute. Remove the eggs onto a plate and set aside.
Making the Andhra Egg Curry – Kodi Guddu Pulusu Recipe
In the same pan, add in some more oil. Add in the fenugreek seeds. Do not add a lot of fenugreek seeds as the curry will become bitter. Add in the mustard seeds, cumin seeds, curry leaves, red chillies and the green chillies. Add in the finely chopped onions. Sauté the onions till the onions are soft. It will take about 5-7 minutes on a medium flame. Add in the ginger garlic paste and sauté for a few minutes. Add in the grated tomatoes and the salt. Mix well to combine.
Cover the pan with a lid and let the curry simmer on a low flame for about 10 minutes. Add in the spice powders and saute till the oils separate from the mixture. Keep sautéing to avoid scorching at the bottom of the pan.
In the mean time, soak tamarind in hot water for 15 minutes. Squeeze the tamarind to extract the pulp. Discard the seeds and the pith. Add in the tamarind pulp and water. Add in the sugar and mix well to combine. The little bit of sugar will help balance the flavors of the curry. Simmer the curry for a few minutes to cook the tamarind.
Add in the boiled eggs and cook for couple of minutes more to warm up the eggs. Do not cook for long after adding the eggs. Finally finish the curry with a generous sprinkling of coriander leaves and the crisped up curry leaves and green chillies (that came while frying the eggs).
Serve Andhra Egg Curry hot with rice and a little drizzle of ghee on top of the rice.
Notes
I use a box grater to grate my tomatoes. If hard pressed for time, just pulse the tomatoes in a mixie for several times to get a coarse puree and use it in the recipe.
- Author: Suguna Vinodh
- Prep Time: 15m
- Cook Time: 30m
