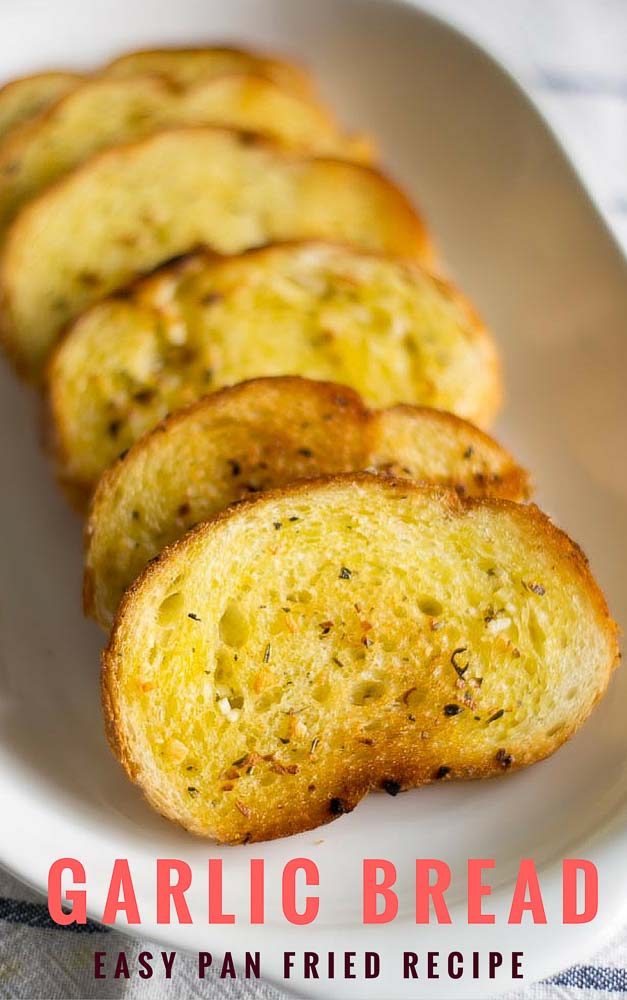
Recipe for homemade easy pan fried garlic bread. Pan seared garlic bread. Made with spiced garlic butter made from scratch. Perfect for snack. How to make garlic bread recipe without an oven or OTG. Make Garlic bread on Griddle / Dosa Tawa using regular bread at home.
Jacques Pepin was once asked about his last meal that he would like to have with family. His answer was good bread and butter. Bread and butter is something that’s hard to beat. There are so many things that one can do with two simple but robust ingredients like butter and bread. To me, garlic bread is genius. Garlic bread is something everyone loves. Our family ain’t different. We love buttery spiced garlic bread. Its a Friday dinner favorite at our place. Its so simple to make and its so heavenly.
Here is a video of how to do Garlic Bread on Tawa, Easy Pan fried Garlic Bread Recipe
Here is how to do an awesome, easy, homemade “Pan fried Garlic Bread Recipe”. The important thing that makes garlic bread flavorful is the garlic butter. Lets do our home made, from scratch, garlic butter. We will be using unsalted butter for this recipe. I always use unsalted butter in my cooking as I can control the amount of salt that goes into the dish. Its very important that the butter be at room temperature. The “spread-ability” of butter is better if its at room temperature.

To the butter add in the other ingredients. Finely minced garlic, Italian seasoning powder (any store bought variety would do fine), chilli flakes and salt.

Finely mix everything to a smooth paste and home-made garlic butter is ready. This butter can be stored in the refrigeratior for upto a week and used when required.

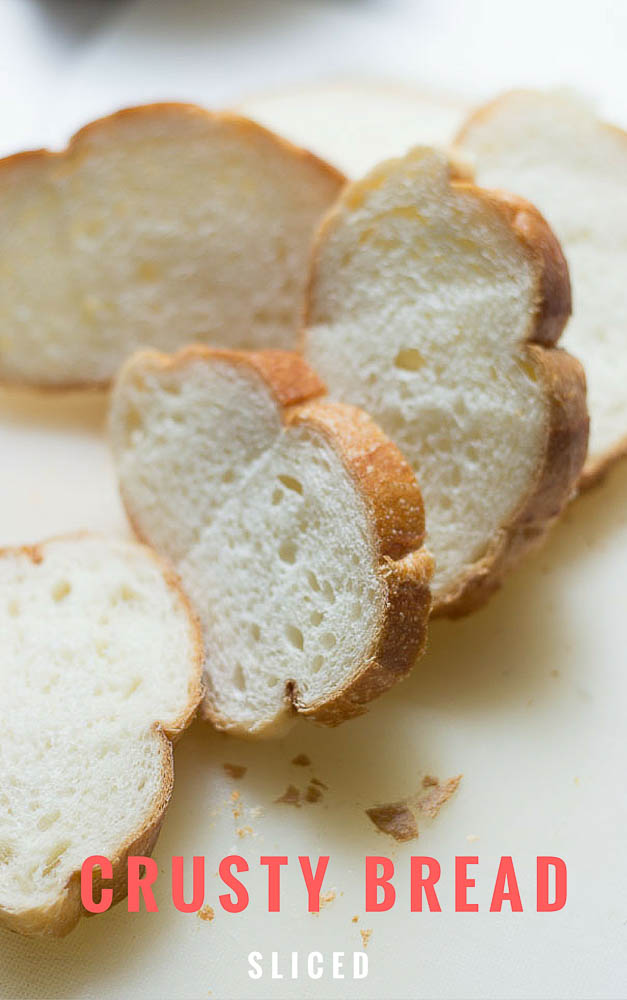
Cut up some crusty bread into sandwich slices. If you cannot get country bread, a day old normal sandwich slices would work equally well too!
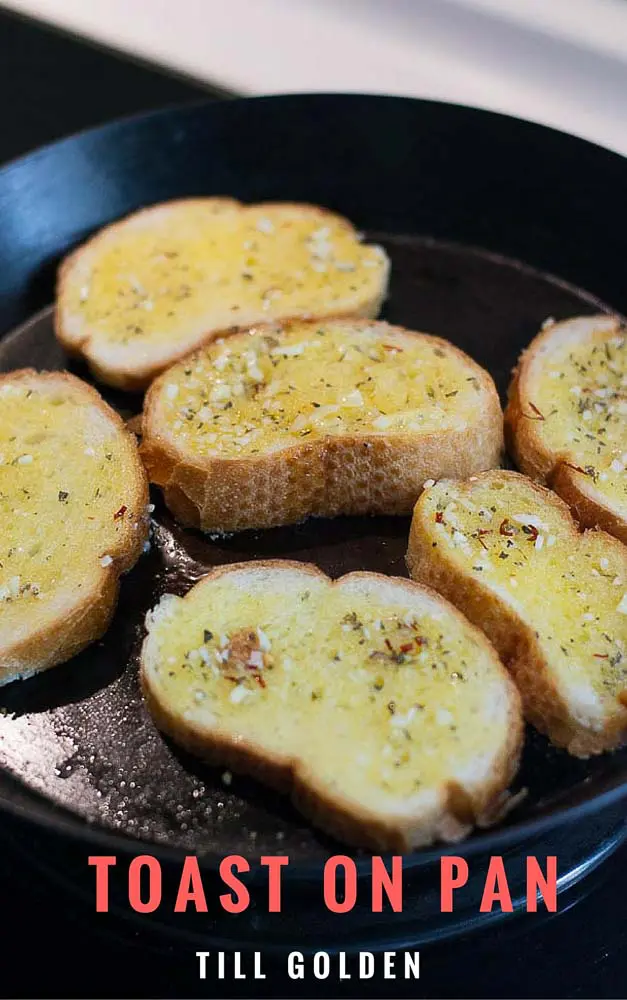
Apply about a teaspoon of butter on each side of the bread slice. So that’s two teaspoons for each slice of bread.

Heat a griddle and place the buttered bread slices and toast on low-medium flame until the butter has melted and the toast is golden. Garlic burns fast. So keep the flame at low-medium at all times.
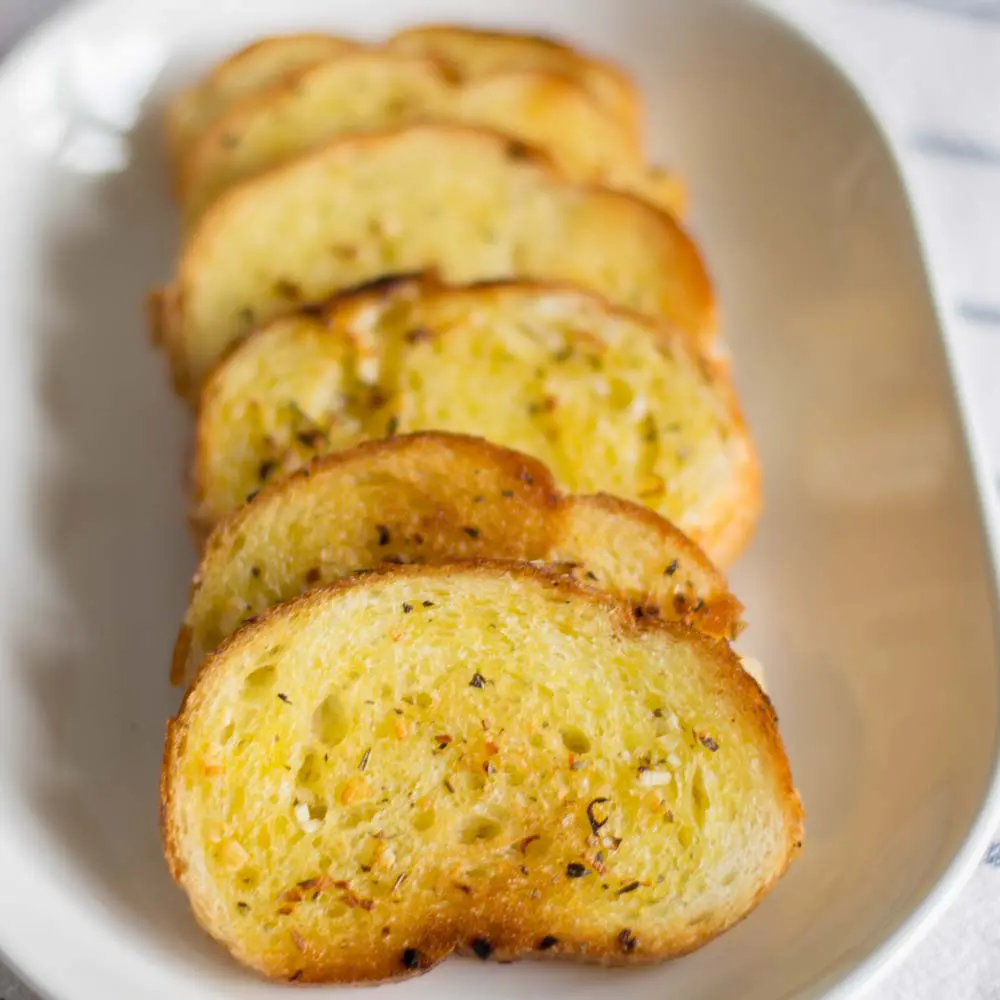
Enjoy!
The best cast iron pan now coming to your kitchens from Coimbatore. The person behind this wonderful venture is my school buddy Santosh Leelakrishnan. Proudly made in India and very reasonably priced. A must have!!! Do check it out! There are other skillets too! Don’t miss.
- 1/4 Cup Butter, at room temperature
- 1 Big Clove Garlic, finely minced
- 1/4 teaspoon chilli flakes
- 1/4 teaspoon Italian seasoning
- 1/4 teaspoon salt
- 8 - 10 crusty bread slices
- To the butter add in the aromatics. Finely minced garlic, Italian seasoning powder (any store bought variety would do fine), chilli flakes and salt.
- Apply about a teaspoon of butter on each side of the bread slice.
- Heat a griddle and place the buttered bread slices and toast on low-medium flame until the butter has melted and the toast is golden.
- Serve hot!
Notes
If you cannot get country bread, a day old normal sandwich slices would work equally well too!
- Author: Kannamma - Suguna Vinodh
- Prep Time: 5 mins
- Cook Time: 5 mins
- Category: Appetizer
- Cuisine: Italian
Find it online : https://www.kannammacooks.com/garlic-bread-pan-fried-garlic-bread/

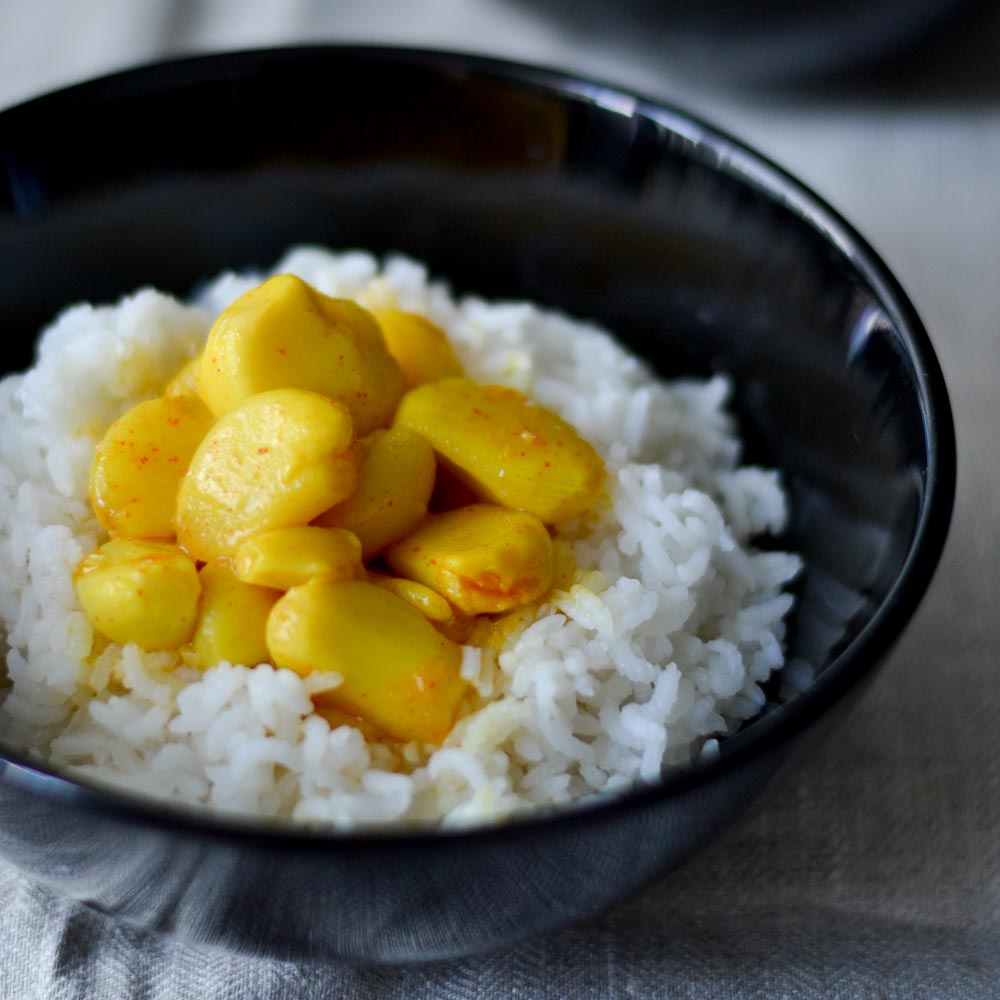
My mom always used to say that the digestive system is very delicate during the first few weeks after delivery. I realized it more once I gave birth to my baby. This is one recipe that is given to new moms in my family. It is believed that garlic enhances digestion and helps with lactation. This is the food that was given to me at every meal after delivery for almost 6 months. I had to eat 5-6 cloves at each meal. My mom would prepare this in the morning and I will have it for breakfast, lunch and dinner. Here is how to do poondu kari.
Peel about 3 pods, around 30 cloves of garlic…..Yup. its a lot of work! You can use store bought peeled garlic if you want. I still remember my husband carrying tubs of peeled garlic from Costco every week and handing over it preciously to my mom.

Pressure Cooker Method: Take a pressure cooker and add in half a cup of water, turmeric, red chilli powder and salt. Add in two teaspoon of ghee and the garlic. Cover the cooker and cook for two whistles. Switch off the flame and wait for the pressure from the cooker to release naturally.

Serve the Garlic Curry with Rice or sneak it into dosa, sandwich etc…

- 30 Cloves Garlic
- 2 Teaspoon Ghee
- 1/2 Cup Water
- 1/4 Teaspoon Turmeric Powder
- 1/4 Teaspoon Chilli Powder
- Take a pressure cooker and add in half a cup of water, turmeric, red chilli powder and salt. Add in two teaspoon of ghee and the garlic. Cover the cooker and cook for two whistles. Switch off the flame and wait for the pressure from the cooker to release naturally.
- Serve the Garlic Curry with Rice or sneak it into dosa, sandwich etc…
Notes
If your stomach is really sensitive or have just delivered a baby, use black pepper instead of chilli powder.
- Author: Kannamma - Suguna Vinodh
- Prep Time: 10 mins
- Cook Time: 5 mins
- Category: Poondu Kari
- Cuisine: Tamilnadu

