
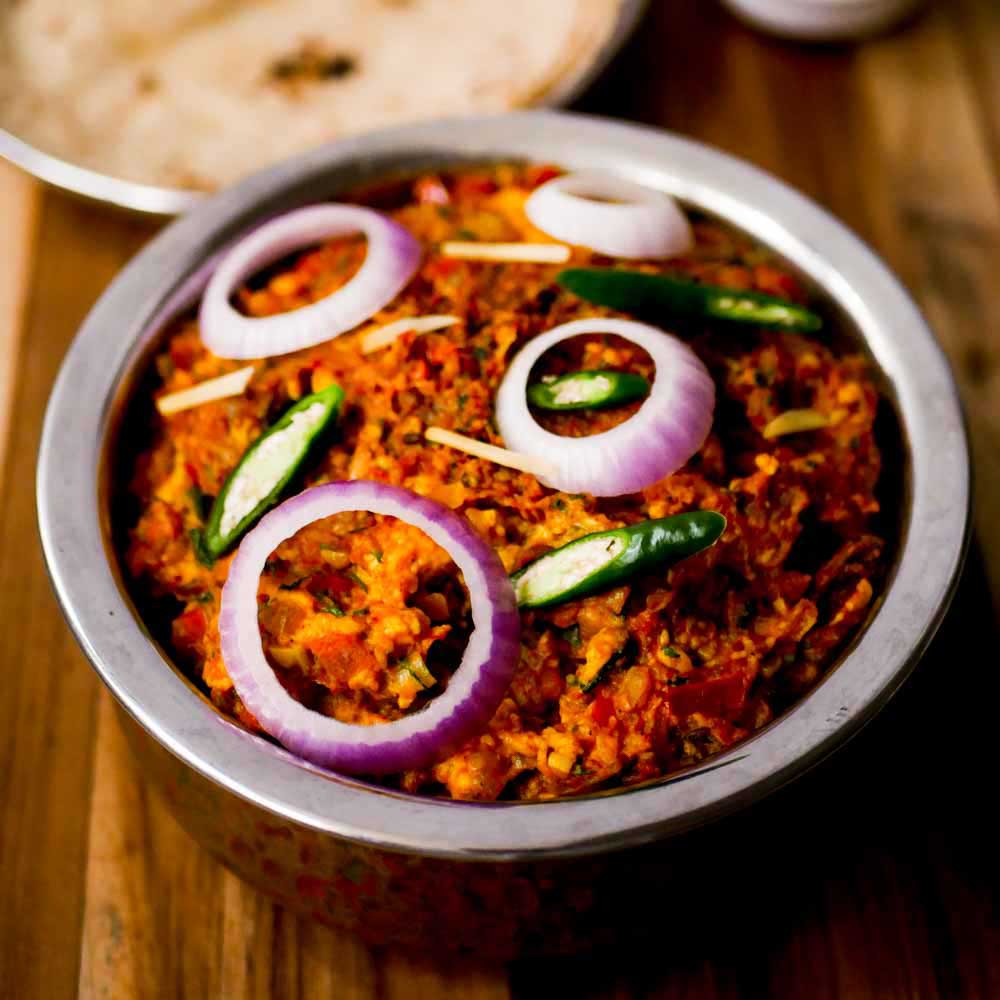
Recipe for Dhaba Style Paneer Bhurji. A very versatile recipe that pairs well with rotis, naan, phulkas and also as an excellent filling for sandwiches, rolls etc.. Recipe with step by step pictures and video.
This Dhaba Style Paneer Bhurji Recipe is very versatile. Bhurji means “scrambled”. This recipe for scrambled paneer in an onion – tomato masala pairs so well with rotis, naan and phulkas. I usually make this dish for dinner. I serve the leftover for breakfast by using the paneer bhurji as a filling for sandwich along with a little bit of mayo. It also tastes delicious as a filling in a roll. This is one recipe that can be adapted in different ways. Do try it at home. Always make extras so you can make breakfast in minutes and mornings can be easy. Perfect for lunch box rolls as the paneer bhurji stays moist for hours.
Here are other recipes from the site using paneer as the main ingredient. Paneer Dishes
Here is the video of how to make Dhaba Style Paneer Bhurji Recipe
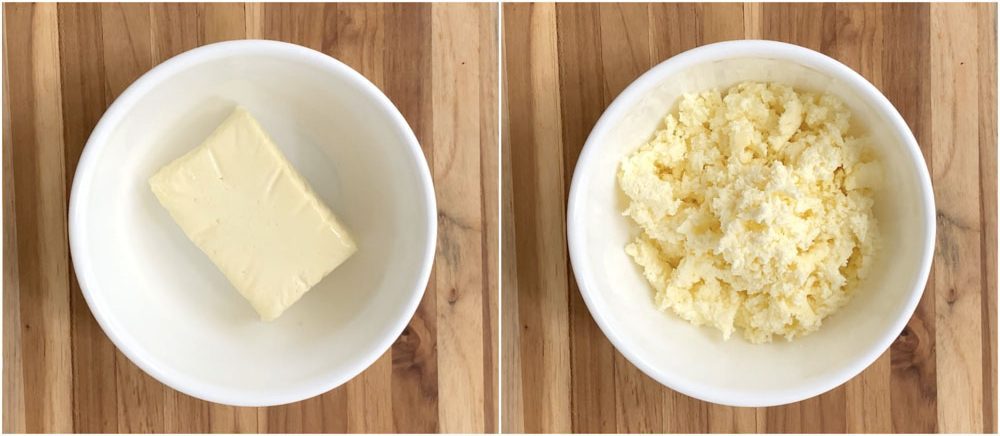
Here is how to do Dhaba Style Paneer Bhurji Recipe Shred a pack of paneer (200 grams) onto a bowl. Just crumble the paneer with hand. Set aside. I have used store bought paneer today. Home made paneer works perfectly fine for making this bhurji too!. Use whatever you have on hand.

Heat oil in a pan and add in the cumin seeds, minced garlic and minced ginger. Saute for a few seconds. I have used vegetable oil for this recipe today. If making for special occasions, you can make it with ghee for a richer flavour.
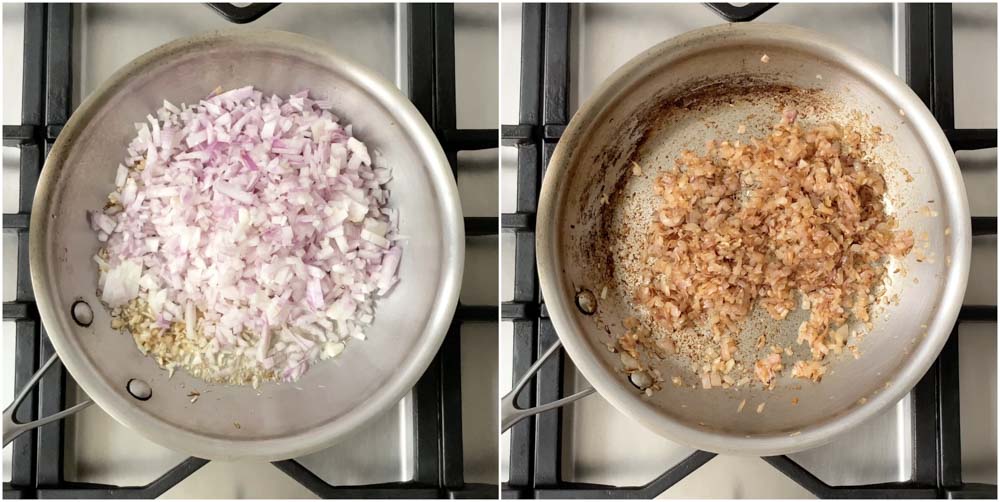
Add in the finely chopped onions. Saute on a medium flame for about 12-15 minutes until the onions are nice and brown. Its very important to cook the onions until they are nicely caramelized and brown.
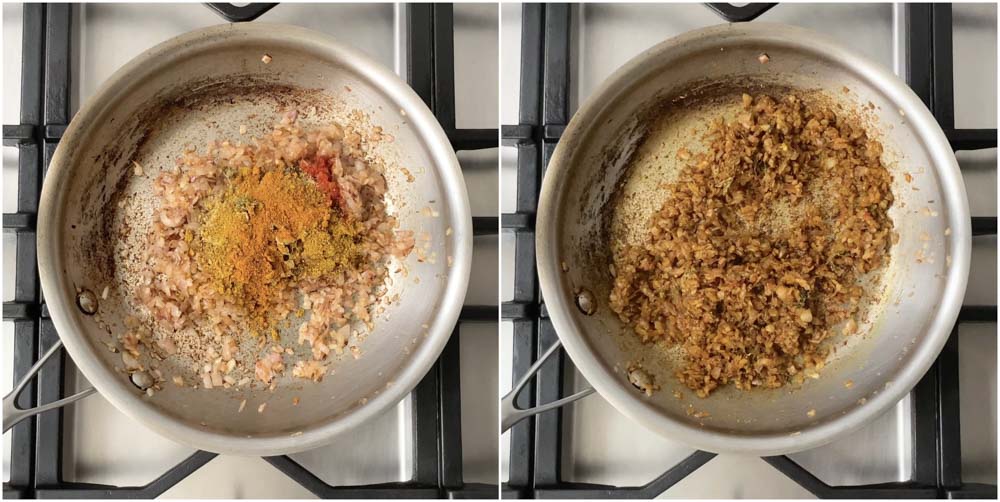
Add in all the spice powders and saute for a minute on a low flame. Sauteing on a low flame is key otherwise the spices will burn.

Add in the besan (Indian chickpea flour). Saute for a minute more on a low flame. Besan gives a nice volume and flavour to the paneer bhurji.
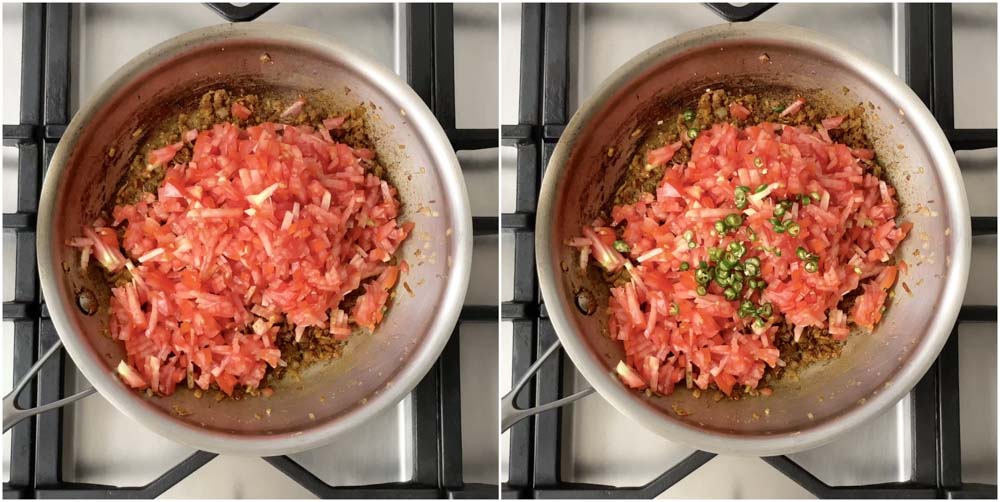
Add in the tomatoes and the green chillies. Adjust the green chillies according to taste. If you want a really spicy bhurji, add in a couple of more green chillies.
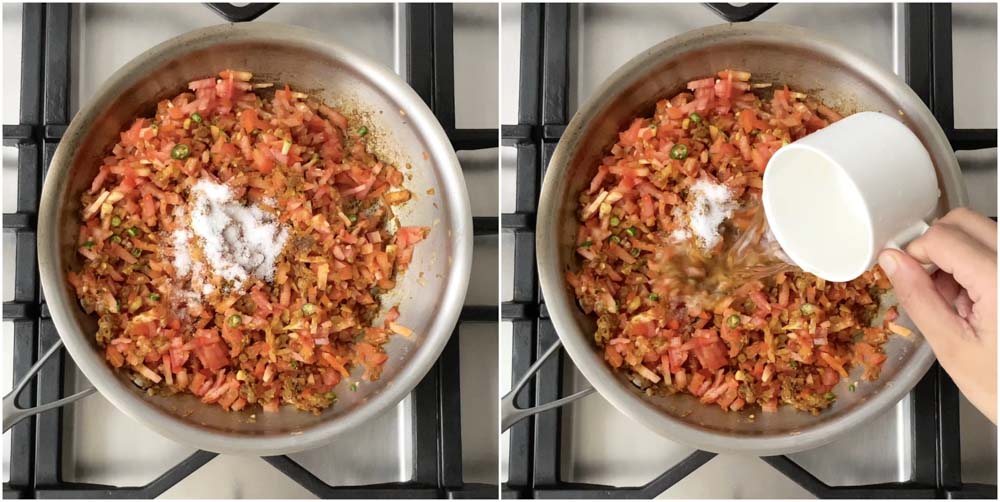
Add in the salt. Add in half a cup of water and cook for 10-15 minutes until the tomatoes are completely mushy.
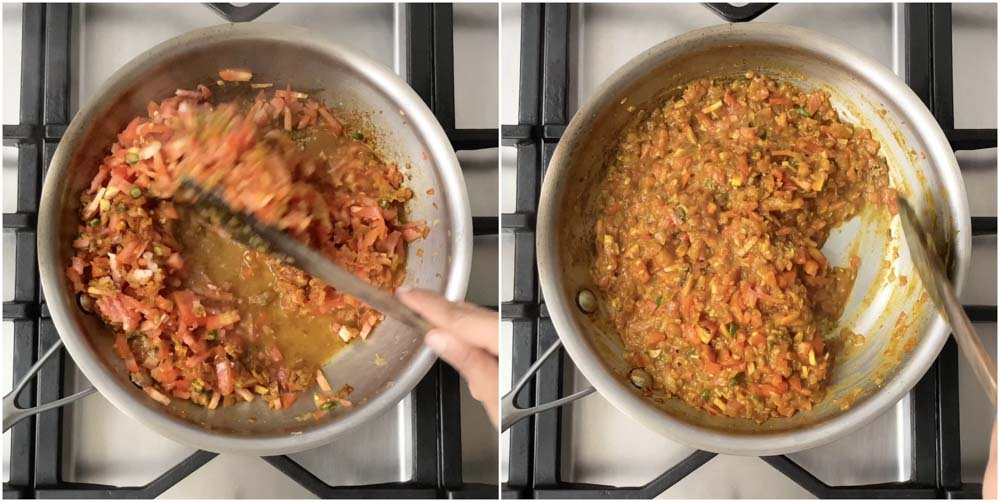
If the mixture is very dry and sticking to the bottom, add little water in intervals as necessary.
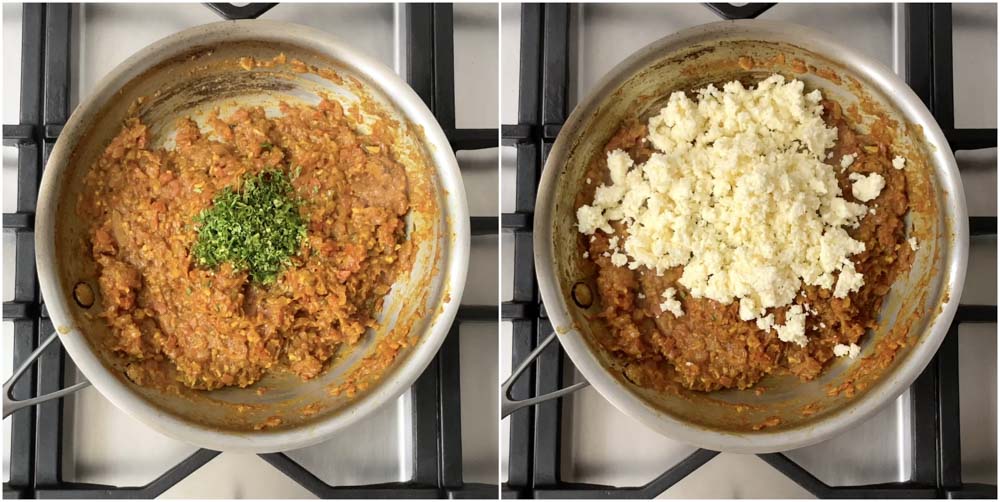
Add in the chopped coriander leaves and the shredded paneer. Cook for a minute so the masalas can mix well with the paneer and become a homogeneous mixture.

Add in the cream. Mix well and cook for a minute more. The cream makes the bhurji very luscious.
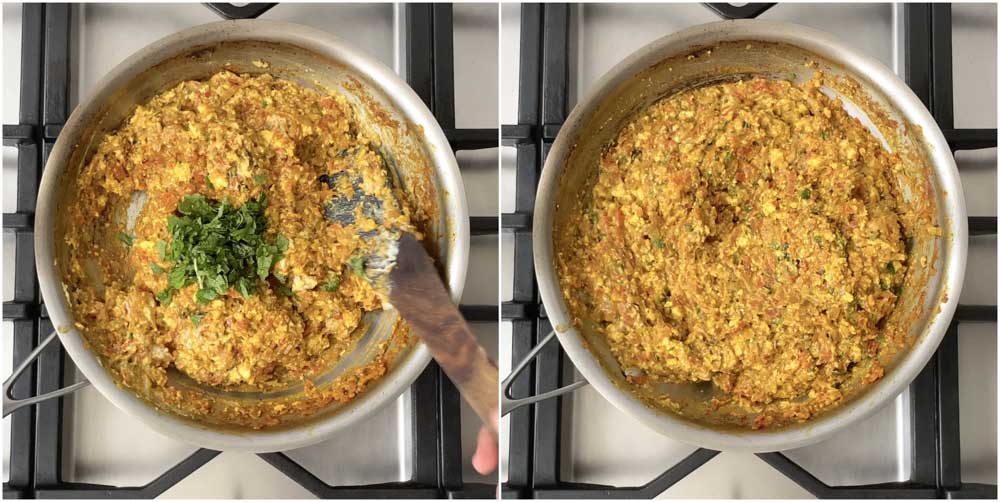
Add in the fresh chopped mint leaves, mix once and remove from heat.
Serve with roti, naan and phulka or as a filling for sandwiches.
Ingredients for Dhaba Style Paneer Bhurji recipe
200 grams paneer, shredded 2 tablespoon vegetable oil 1/4 teaspoon cumin seeds 2 tablespoon minced garlic 2 tablespoon minced ginger 1.5 cups finely chopped onions 1/2 teaspoon red chilli powder 1/2 teaspoon turmeric powder 1 teaspoon coriander powder 1/4 teaspoon black pepper powder 1 teaspoon kasuri methi 1 teaspoon kitchen king masala 1/2 teaspoon garam masala 1 tablespoon besan (Indian chickpea flour) 1.5 cups finely chopped tomatoes 3 green chillies finely chopped 1 teaspoon salt 1/2 cup water 2 tablespoon coriander leaves, chopped 2 tablespoon cream 2 tablespoon mint leaves
Shred a pack of paneer (200 grams) onto a bowl. Just crumble the paneer with hand. Set aside. I have used store bought paneer today. Home made paneer works perfectly fine for making this bhurji too!. Use whatever you have on hand.
Heat oil in a pan and add in the cumin seeds, minced garlic and minced ginger. Saute for a few seconds. I have used vegetable oil for this recipe today. If making for special occasions, you can make it with ghee for a richer flavour.
Add in the finely chopped onions. Saute on a medium flame for about 12-15 minutes until the onions are nice and brown. Its very important to cook the onions until they are nicely caramelized and brown.
Add in all the spice powders and saute for a minute on a low flame. Sauteing on a low flame is key otherwise the spices will burn. Add in the besan (Indian chickpea flour). Saute for a minute more on a low flame. Besan gives a nice volume and flavour to the paneer bhurji.
Add in the tomatoes and the green chillies. Adjust the green chillies according to taste. If you want a really spicy bhurji, add in a couple of more green chillies. Add in the salt. Add in half a cup of water and cook for 10-15 minutes until the tomatoes are completely mushy. If the mixture is very dry and sticking to the bottom, add little water in intervals as necessary.
Add in the chopped coriander leaves and the shredded paneer. Cook for a minute so the masalas can mix well with the paneer and become a homogeneous mixture. Add in the cream. Mix well and cook for a minute more. The cream makes the bhurji very luscious. Add in the fresh chopped mint leaves, mix once and remove from heat. Serve with roti, naan and phulka or as a filling for sandwiches.
Author: Suguna Vinodh
Prep Time: 15m
Cook Time: 45m
Find it online : https://www.kannammacooks.com/dhaba-style-paneer-bhurji/
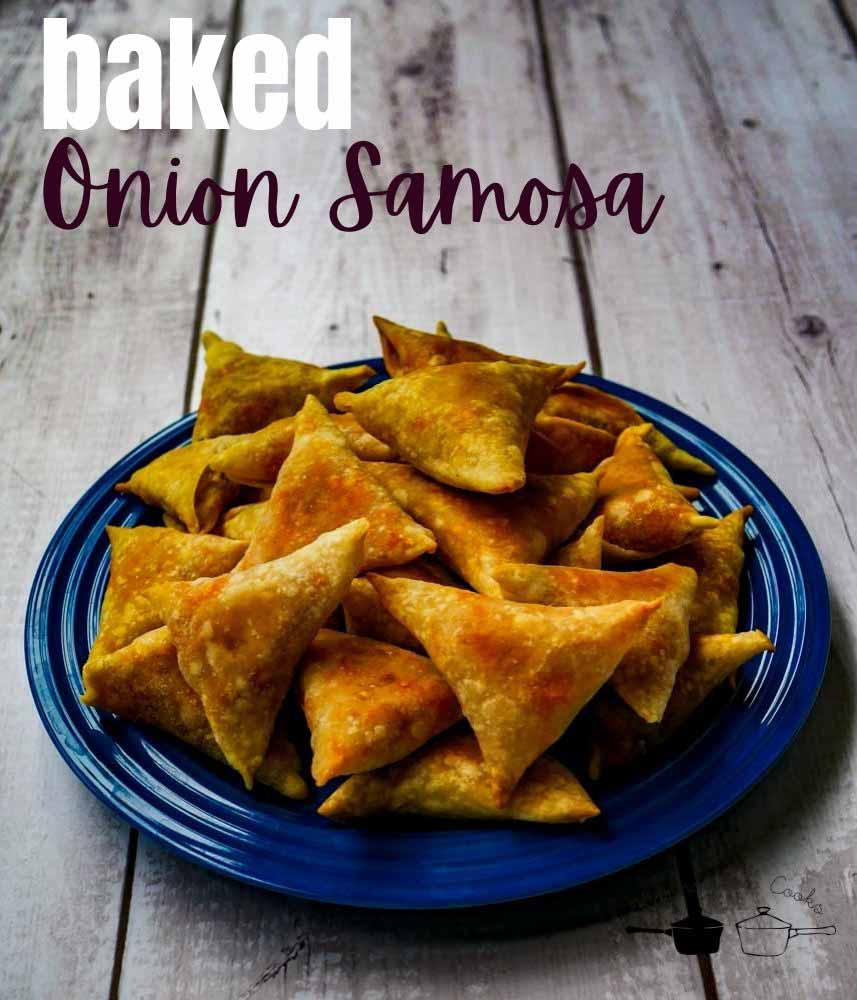
Recipe for South Indian style Baked Onion Samosa / Baked Vengaya samosa -வெங்காய சமோசா / வெங்காய பப்ஸ். Baked version of the traditional samosa made with a filling of sautéed onions. Recipe with step by step pictures and video.
Here are the other recipes from the site you may be interested in Onion based recipes Baking recipes
Here is the video of how to make Baked Onion Samosa Recipe, Baked Vengaya Samsa Recipe
We love the traditional deep fried Onion Samosa at home. Here is my take on making a relatively healthier version by baking these samosas instead of deep frying them. I have used maida (all purpose flour) for making the wrappers. You can make it 50:50 by using maida and whole wheat flour / atta. Onion samosas are a labour of love as the wrapping consumes time. So plan accordingly when you decide to make it.
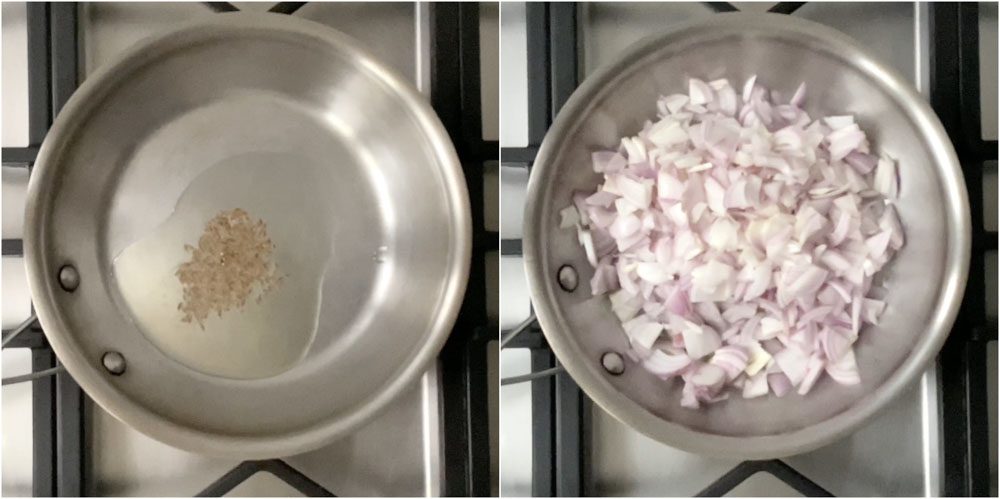
Here is how to make Baked Onion Samosa Recipe, Baked Vengaya Samsa Recipe First, lets make the filling. Slice around 3 cups of onions. Heat oil in a pan and add in the cumin seeds. Add in the sliced onions and the salt. Saute for 2-3 minutes till the onions are soft. No need to brown the onions.
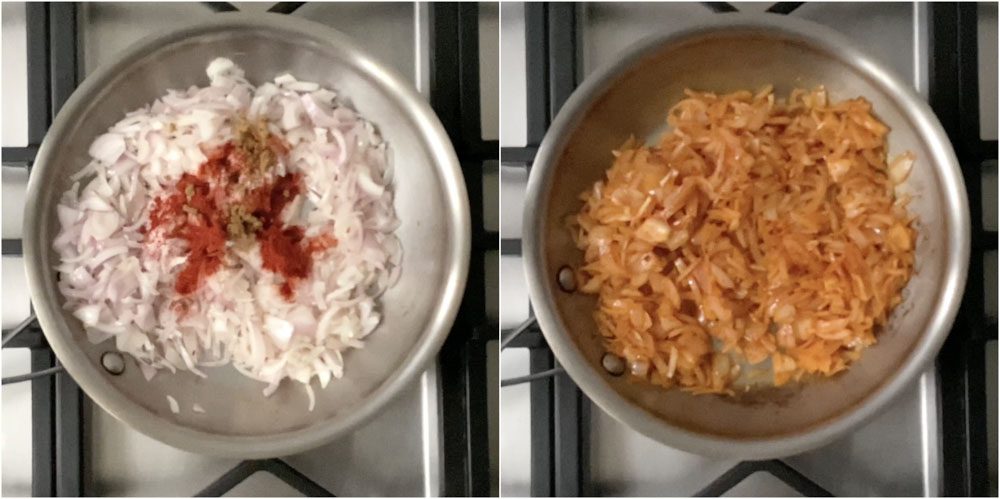
Add in the red chilli powder and garam masala powder. Saute for a few minutes. The onions will be getting cooked again during baking.

Add in the beaten rice (aval in tamil) and mix well. The aval will help absorb all the moisture from the onions so the samosa wrappers dont become soggy. Remove from heat and set aside to cool. The stuffing for baked onion samosa is ready.
The wrappers for making baked onion samosa: We will be using one cup of maida (all purpose flour) for this recipe. A cup of maida will make around 32 mini samosas. As for the portion sizes, 5 samosas per person is ideal ( they are small). Keeping the sizes small is important so the samosas bake and crisp up evenly without becoming soggy.
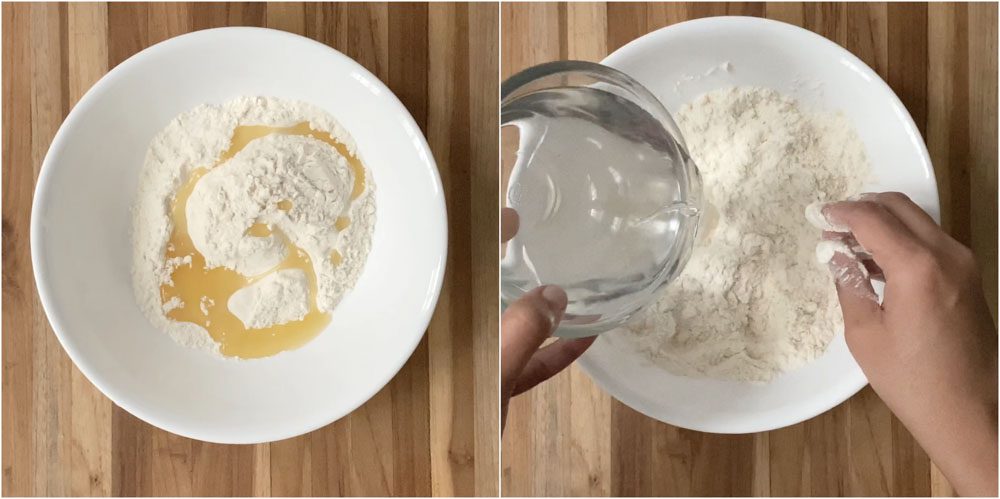
Take a bowl and add in a cup of maida. Add in the oil, salt and the baking soda. The baking soda will help in browning and crisping up of the warappers. Mix well to combine. Add water little by little and mix to form a dough. The consistency of the dough should be stiff and that of a chapati dough.
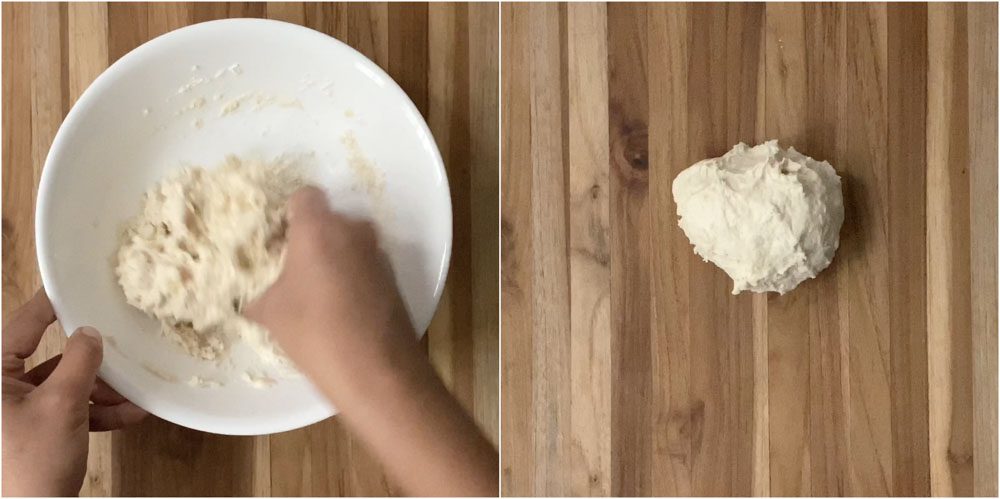
Knead the dough for a good 2-3 minutes so its soft and pliable.
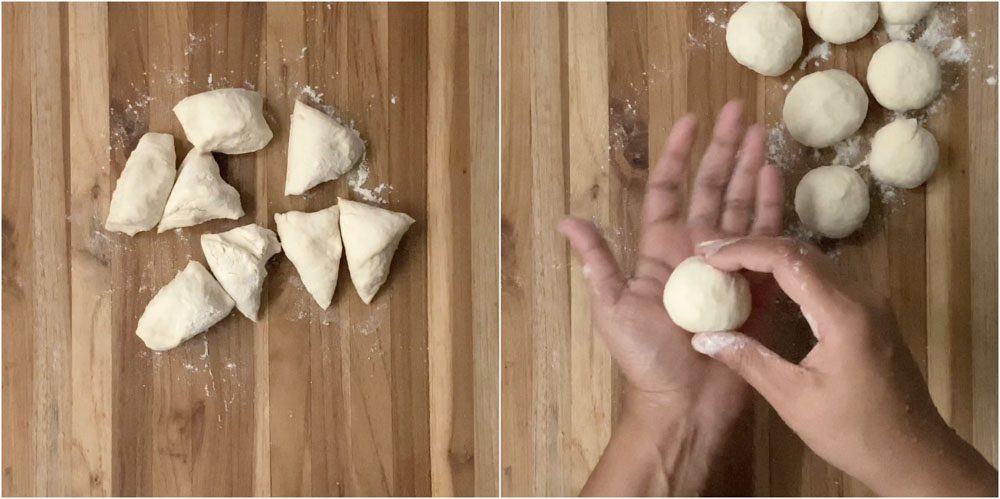
Divide the dough into 8 equal pieces. Shape the pieces into balls and set aside.
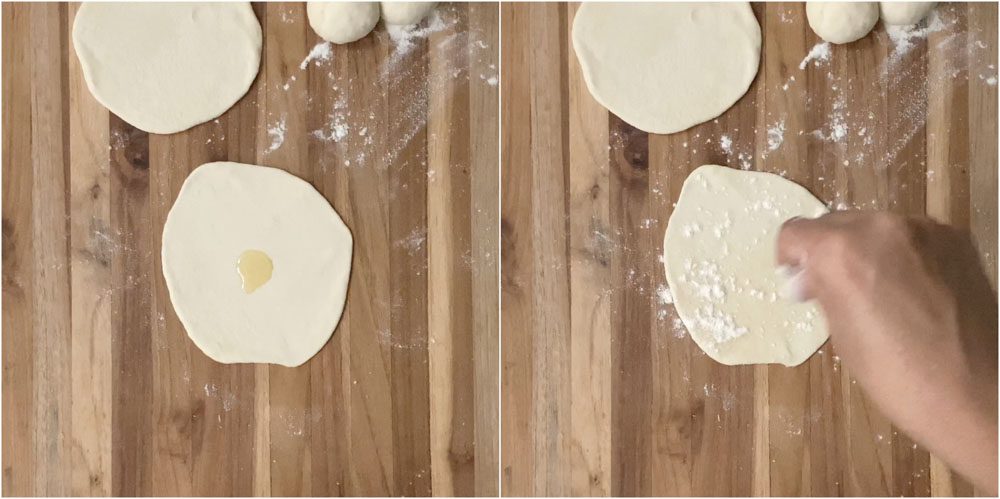
Take a dough ball and generously dust it with flour. Roll the dough into a 3 inch round on a flat smooth surface using a rolling pin. Brush oil on top of the rolled dough. Sprinkle flour on it.
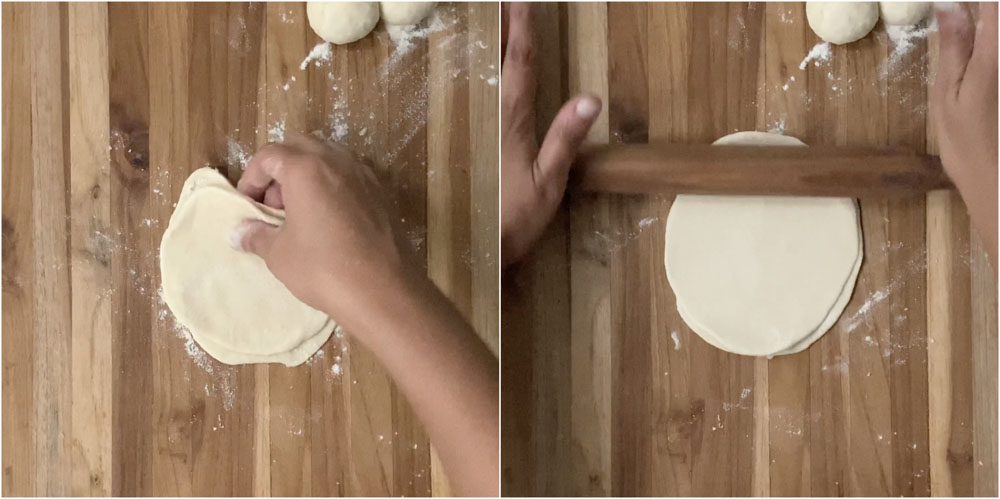
Place another rolled sheet on top of this and roll again. Sprinkle flour while rolling. It will expand. The thinner the sheet, the better. Dont press too hard. Be gentle while rolling. The oil and the sprinkled flour in between the sheets will help to remove the sheets later on.
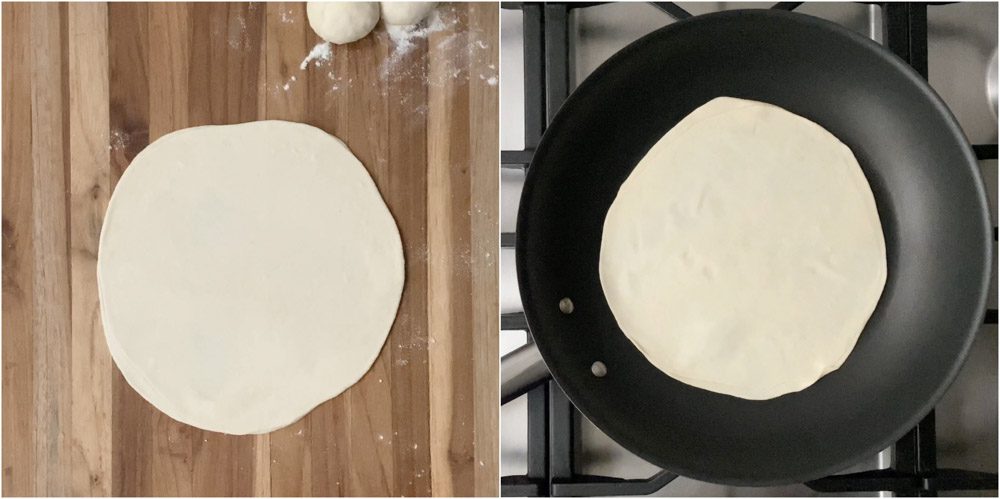
Place the combined sheets on a hot griddle and cook for a few seconds on each side. No need to brown the sheets.
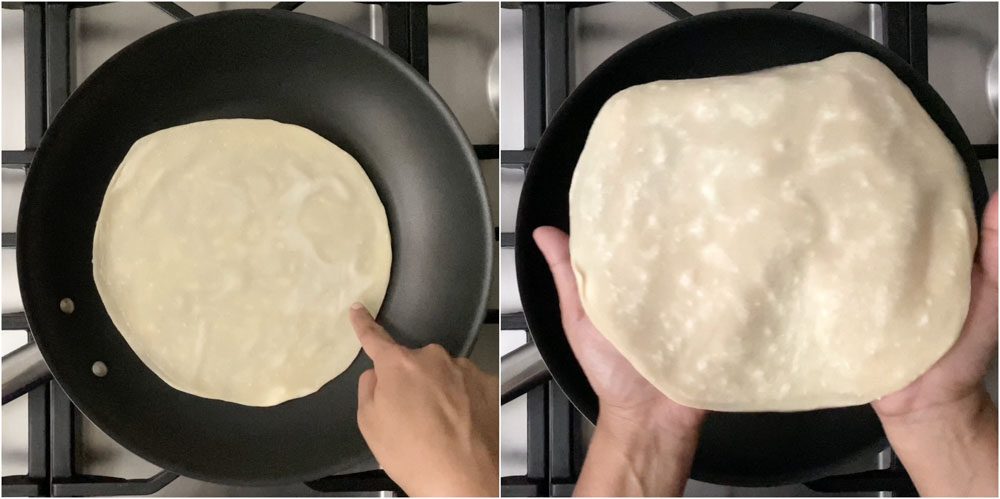
Cooking for a few seconds till the moisture in the dough dries up is all we are looking for. We still need the sheets to be pliable. So do not cook for long.
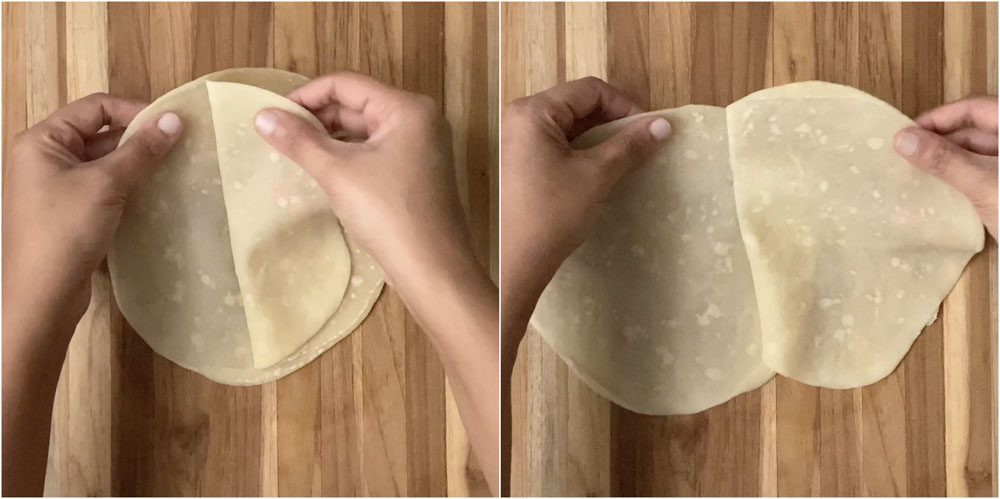
Remove the sheets from the pan and gently separate the sheets. Repeat the same with the remaining sheets. Cook all the sheets. Set aside.
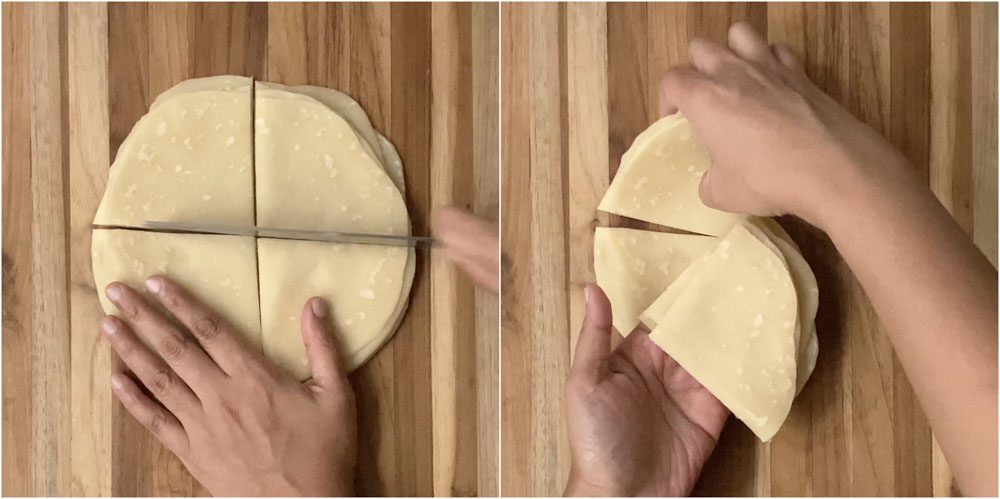
Now using a knife, cut the sheets into four triangles. Cover them with a cloth so it does not dry up a lot. The triangle sheets are ready. Each triangle will make one samosa.
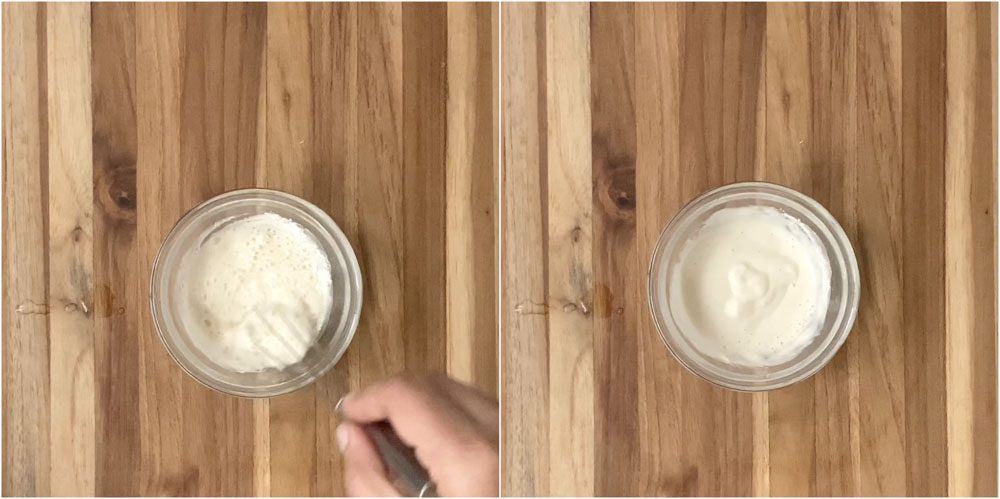
In a small cup dilute three tablespoons of maida with few teaspoons of water. This is our maida gum. Set aside.
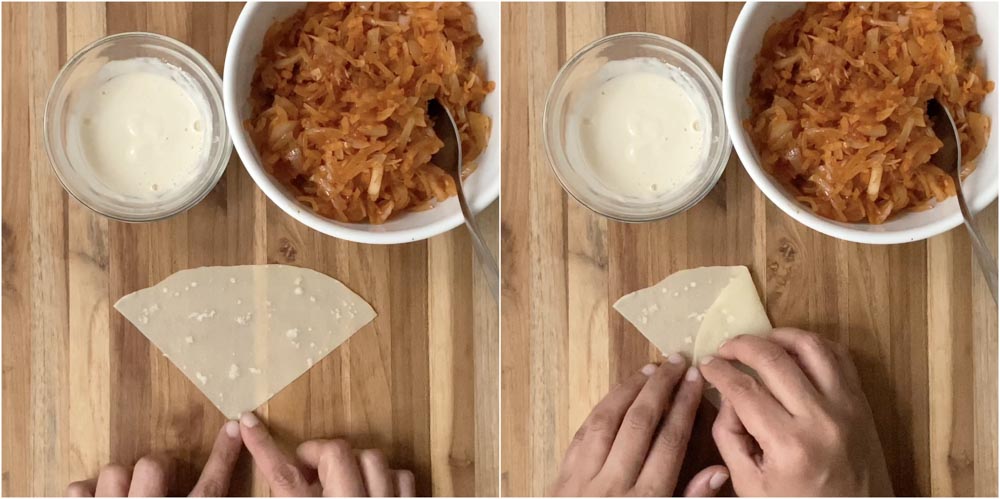
Take a triangle sheet. Fold on one side like below.
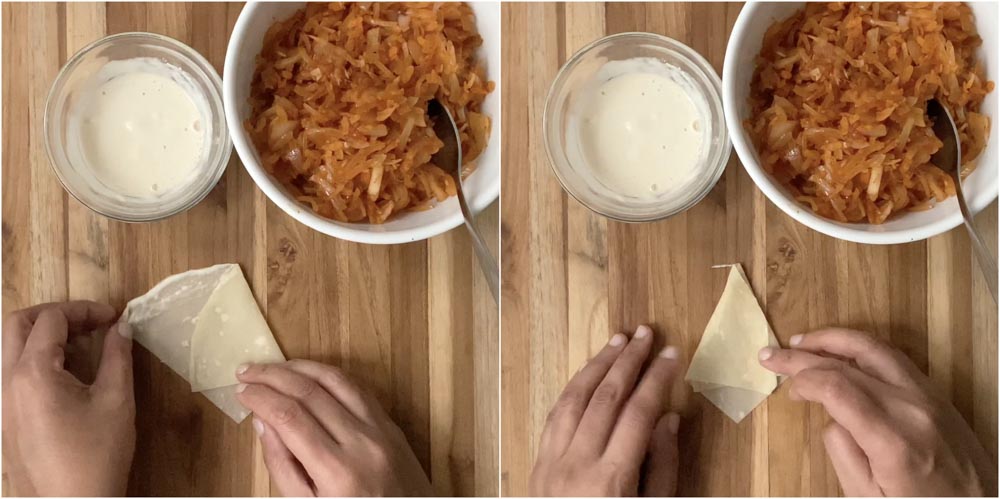
Gather the other side and make a cone. Press well so the maida gum adheres.
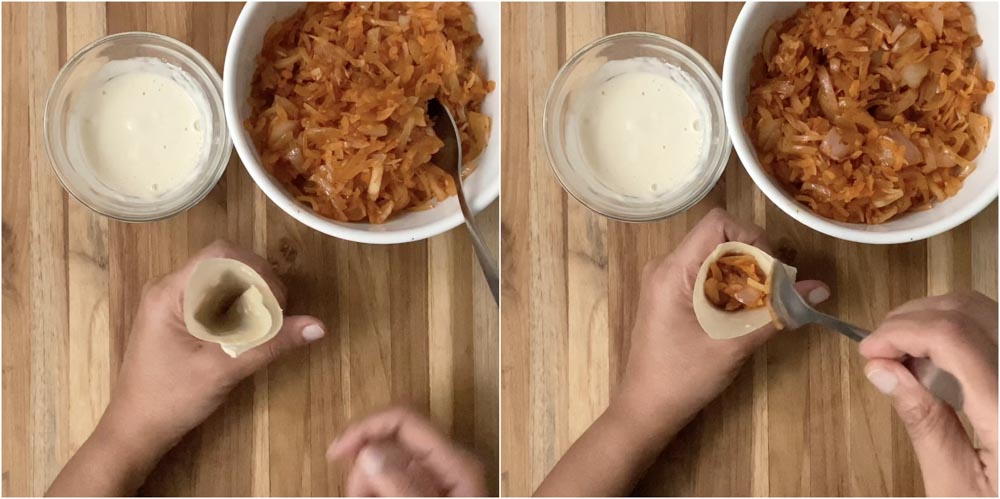
Fill the cone with the onion filling we made before.
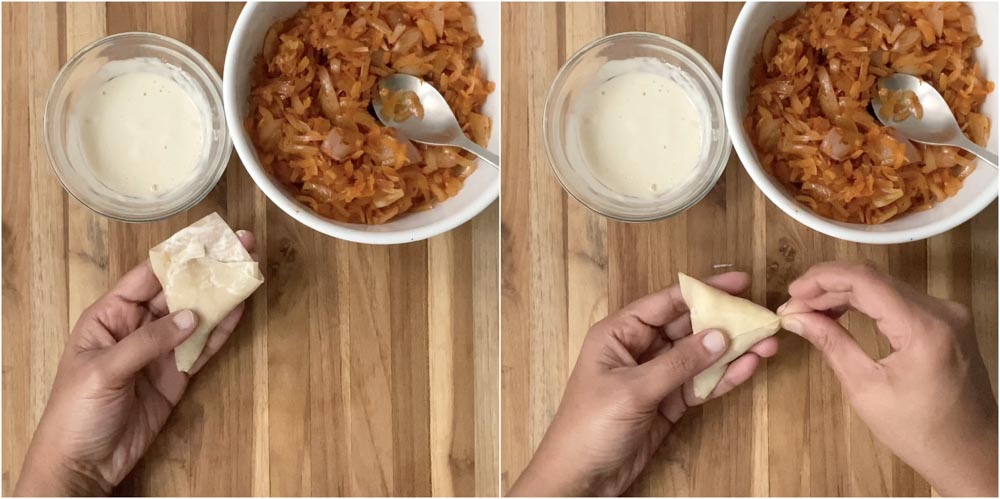
Apply the maida gum on the remaining sheet and fold to make a triangular samosa. Pinch the edges so there is no holes.
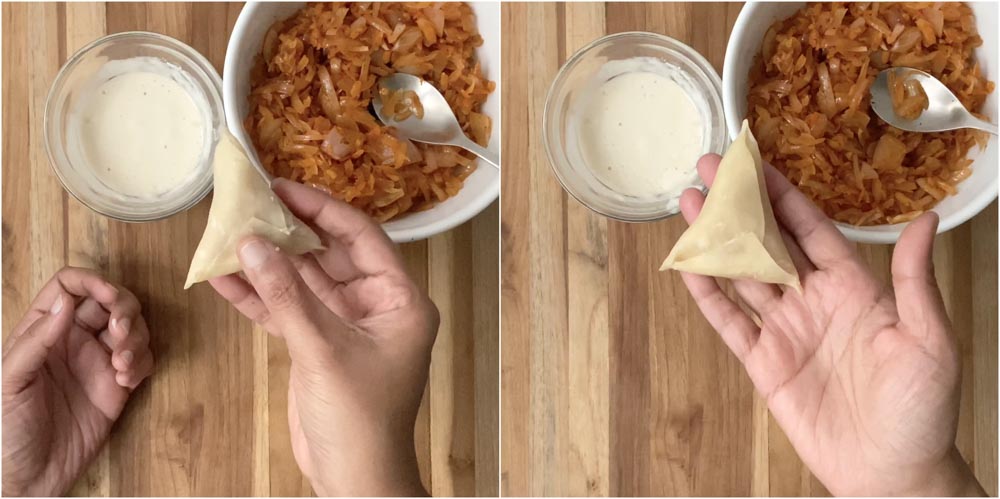
Repeat with the rest of the sheets. Set aside.
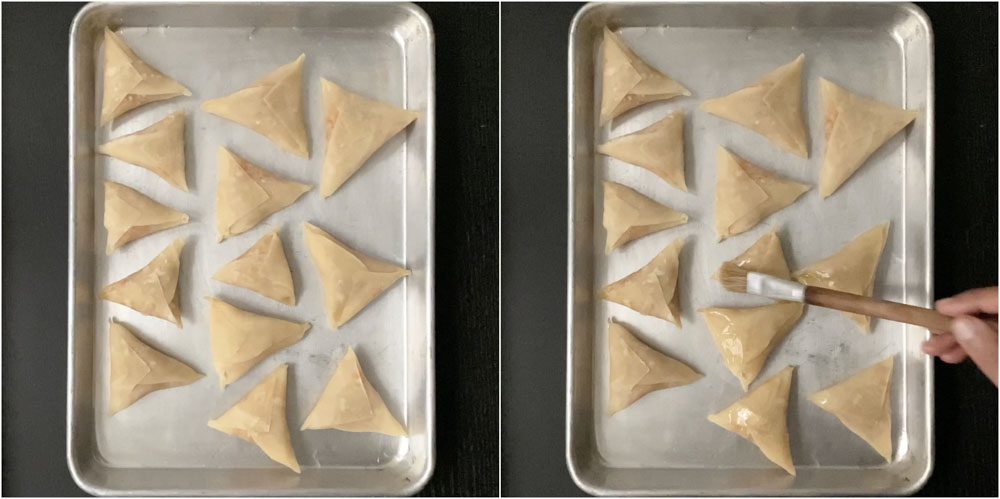
Baking the samosas Preheat the oven for 15 minutes at 200°C / 400°F. Take a greased sheet pan and place the prepared samosas. Brush the samosas with oil. Make sure to brush evenly so the entire samosa is evenly covered. Bake at 200°C / 400°F for 20-25 minutes. Bake in batches if necessary.
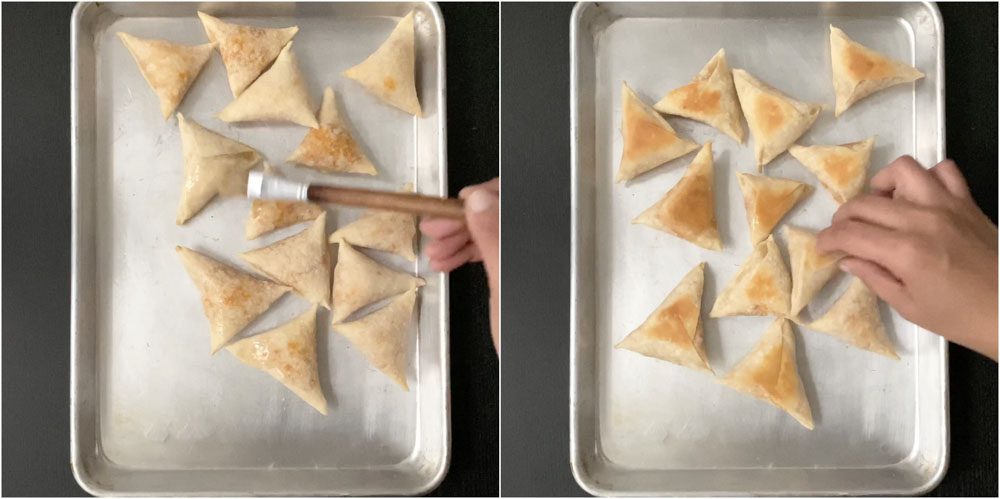
Half way through, after 10 minutes, remove the samosas from the oven and apply oil on the top again. Turn the samosas. The side that is in contact with the pan will brown faster. So turning will ensure that the samosas are baked evenly.
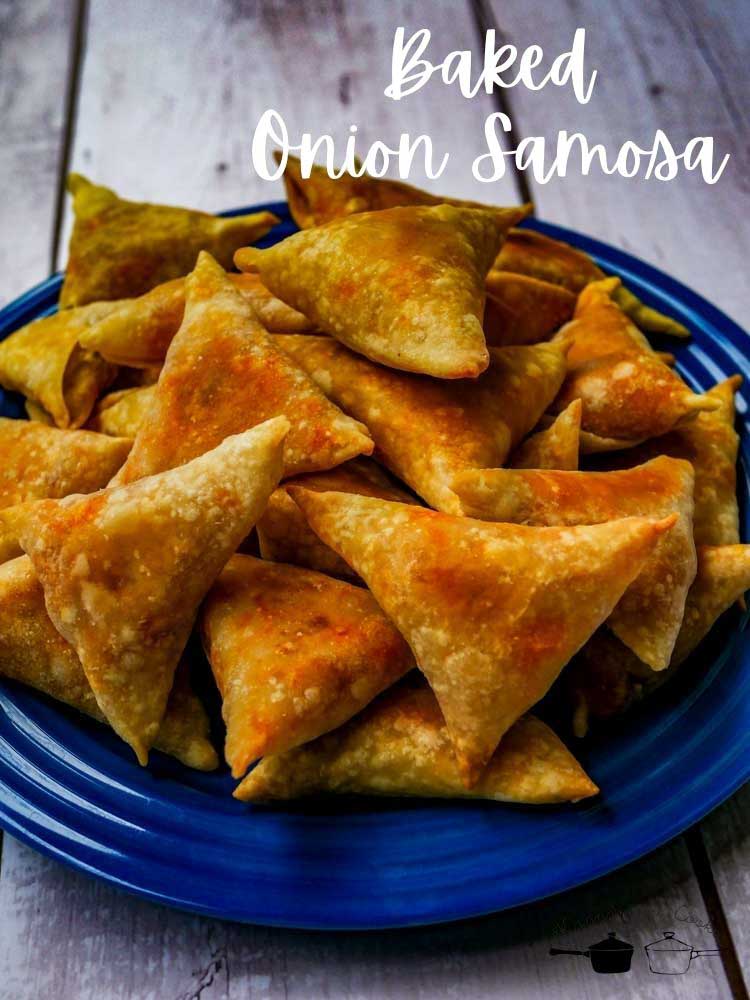
Bake until the samosas are nice and brown.
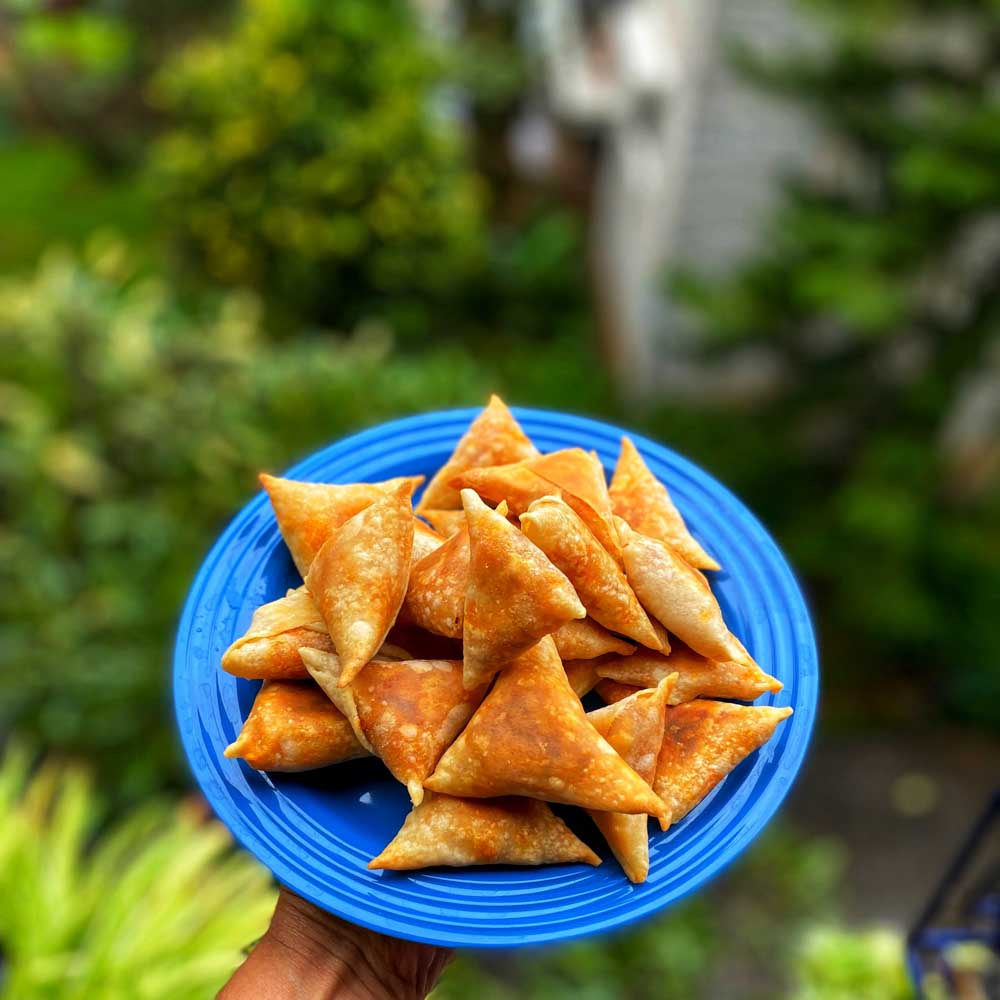
Serve as a appetizer or as an evening snack.
For the baked onion samosa filling
2 teaspoon vegetable oil 1/2 teaspoon cumin seeds 300 grams onions, sliced 1 teaspoon salt 1 teaspoon red chilli powder 1/2 teaspoon garam masala 1/4 cup aval / poha For the samosa sheets
For the samosa wrappers
1 cup maida / all purpose flour 1/4 teaspoon salt 1/4 teaspoon baking soda 2 teaspoon vegetable oil Few teaspoon of vegetable oil for brushing the wrappers
For the maida paste
3 tablespoon maida / all purpose flour few teaspoons of water
Slice around 3 cups of onions. Heat oil in a pan and add in the cumin seeds. Add in the sliced onions and the salt. Saute for 2-3 minutes till the onions are soft. No need to brown the onions. Add in the red chilli powder and garam masala powder. Saute for a few minutes. The onions will be getting cooked again during baking. Add in the beaten rice (aval in tamil) and mix well. The aval will help absorb all the moisture from the onions so the samosa wrappers dont become soggy. Remove from heat and set aside to cool. The stuffing for baked onion samosa is ready.
Take a bowl and add in a cup of maida. Add in the oil, salt and the baking soda. The baking soda will help in browning and crisping up of the warappers. Mix well to combine. Add water little by little and mix to form a dough. The consistency of the dough should be stiff and that of a chapati dough. Knead the dough for a good 2-3 minutes so its soft and pliable. Divide the dough into 8 equal pieces. Shape the pieces into balls and set aside. Take a dough ball and generously dust it with flour. Roll the dough into a 3 inch round on a flat smooth surface using a rolling pin. Brush oil on top of the rolled dough. Sprinkle flour on it. Place another rolled sheet on top of this and roll again. Sprinkle flour while rolling. It will expand. The thinner the sheet, the better. Dont press too hard. Be gentle while rolling. The oil and the sprinkled flour in between the sheets will help to remove the sheets later on. Place the combined sheets on a hot griddle and cook for a few seconds on each side. No need to brown the sheets. Cooking for a few seconds till the moisture in the dough dries up is all we are looking for. We still need the sheets to be pliable. So do not cook for long. Remove the sheets from the pan and gently separate the sheets. Repeat the same with the remaining sheets. Cook all the sheets. Set aside. Now using a knife, cut the sheets into four triangles. Cover them with a cloth so it does not dry up a lot. The triangle sheets are ready. Each triangle will make one samosa. In a small cup dilute three tablespoons of maida with two tablespoons of water. This is our maida gum. Set aside. Take a triangle sheet. Fold on one side. Gather the other side and make a cone. Press well so the maida gum adheres. Fill the cone with the onion filling we made before. Apply the maida gum on the remaining sheet and fold to make a triangular samosa. Pinch the edges so there is no holes. Repeat with the rest of the sheets. Set aside.
Preheat the oven for 15 minutes at 200°C / 400°F. Take a greased sheet pan and place the prepared samosas. Brush the samosas with oil. Make sure to brush evenly so the entire samosa is evenly covered. Bake at 200°C / 400°F for 20-25 minutes. Bake in batches if necessary. Half way through, after 10 minutes, remove the samosas from the oven and apply oil on the top again. Turn the samosas. The side that is in contact with the pan will brown faster. So turning will ensure that the samosas are baked evenly. Bake until the samosas are nice and brown. Serve as a appetizer or as an evening snack.
- Author: Suguna Vinodh
- Prep Time: 30m
- Cook Time: 30m
