Recipe for Bengaluru cafe inspired chutney pudi / idli podi served with idli and dosai. Recipe with video.
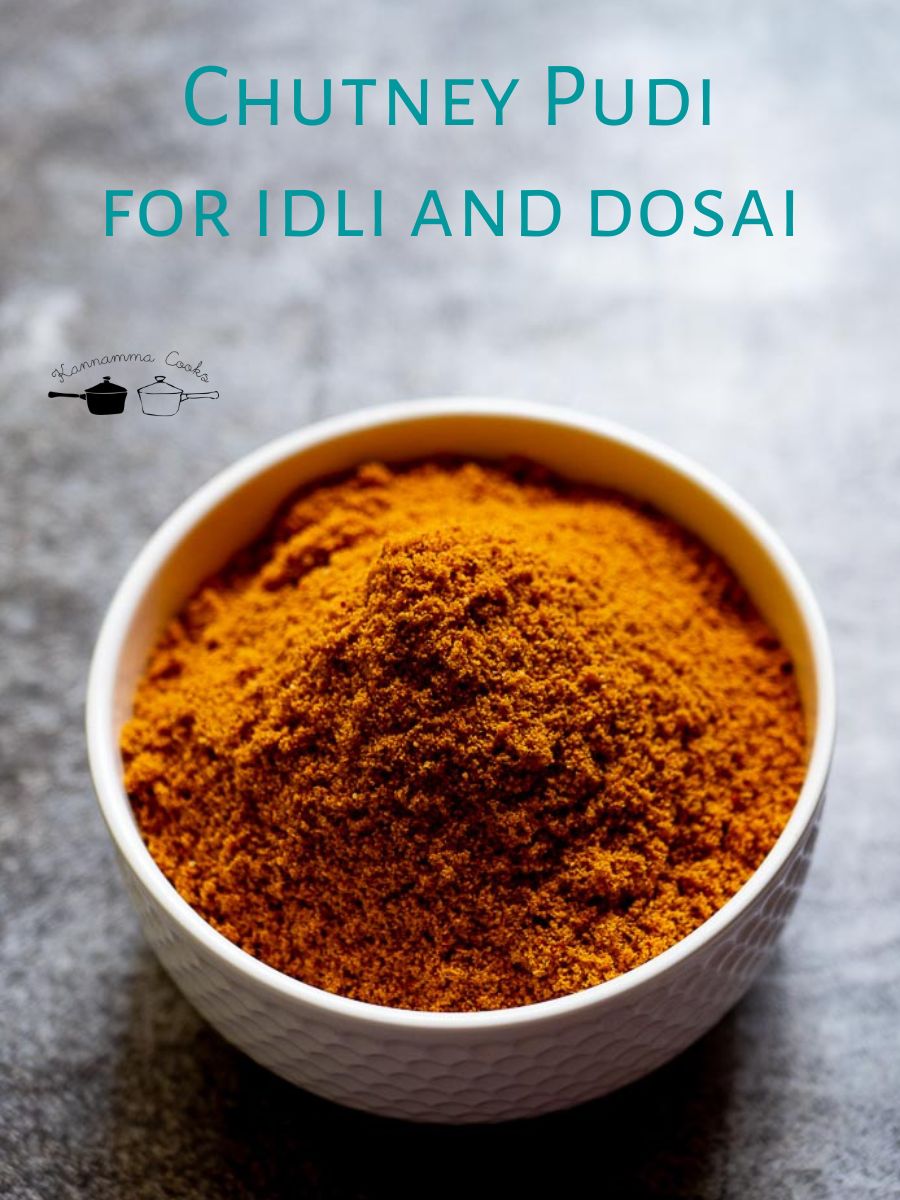
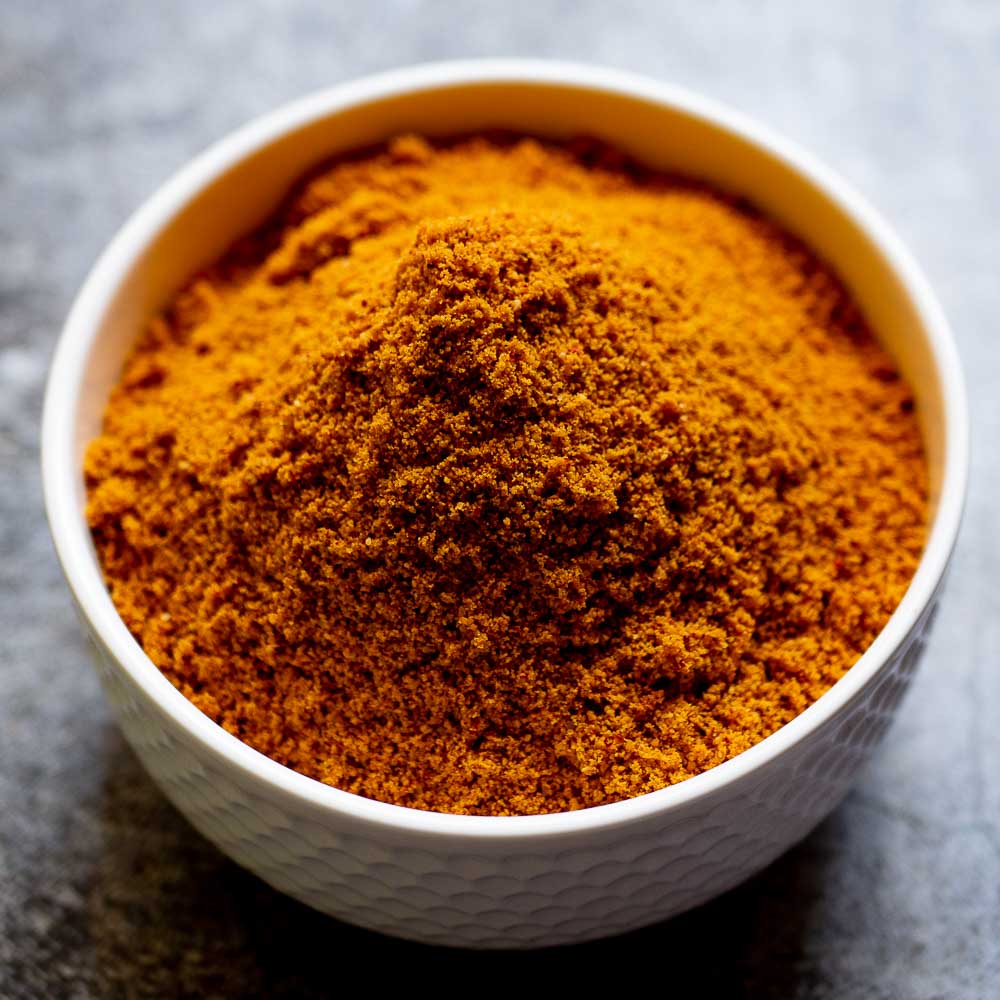
Bengaluru style Chutney Pudi / Idli Podi that goes really well with idli and dosai. The addition of coconut makes this podi very rich and the tamarind adds a slight tanginess to the podi. This podi is very addictive. My son loves the podi idli from Rameswaram cafe here in Bengaluru. The addition of desiccated coconut in their podi makes it rich and addictive. Not to forget the generous loads of thuppa – ghee smeared on the idlis. I tried my hands at making chutney podi with the addition of coconut. Do try it at home.
Here are the things you can buy online for making this recipe BIG Tri Ply Deep Fry Stainless Steel Saute pan https://amzn.to/347Rqdx Heavy Duty Indian Mixie https://amzn.to/3GptNKD
Here is the video of how to make Bengaluru cafe inspired Chutney Pudi For Idli And Dosai Print
3/4 cup chana dal 1/2 cup split urad dal 1 tablespoon coconut oil 10 Byadagi chillies 1/2 inch piece tamarind 3 sprigs curry leaves 1/2 cup desiccated coconut 1/4 teaspoon asafoetida 1/2 teaspoon salt 1 teaspoon jaggery
Take a heavy bottomed pan and add in the chana dal. Dry roast on a low flame. Roasting on a low flame is key to this recipe so the lentil gets roasted thoroughly. The chana dal should become golden in color after about four to five minutes. When the chana dal is nicely roasted and golden, remove from the pan and set aside to cool.
In the same pan, add in the split urad dal. Dry roast on a low flame till golden. The lentil will slowly start browning as it roasts. Roast on a low flame at all times. Once the urad dal is roasted and golden, remove from the pan and set aside on a plate to cool.
In the same pan, add in a tablespoon of coconut oil. Add in the byadagi chillies. The byadagi chillies are mildly hot but impart a bright color to the chutney podi. Roast for a few seconds for the chillies to fluff up. Once the chillies are fluffed up, remove from the pan. Make sure not to burn the chillies.
To the remaining oil in the pan, add in a small piece of tamarind. Add in the curry leaves. Roast for a few seconds. The curry leaves should nicely crisp up. Once the curry leaves are crisped up, remove from the pan and set aside to cool.
Now, switch off the flame. Add in the desiccated coconut. roast the coconut for a few seconds. The residual heat from the pan will suffice for roasting the coconut. When the coconut slightly changes colour, remove the coconut from the pan and set aside to cool.
We will need a heavy duty mixie for grinding the chutney podi. Add in the cooled chana dal to the mixie. Make sure that the roasted ingredients have cooled completely. Add in the roasted and cooled urad dal. Add in the tamarind, curry leaves and the chillies. We have added everything except the coconut at this stage.
Add a little asafoetida, some salt and a little bit of jaggery. Grind this mixture to a smooth powder. The lentils and the chillies should be nicely ground and should be homogenous.
To this powder, add in the roasted and cooled coconut. Pulse the mixie several times for the coconut to get ground and mix with the rest of the ingredients.
Our chutney pudi for idli and dosai is now ready. Taste the chutney podi at this stage and adjust the salt and jaggery if necessary. Let the podi cool completely. Once the podi is cool, store it in an air-tight container and store at room temperature. The podi stays fresh for upto a month.
Do try this at home. Enjoy!
- Author: Suguna Vinodh
- Prep Time: 10m
- Cook Time: 15m
Find it online : https://www.kannammacooks.com/chutney-pudi/
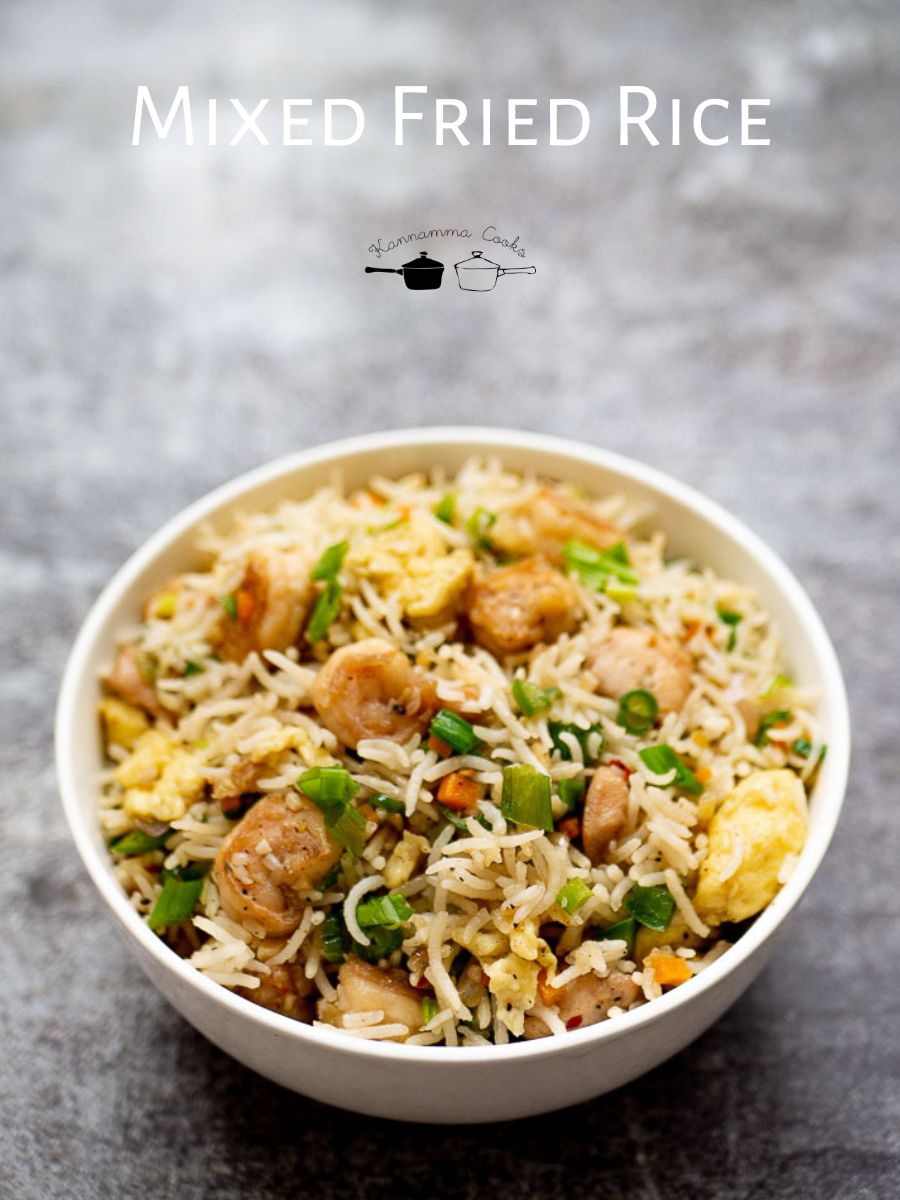
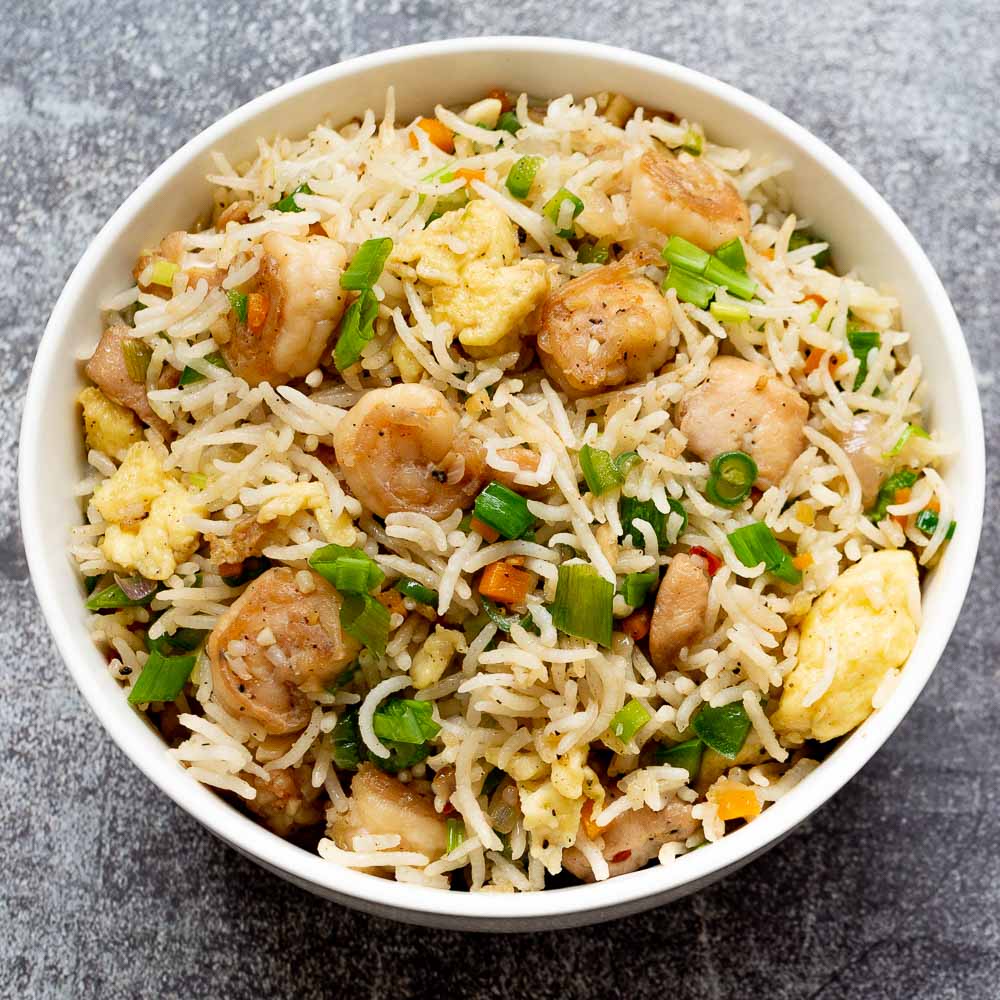
A little bit of everything comes together so well in this mixed fried rice made with chicken, prawns, eggs and veggies.
Here are the things you can buy online for making this recipe Carbon Steel Wok Pan https://amzn.to/3s6NuSr White Granite Pan with Lid PFOA Free https://amzn.to/3HDhdsD Carote Knife https://amzn.to/3IWGrnd Chicken Stock Cube https://amzn.to/3LJbOS6 Kikkoman All Purpose Soy Sauce https://amzn.to/3wBqPBe
Here is the video of how to make Mixed Fried Rice Print
For cooking chicken
1 teaspoon Indian sesame oil 250 grams Chicken, Boneless 1 teaspoon soy sauce 1 pinch baking soda 1/2 teaspoon black pepper powder
For cooking prawns
1 teaspoon Indian sesame oil 250 grams prawns, cleaned and deveined 1 teaspoon soy sauce 1 pinch baking soda 1/2 teaspoon black pepper powder
For cooking eggs
1 teaspoon Indian sesame oil 3 eggs 1/4 teaspoon salt
For cooking rice
1 cup basmati rice 1.5 cups water 1 chicken stock cube, broken into small pieces
Other ingredients
1 teaspoon Indian sesame oil 2 tablespoon minced garlic 1 tablespoon minced ginger 2 sprigs sprigs onions, white part only 1/4 cup onions, finely chopped 1/2 teaspoon red chilli flakes 1/4 cup carrots, finely chopped 1/4 cup beans, finely chopped 1/4 cup capsicum, finely chopped 1/2 teaspoon black pepper powder 1 teaspoon sugar 1 teaspoon soy sauce 1 tablespoon unsalted butter 2 sprigs sprigs onions, green part
Take boneless chicken – cut into small pieces in a bowl. Add in the soy sauce and a little pinch of baking soda. The little baking soda will tenderize the meat and will retain the juiciness in the meat after cooking without the meat drying out. The baking soda is optional. If you do not want to add it, you can just leave it out. Mix everything well to combine. I used boneless chicken breast today. Chicken thighs also work well in the recipe. Let the chicken marinate for about 15 minutes. Set aside.
Take cleaned and deveined prawns in a bowl. Add in the soy sauce and a little pinch of baking soda. Mix everything well to combine. Do not use big sized prawns. For fried rice, medium sized or even small sized prawns work well. Let the prawns marinate for about 15 minutes. Set aside.
Break three eggs in a bowl. Add little salt and whisk well to combine. If you like the texture and flavour of scrambled eggs in your fried rice, you can add one more egg. Once the eggs are mixed well, Set aside.
Let’s get the rice ready. We will be using basmati rice for the fried rice today. I have taken about a cup of basmati rice today. Wash the rice gently in water once or twice. Soak the rice in water for about 20 minutes. Soaking helps in keeping the rice separate without becoming sticky and gummy.
Once the rice is soaked, drain the water and add it to a pressure cooker. I am using a 5 liter cooker today. Add the water. For one cup rice – I use 1.5 cups of water. Add a stock cube broken into small pieces. The stock cube will nicely flavour the rice. If you dont have a stock cube, add a little salt and proceed with the recipe. Mix well to combine. Cover the pressure cooker and let it cook for two whistles on medium flame.
After the said whistles switch off the flame and let the pressure from the cooker release naturally. Open the cooker and gently fluff up the rice and Set aside on a plate to cool.
Take a pan and add in some oil. Add the marinated prawns to the pan. Saute them for about three to four minutes. Once the prawns are cooked, add in some black pepper powder and mix well to combine. Do not cook the prawns for long. Remove the prawns from the pan and set aside on a plate to cool.
In the same pan, add a little oil. Add the marinated chicken to the pan. Since the chicken is boneless and is cut into small pieces, it will cook fast. Keep sauteing so the chicken browns evenly. Once the chicken is done, add in the black pepper powder and mix well to combine. Remove the chicken from the pan and set aside on a plate to cool.
Add a little oil to the pan. Add the eggs. Scramble the eggs to a soft consistency. Do not overcook the eggs. Once the eggs are scrambled and done, remove from the pan and set aside on a plate to cool.
Now, let’s assemble the fried rice.
Add a little oil in the pan. I am using Indian style sesame oil. I like the flavour of Indian sesame oil in fried rice. You can use vegetable oil too. Add in the finely minced garlic. Add the finely minced ginger. Add the spring onions – white part only at this stage. Saute for a minute. Add in the finely chopped onions and the red chilli flakes. Saute for a couple of minutes for the onions to become soft. Once the onions are soft, add in the finely chopped carrots and the finely chopped beans. Cook for a few minutes for the veggies to cook. The veggies should be crunchy and not fully cooked for fried rice. Just cook till the veggies are half done. Add the capsicum to the pan. At this stage, add in our cooked chicken, cooked prawns and the scrambled eggs. Mix everything well.
Add in the black pepper powder. Add in a little sugar. The little sugar will nicely balance the flavours. Add in some soy sauce. Add my secret ingredient to the fried rice – little butter. The butter will make the fried rice very glossy and enhance the taste too. Butter makes everything better. Isn’t it? Mix everything well. At this stage, add in the cooked rice and mix well to combine. We have not added any salt as the sauce and the stock cube that we added is itself salty. You can check for seasoning and add salt only if necessary. Finally add in some spring onions and mix well.
Our one pan mixed fried rice is now ready. This protein packed mixed fried rice will surely become a favorite at your home. Serve the fried rice hot.
Enjoy.
- Author: Suguna Vinodh
- Prep Time: 30m
- Cook Time: 20m
