Chettinadu Thenkuzhal Murukku Recipe from Soundaram Aachi of Soundaram snacks Karaikudi, Tamilnadu. With step by step pictures.
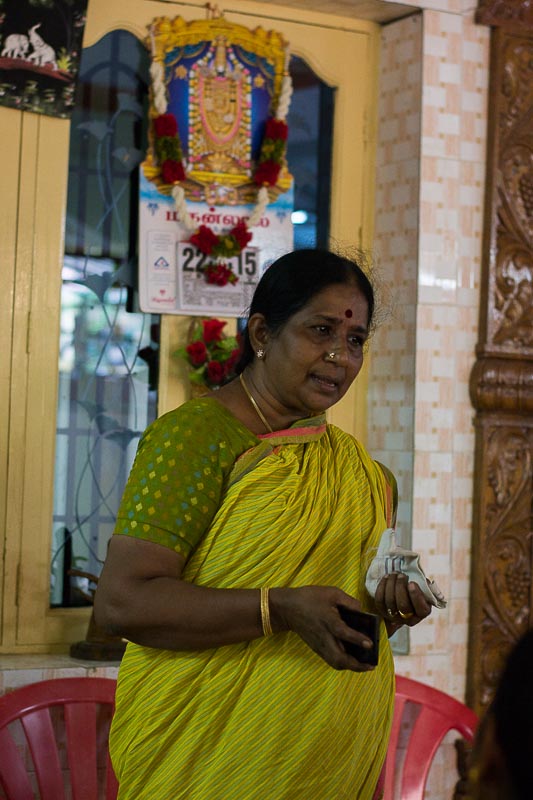
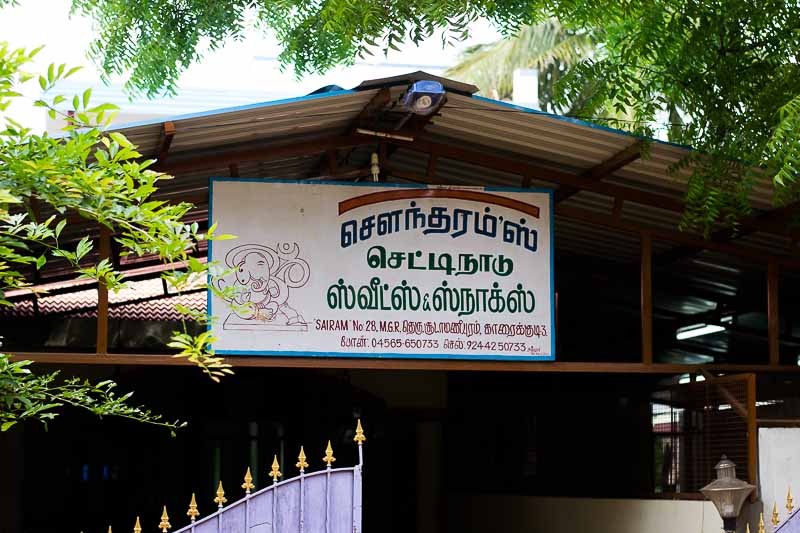
This is Soundaram amma’s story. She was a typical home maker until her quiet world toppled over when her husband met with an accident and was disabled for a while. After some time, she also lost her only son in a road accident. This business became her livelihood and she worked so hard and buried all her worries making snacks day and night. The business has become so big and Soundaram is a household name in Karaikudi now. Even today, each and every product gets packed only after Soundaram Aachi does the taste testing. A very passionate, hard working, down to earth person who will make you feel that the world is a better place because of people like her. She has a grandson from her daughter and she could not stop talking about him the whole time. She is the cutest person you will ever meet in your life. So when you are in Karaikudi, you should not miss this gem of a place thats a heaven for foodies. Soundaram Snacks is located at Number 28, MGR Street, Soodamani Puram, Karaikudi – 3. Phone Number+(91)-4565-650733.
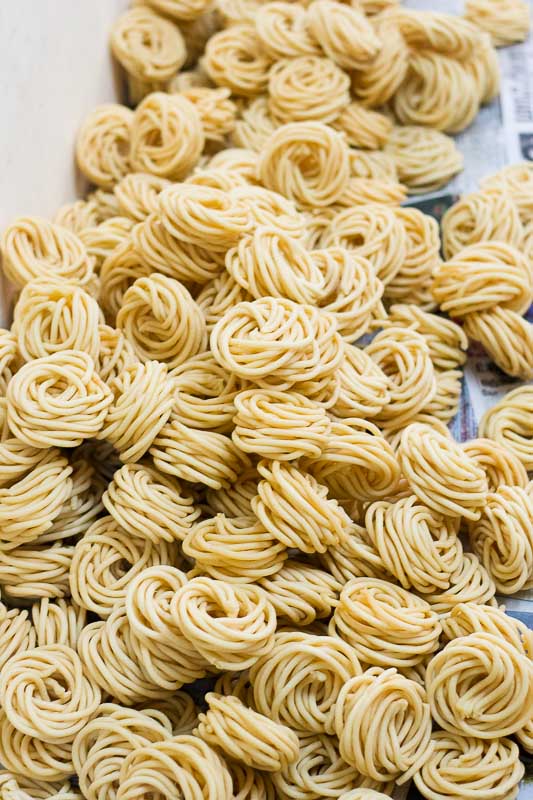
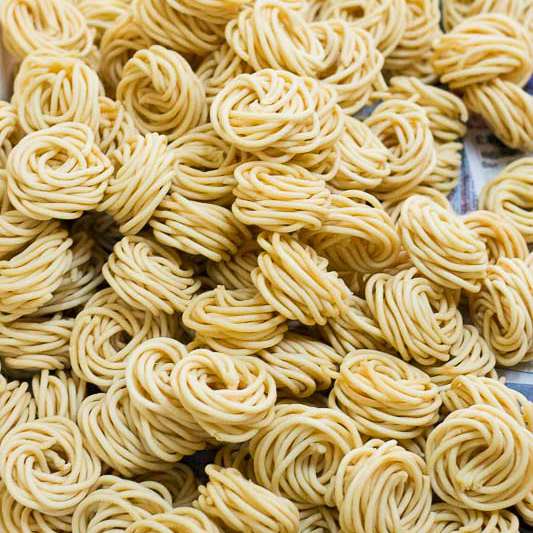
The sight of mountains of murukku made from scratch cannot be described in words. Everything at Soundaram is made by hand.
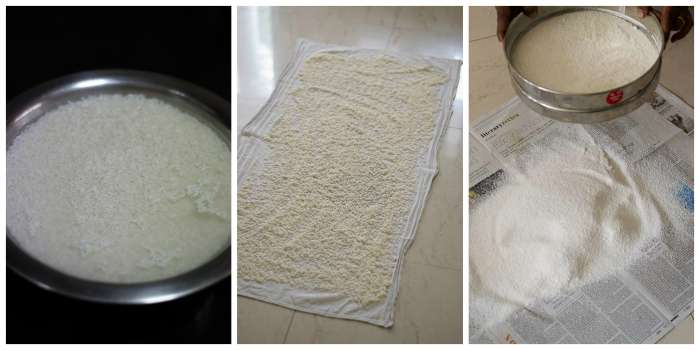
Here is how to do Thenkuzhal murukku chettinad style. There are two methods to do this recipe. One is using the traditional method where rice is soaked, dried and ground to a fine powder. The second one is to use the store bought idiyappam flour. This is an easier method and produces equally good results. If you are using the traditional method, follow the instructions below. Soundaram Aachi suggests using the following variety of raw rice if you are in Tamilnadu. C.R.Pachai or IR20. If you are else where, use the raw rice variety you can get in the grocery stores. Soak the raw rice in water for one hour. After soaking for an hour, drain the water completely and dry the rice on a cloth for 3-4 hours. The rice needs to dry in shade only. Not under the sun. Once the rice is dried and has very little moisture left, grind to a fine powder. Usually the rice is ground to a fine powder by giving it in a rice mill. If grinding at home, grind in very small quantities in a mixie until its really smooth. Once the powder is ready, sieve and set aside. If you are going to use ready made idiyappam flour, this step is not necessary.
Dry roast the urad dal in very low flame until the dal starts to smell aromatic. Do not let the dal brown. Remove off heat and allow it to cool. Once the dal is cool, grind in a mixie to a very smooth powder. Once the powder is ready, sieve and set aside.
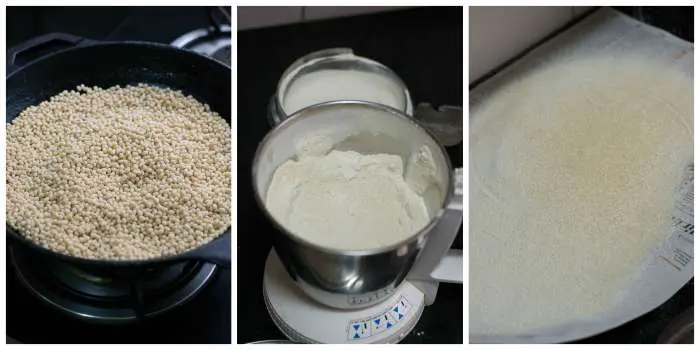
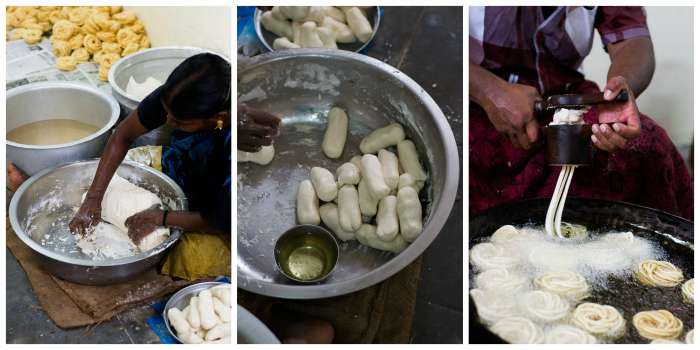
Mix in the rice powder, dal powder and salt. My little iron man did the mixing for me. Add the ghee and water and mix into a pliable soft dough. Make little logs to fill the murukku press.

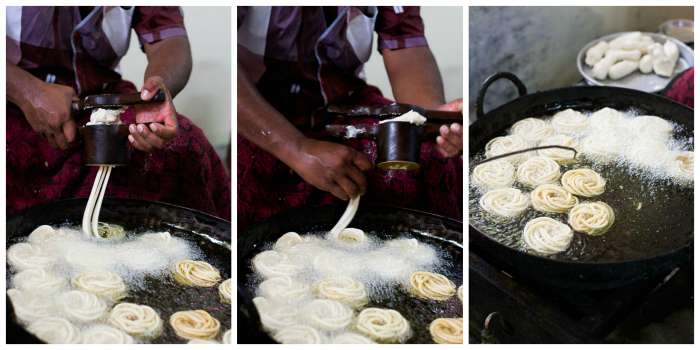
Heat oil in a pan in medium flame until hot and press the murukkus from the murukku press directly in oil. Soundaram Aachi says, that’s the secret to getting crispy light murukkus.
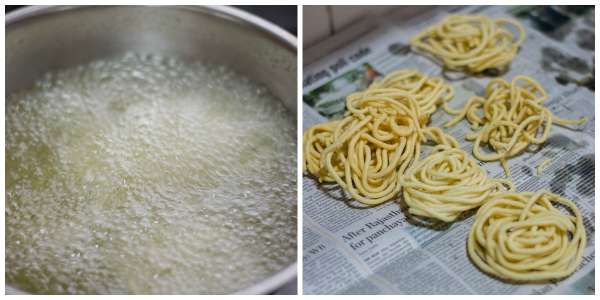
Remove once the bubbles in oil settle down and store in an air tight container for up-to 2 weeks. My murukku was in all shapes and sizes but tasted great.
- 750 grams Raw Rice or Idiyappam Rice Flour
- 300 grams Urad dal
- 1.5 tablespoon salt
- 4 - 5 tablespoon ghee
- Water to mix
- Oil for deep frying (sunflower oil, canola or refined peanut oil)
- Soak the raw rice in water for one hour. After soaking for an hour, drain the water completely and dry the rice on a cloth for 3-4 hours. The rice needs to dry in shade only. Not under the sun. Once the rice is dried, grind to a fine powder. Usually the rice is ground to a fine powder by giving it in a rice mill. If grinding at home, grind in very small quantities in a mixie until its really smooth. Once the powder is ready, sieve and set aside.
- Dry roast the urad dal in very low flame until the dal starts to smell aromatic. Do not let the dal brown. Remove off heat and allow it to cool. Once the dal is cool, grind in a mixie to a very smooth powder. Once the powder is ready, sieve and set aside.
- Mix in the rice powder, dal powder and salt. Add the ghee and water and mix into a pliable soft dough. Make little logs to fill the murukku press.
- Heat oil in a pan in medium flame until hot and press the murukkus from the murukku press directly in oil. Soundaram Aachi says, that’s the secret to getting crispy light murukkus.
- Remove once the bubbles in oil settle down and store in an air tight container for upto 2 weeks. My murukku was in all shapes and sizes but tasted great.
Notes
Troubleshooting while murukku making – what can go wrong and how to rectify If the murukku is cracking on the sides when pressed, add in a little more water to the dough and mix well. If the murukku is hard to bite after fried, add in a tablespoon or two of ghee to the dough and mix well. By any chance the dough becomes too soft, add in a little bit of rice flour and mix well.
- Author: Kannamma - Suguna Vinodh
- Prep Time: 3 hours
- Cook Time: 1 hour
- Category: Snacks
- Cuisine: Tamilnadu, South Indian
Find it online : https://www.kannammacooks.com/thenkuzhal/
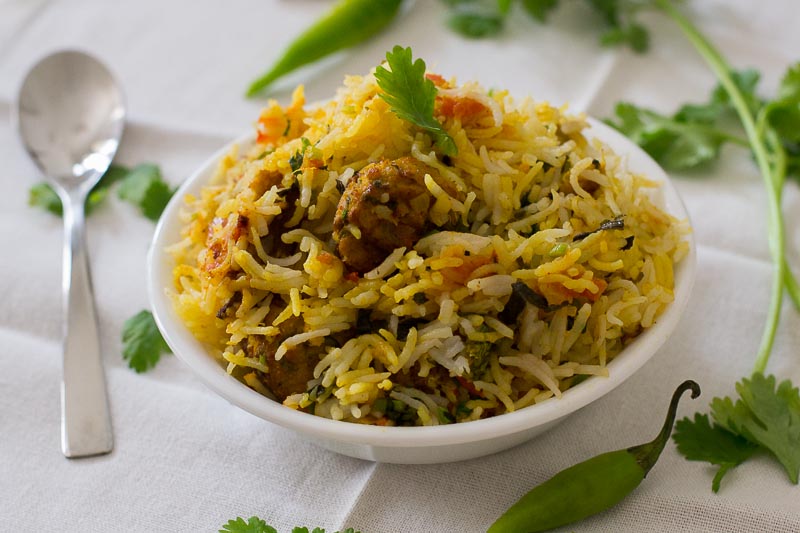
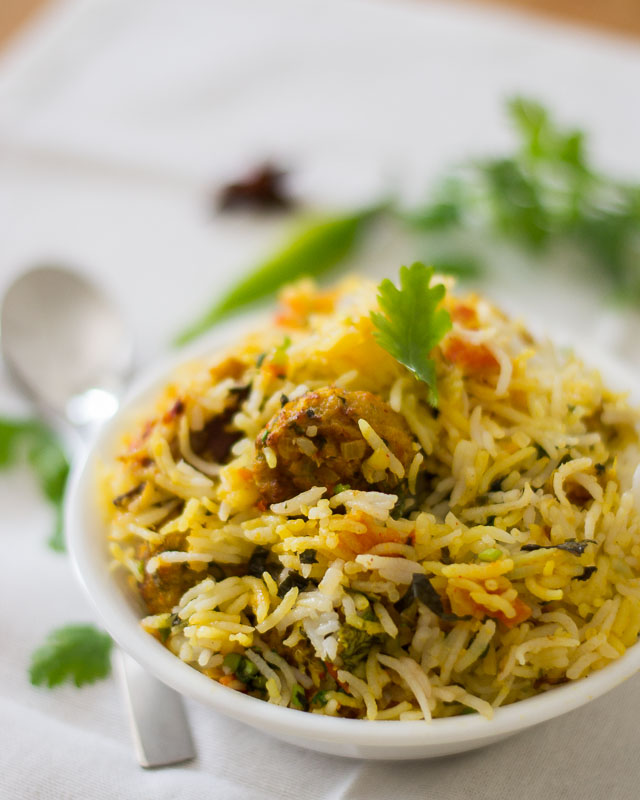
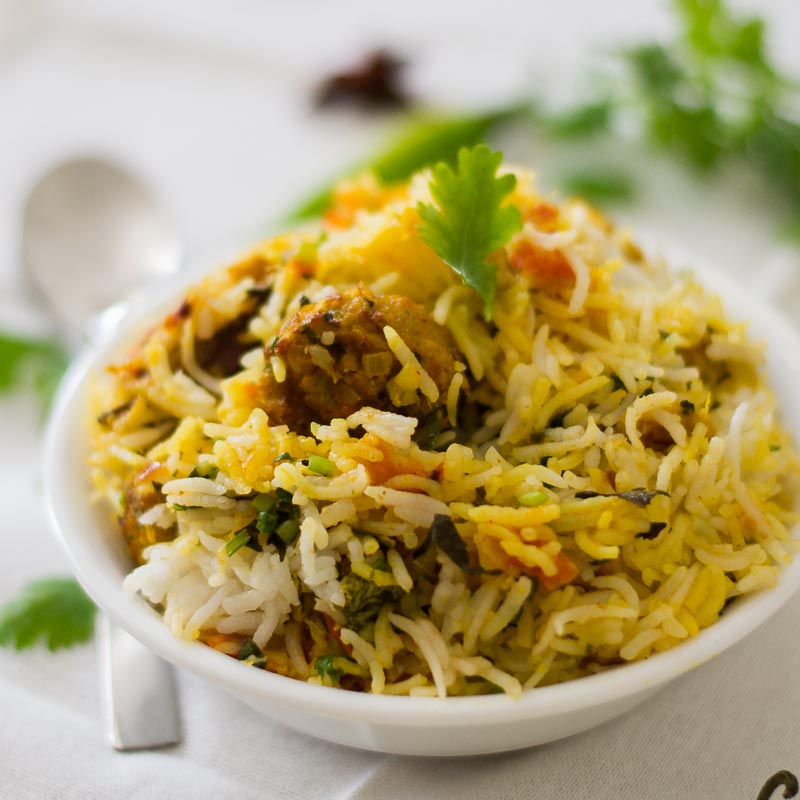
Recipe for South Indian Style Soya Kheema Biryani. The kheema balls fried in air fryer instead of deep frying. Healthy recipe. With step by step pictures.
I generally like to cook the traditional way. I received this Havells Air Fryer last week. I was kind of skeptical as I had never made anything in an air fryer or eaten out of one. I was not convinced if it will work. I never gave an ear all these days when someone talked about an air fryer. I was of the opinion that it was just another gadget that will occupy the kitchen counter. But now that the black, good looking machine was on the kitchen counter, I wanted to know if it will work myself. I cranked up the timer and went to work. I made a batch of classic French fries to start with and I was pleasantly surprised. OK. Potatoes, air fried – Whats the big deal? Right. I hear you. Just like anyone else, I wanted to know if the air fryer will work for non-conventional recipes. I just selected my regular Soya kheema biryani recipe for the test. The kheema balls are deep fried in the recipe. But instead of deep frying, I air fried. The results were mind blowing. It was so good that my husband could not find the difference. Whats more? The family favorite recipe is now healthy too. Here is how to do Soya Kheema Biryani using an air fryer. I use Havells air fryer and I really like it. Its simple to use, easy to clean and comes with a self timer which I really like. Here is where you can buy the air fryer.

Havells Air Fryer
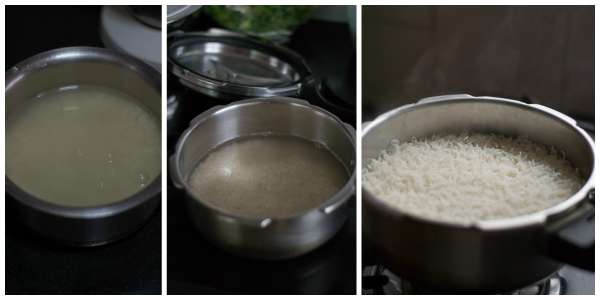
Wash the Basmati rice gently 2-3 times in running water. Soak Basmati rice in water for 20 minutes. Drain the water and set aside. For every cup of rice, we use 1.5 cups of water. We used 2 cups of rice today. So we need to add 3 cups of water. You can cook the rice either in a rice cooker or a pressure cooker. If cooking in a pressure cooker, cook for exactly 2 whistles or 5 minutes. Switch off the flame and place the cooker under running water to release the pressure in the cooker. We want to cook the rice to only 75%. So do not let the pressure to release naturally. Over cooked rice may spoil the texture of the rice. If using rice cooker, follow the cooker instructions. Once the rice is cooked, fluff up the rice and let it to cool.
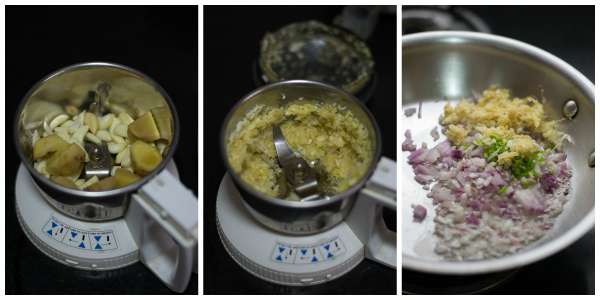
Now lets make kheema for the Biryani. Grind the ginger and garlic in a small mixie without adding water. Let it be crushed but not pureed. Set aside. Heat oil in a pan and add in the onions, finely chopped green chillies and half of the ginger garlic mixture. Fry till the onions are soft.
When the onions are cooking, soak the soya chunks in water for 3-4 minutes. Drain the water and run it in a mixie / blender until the soya chunks becomes a paste / kheema. Add up-to a cup of water while grinding. Now drain the water. You can either squeeze the soya kheema in your palm to get rid of the water or use a strainer. I have shown both the methods in the picture below. Whatever works for you, go for it.

Add in the drained soya kheema, salt and turmeric. Mix well to combine. Add in the chopped coriander leaves and mint leaves and switch off the flame. Combine well.

Break an egg and add it to the kheema and mix well. We add an egg as its a binding agent and will help in keeping the kheema from breaking while frying. You can add 2 tablespoons of besan / gram flour if you are a vegetarian and want to avoid eggs. Make little balls and place in the air fryer. The balls can be baked too! If baking, bake at 400F for 20 minutes. Note: Some readers have mentioned the balls breaking when deep fried. So avoid frying in oil.
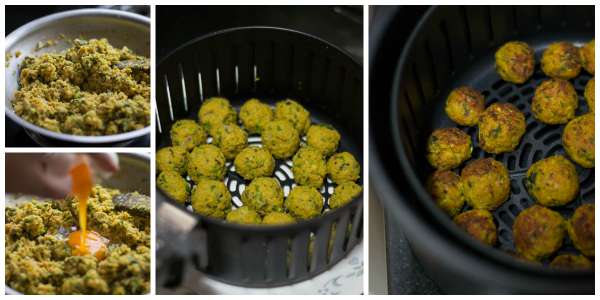
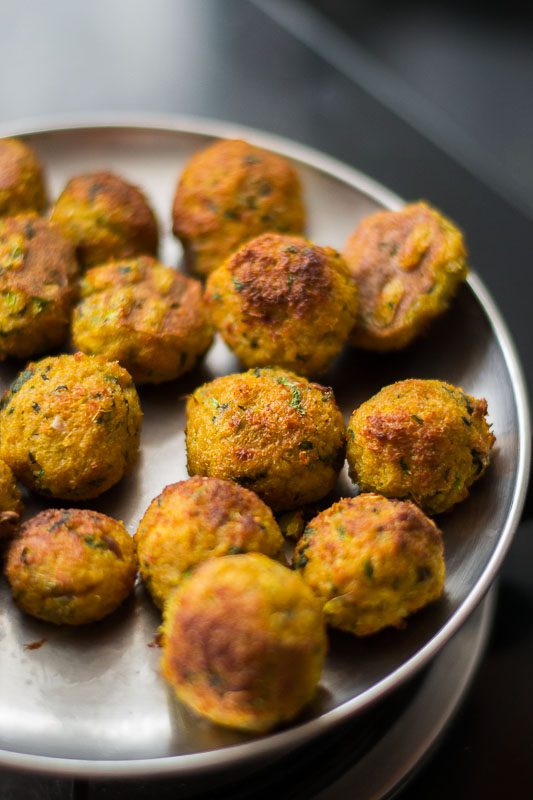
Set the timer for 15 minutes and fry the kheema balls in 200 degrees Celsius temperature. Fry in batches. Do not over crowd the air fryer. You will be really pleased with the browned kheema that will come out of the fryer after 15 minutes. Balaboosta baby!
Now lets make the Gravy for the biryani.
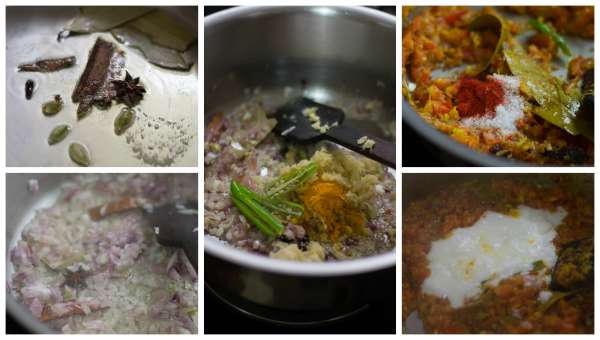
Heat oil and ghee in a pan and add in the spices. Let the spices plump for 30 seconds. Add in the onions. Fry for 2-3 minutes. Add in the sliced green chillies, turmeric and the remainder of the crushed ginger and garlic. Fry for a minute. Add in the tomatoes and fry for a minute. Add in the chilli powder, salt and yogurt. Fry for a minute more.
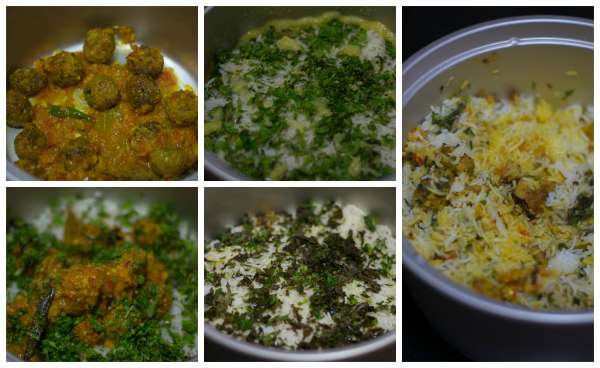
Add in a cup of water to the pan and let it come to a boil. Add in the kheema balls and the lime juice. Gently mix to combine. Switch off the flame.

Now lets layer the biryani. I used my rice cooker pan. Add half of the kheema ball gravy on the bottom of a wide pan. Form a second layer with half of the cooked rice. Add a hand full of chopped mint leaves and chopped coriander leaves. Repeat once again. Top it with two tablespoon of ghee. Now, Cook the layered rice mixture in a rice cooker for 10 minutes. If you don’t have a rice cooker, heat a dosa pan on the stove and put the biryani bowl with a tightly covered lid on top of the dosa pan and allow it to cook on low flame for 15 minutes. Once its cooked, gently fluff up the biryani.
Serve hot.
For Cooking Rice
- 2 Cups long grain Basmati Rice
- 3 Cups Water
For crushed ginger garlic
- Use half of the crushed Ginger Garlic for kheema balls and the other half for gravy.
- 15 cloves garlic
- 3 inch piece ginger
For the Kheema Balls
- 2 teaspoon Vegetable Oil
- 1 onion finely chopped
- 2 green chillies finely chopped
- 2 cups soya chunks
- 1 teaspoon salt
- 1 teaspoon Turmeric
- 1/4 cup chopped coriander leaves (roughly 5 sprigs)
- 1/4 cup chopped mint leaves (roughly 15 leaves )
- 1 Egg (or) 2 Tablespoon Besan Flour
For the Gravy
- Spices – 2 each of cinnamon, cloves, cardamom, star Anise and bay leaf
- 1 teaspoon Vegetable Oil
- 1 teaspoon Ghee
- 2 Onion, chopped
- 3 green chillies
- 1 teaspoon turmeric
- 2 tomatoes, chopped
- 1 teaspoon chilli powder
- 1 teaspoon salt
- 1/2 cup yogurt
- 1 cup water
- Juice of 1 lime
For layering the Biryani
- handful of chopped coriander leaves
- handful of chopped mint leaves
- 2 tablespoon ghee
For Cooking Rice
- Wash the Basmati rice gently 2-3 times in running water. Soak Basmati rice in water for 20 minutes. Drain the water and set aside. In a pressure cooker, cook for exactly 2 whistles or 5 minutes. Switch off the flame and place the cooker under running water to release the pressure in the cooker.Once the rice is cooked, fluff up the rice and let it to cool.
For the Kheema Balls
- Grind the ginger and garlic in a small mixie without adding water. Set aside. Heat oil in a pan and add in the onions, finely chopped green chillies and half of the ginger garlic mixture. Fry till the onions are soft.
- When the onions are cooking, soak the soya chunks in water for 3-4 minutes. Drain the water and run it in a mixie / blender until the soya chunks becomes a paste / kheema. Add up-to a cup of water while grinding. Now drain the water in a strainer.
- Add in the drained soya kheema, salt and turmeric. Mix well to combine. Add in the chopped coriander leaves and mint leaves and switch off the flame. Combine well.
- Break an egg and add it to the kheema and mix well. You can add 2 tablespoons of besan / gram flour if you are a vegetarian and want to avoid eggs. Make little balls and place in the air fryer. Set the timer for 15 minutes and fry the kheema balls in 200 degrees Celsius temperature.
For the Gravy
- Heat oil and ghee in a pan and add in the spices. Let the spices plump for 30 seconds. Add in the onions. Fry for 2-3 minutes. Add in the sliced green chillies, turmeric and the remainder of the crushed ginger and garlic. Fry for a minute. Add in the tomatoes and fry for a minute. Add in the chilli powder, salt and yogurt. Fry for a minute more. Add in a cup of water to the pan and let it come to a boil. Add in the kheema balls and the lime juice. Gently mix to combine. Switch off the flame.
For layering the Biryani
- Add half of the kheema ball gravy on the bottom of a wide pan. Form a second layer with half of the cooked rice. Add a hand full of chopped mint leaves and chopped coriander leaves. Repeat once again. Top it with two tablespoon of ghee.
- Now, Cook the layered rice mixture in a rice cooker for 10 minutes. If you don’t have a rice cooker, heat a dosa pan on the stove and put the biryani bowl with a tightly covered lid on top of the dosa pan and allow it to cook on low flame for 15 minutes.
- Once its cooked, gently fluff up the biryani.
- Author: Kannamma - Suguna Vinodh
- Prep Time: 30 mins
- Cook Time: 1 hour 30 mins
- Category: Main dish, Biryani
- Cuisine: South Indian, Chettinad


