
There is something magical about recipes like these which are so simple to make but the guests just cannot get enough of it. Its a simple 5 ingredient recipe. Its perfect for parties as they can be made ahead of time. Its also perfect to make as dessert for your family for those easy cozy friday night dinners. Here is how to make baked vanilla yogurt.
Take a bowl and add in half a cup each of plain yogurt, heavy cream and condensed milk. I used home made fresh yogurt that’s not sour. Store bought yogurt works fine too. In India, we do not get heavy whipping cream. We get only low fat cream and it works fine for this recipe. I used Amul cream today.

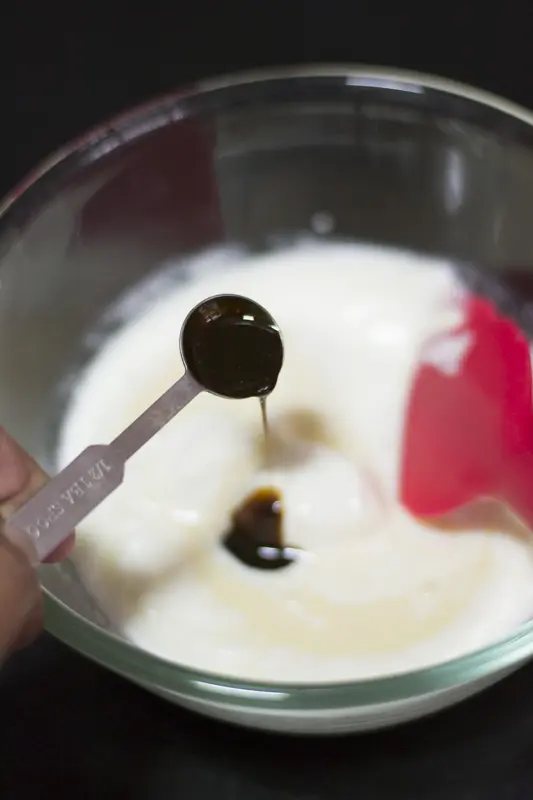
Now we need to add vanilla. We need real good quality vanilla extract for this recipe. Please do not use imitation vanilla. Once you have tasted good vanilla, you will never go back to anything else. I use the brand of pure vanilla extract called Goodness Vanilla. It also makes me proud that it comes from my home town near Coimbatore from a place called Pollachi. Its one of the best vanilla you will find in India. Buy Goodness Vanilla Online . I cannot emphasize more on using good quality ingredients. Your end product will only be as good as the quality of the ingredients you use. Add in 1/2 a teaspoon of vanilla extract to the mixture.
Mix everything well until smooth. Pour it in ramekins and bake in a 120° celsius oven for 15-20 minutes. No need to preheat the oven for this recipe. After 15 minutes, the middle of the ramekins should be jiggly. If its still liquid, bake for a couple of minutes more. Do not let it cook for long else it will become hard. Remove from the oven and allow it to cool.

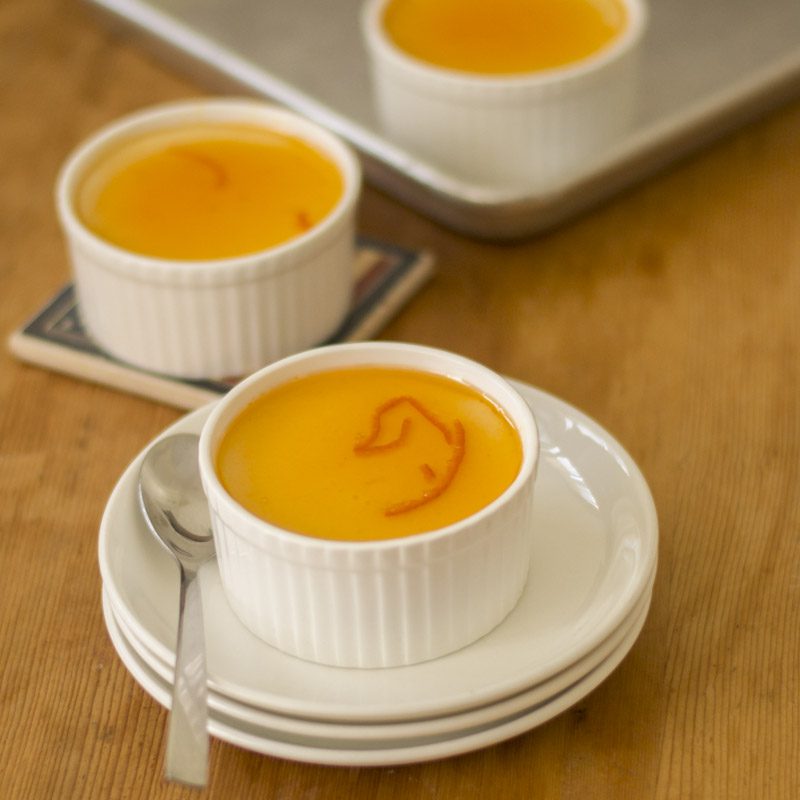
In the mean time lets make the glaze for the yogurt. Take 2 tablespoon of orange marmalade or jam of your choice and add in 2 tablespoon of water. Bring it to a simmer until the jam has melted. Allow it to cool a bit and pour a tablespoon of the melted syrup on each ramekin. Refrigerate for 6-8 hours in the fridge and serve cold.

One of the simple and best desserts ever!
- 1/2 cup yogurt
- 1/2 cup heavy whipping cream (Amul cream works fine)
- 1/2 cup condensed milk
- 1/2 teaspoon pure vanilla extract
- 2 tablespoon orange marmalade
- Take a bowl and add in half a cup each of plain yogurt, heavy cream and condensed milk.
- Add in the vanilla extract.
- Mix everything well until smooth. Pour it in ramekins and bake in a 120° celsius oven for 15-20 minutes. No need to preheat the oven for this recipe. After 15 minutes, the middle of the ramekins should be jiggly. If its still liquid, bake for a couple of minutes more. Remove from the oven and allow it to cool.
- Take 2 tablespoon of orange marmalade or jam of your choice and add in 2 tablespoon of water. Bring it to a simmer until the jam has melted. Allow it to cool a bit and pour a tablespoon of the melted syrup on each ramekin. Refrigerate for 6-8 hours in the fridge and serve cold.
- Author: Kannamma - Suguna Vinodh
- Prep Time: 5 mins
- Cook Time: 20 mins
- Category: Dessert
- Cuisine: Indian
Find it online : https://www.kannammacooks.com/baked-vanilla-yogurt-baked-dessert/

Before we jump into the recipe, there are a few things that grandmothers would tell you when making rasam. Especially if its a tamarind based rasam.
Rasam should never be brought to a roaring boil # Salt should be added only in the end # Always cook rasam at a low temperature
BUT WHY?
Traditionally rasam in Tamilnadu was made in eeya chatti. Eeyam or Velleeyam that’s used for cooking is nothing but a vessel coated with Tin. Tin is supposed to have health properties. But there was one problem. Tin has a very low melting point. Tin melts at a low temperature of about 200 – 230 °C. So the liquid cannot be heated up in a tin vessel for long. If heated for too long, the metal itself would start to melt.
Also reactive ingredients like tamarind, lemon and salt were never boiled for a long time in the vessel. That’s the reason lemon and salt were added during the end of cooking process. Tamarind water was never boiled for too long for the same reason. Rasam made in eeya chatti tastes different. But today, steel vessels have taken over every kitchen. So people have forgotten the reason as to why things were done in a certain way. But if one follows the same principles even today, you will end up with a lip smacking rasam that will cozy up your tummy and warm up your heart. You will end up with a rasam that tastes as close to your grandma.
Here is the video of the recipe.
Lets make traditional style poondu rasam today. Not in eeya chatti but in an everyday steel vessel. I adapted this recipe from a Coimbatore cookbook called “simply homemade” by Jayanthi Manohar. The book has recipes from the kongunad region. We will need to make “Jillakara Mirel” powder for this rasam. Its nothing but cumin and pepper powder. Grind the cumin and pepper in a mortar and pestle. Set aside. Also roughly crush the garlic cloves along with its peel. Set aside. Soak tamarind in 1 cup of water for 20 minutes. Squeeze the tamarind to make tamarind pulp. Discard the seeds and the pith. Add 2 cups of water to the tamarind pulp. Set aside. We will have 3 cups of liquid now.

Heat sesame oil in a pan and add in the mustard seeds, fenugreek seeds and compound asafoetida / katti perungayam. Katti perungayam tastes so much better than the usual asafoetida powder. If you dont have compound, then you can add powder. Let the seeds splutter. Add in the crushed garlic and fry for a minute to roast the garlic. Add in the “Jillakara Mirel” / cumin-pepper powder and fry for 20 seconds. Frying the cumin and pepper brings out the essential oils in them and the final rasam tastes more flavorful.

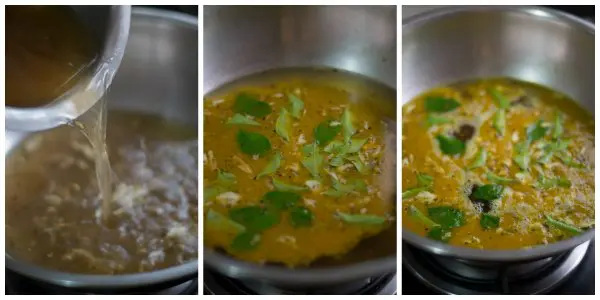
Now add in the tamarind pulp and reduce the flame to low. Add in the curry leaves and turmeric. The flavor of curry leaves that is tempered in oil vs boiled in liquid is totally different. Add in the curry leaves after adding the tamarind liquid. Let it come to a mere simmer. The rasam will slowly foam up and slightly start to boil. That is it. Switch off the flame.
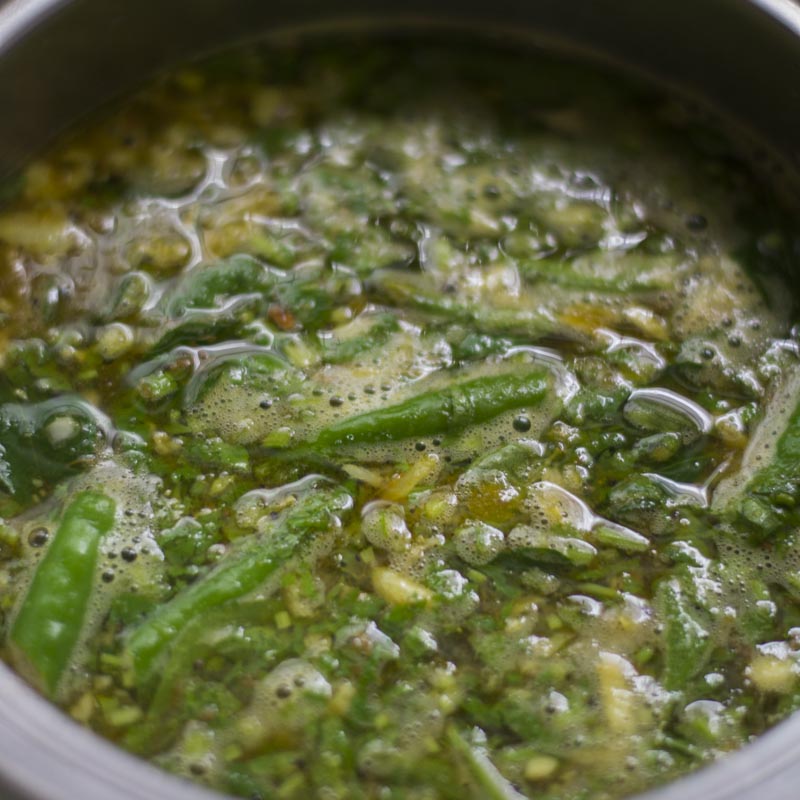
Green chillies are added in almost every rasam at the last in the kongunad region. It doesn’t make the rasam spicy but the chilli aroma gets steeped into the rasam and makes it so aromatic. Add in the coriander leaves and the salt.
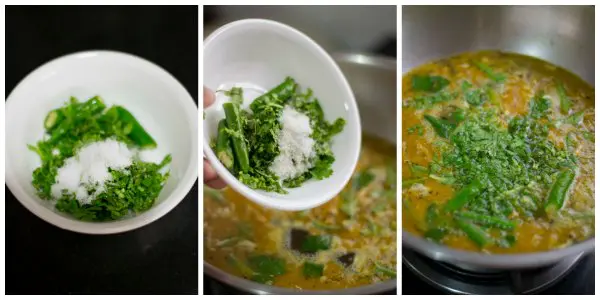
Now comes the important part. Immediately after adding these 3 ingredients, cover the rasam with a lid and allow the flavors to steep for 15 minutes.

Serve the rasam with rice for lunch.
- 1 teaspoon sesame oil (gingely / nallennai)
- 1/4 teaspoon mustard seeds
- 1/8 teaspoon fenugreek seeds
- a big pinch asafoetida
- 1 teaspoon cumin seeds
- 1 teaspoon black pepper corns
- 12 cloves garlic
- 1/2 a lime size tamarind
- 2 sprigs curry leaves
- 1/2 teaspoon turmeric
- 1 teaspoon salt
- 2 green chillies, chopped
- 2 sprigs coriander leaves, chopped
- 3 cups water ( 750 ml)
- Grind the cumin and pepper in a mortar and pestle. Also roughly crush the garlic cloves along with its peel. Soak tamarind in 1 cup of water for 20 minutes. Squeeze the tamarind to make tamarind pulp. Discard the seeds and the pith. Add 2 cups of water to the tamarind pulp. Set aside. We have 3 cups of liquid now.
- Heat sesame oil in a pan and add in the mustard seeds, fenugreek seeds and compound asafoetida. Let the seeds splutter.
- Add in the crushed garlic and fry for a minute to roast the garlic. Add in the cumin-pepper powder and fry for 20 seconds.
- Now add in the tamarind pulp and reduce the flame to low. Add in the curry leaves and turmeric. The rasam will slowly foam up and slightly start to boil. Switch off the flame.
- Add in the chopped green chillies, coriander leaves and the salt.
- Cover the rasam with a lid and allow the flavours to steep for 15 minutes.
- Author: Kannamma - Suguna Vinodh
- Prep Time: 10 mins
- Cook Time: 10 mins
- Category: Rasam
- Cuisine: Tamilnadu

